Get a Jump Start on the Project Display Board
You don't have to wait until the last minute to start the project display board for a science fair project. A great board takes planning, and you can do a good deal of preliminary legwork getting your board ready even before the project is complete!

The Science Fair Project Display Boards resource at Science Buddies contains a wealth of information to help students who are putting together a display board to share their science fair project. The standard tri-fold project display board unfolds to a pretty substantial three by four feet. This leaves students who are used to working with much smaller pieces of paper and cardboard with a lot of space to fill, but there is a good bit of information to include on the science project display board!
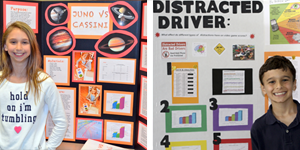
From the abstract to the hypothesis to the procedure, data, conclusion, and acknowledgments (or bibliography), there are a number of sections (more than those just listed!) that make an appearance on most project display boards for K-12 science fair presentation. In addition to required elements, your board might include photographs, data charts, or other visual elements to help draw viewers to your board for a closer look and to more clearly show and help viewers visualize what your project was about and what you discovered.
Every board will be different, and the choices you make about how you present your project can make a big difference in how the project is received by viewers. Will you mat your sections? Will you hand letter your headline, or will you use cutout letters? Will you add photographs or drawings? Will you cover your board with a colored paper? What typeface will you use to print your section titles?
The display board is your chance to really show off your project, and while you can unleash your creativity designing and decorating the board, you can also create a very nice and effective board without adding lots of extras, as long as you pay careful attention to guidelines regarding the size of the type for headlines, subheads, and information that viewers will be reading in each section. Attention to details like these can make a big difference in the success of a board. Finding and sticking with some kind of color scheme can also be a good strategy and can help visually organize elements of your board into a cohesive display.
So when should you start?
The display board is often presented as an end stage in the process of doing a science fair project. It reality, it cannot be completed until after you have fully finished your experimentation. That doesn't mean you have to wait until the end to get started though!
Planning Ahead for the Display Board
While parts of the science fair project display board cannot be completed until the project is over and the data has been analyzed, conclusions drawn, and thoughts on future research (or how the project went and what the student might do differently if she did it again) formulated, there are many steps a student can take to begin preparing the board even while the project is still underway. This can be especially helpful if the project is long (being conducted over a number of weeks), if there is a delay in getting materials, if a problem is encountered that puts the project temporarily on hold, or if the project was started late.
Using teacher-provided guidelines for the project display board sections or the general diagram in the Science Fair Project Display Boards, students can prepare the headline and subheads for the board at any point in the process. Similarly, some of the overview, summary, and pre-testing sections can be typed up, printed out, and mounted on the board early in the process.
Plan Your Board, and Follow the Plan!
A great tip for working on the board is to sketch out your plan first on a piece of paper, just drawing in boxes for the headline, subheads, and sections that you plan to incorporate on the board so that you can see how you want to organize your information (and how you can fit in all the necessary information required by your teacher). On your sketch, make note of spots where you plan to use photos or other visual elements like charts. This blueprint of your board will help keep you on track and will also give you a sense of how much information you have so that you can be sure everything fits.
Using information in the Project Display Board Guide, you can make decisions about the size of your elements, printed sections, headlines, and subheads, as well as think through what size photos you will need and whether or not you plan to add other creative elements to the board.
With a clear plan in hand, you can start typing in parts of your board information early on, formatting it to meet your sizing needs, mounting it (if you plan to mat your sections), and getting it ready for the board even while you are still testing and gathering data. Use your preliminary display board sketch as a checklist, and mark off each section as you complete it to help you see, at a glance, what sections you still need to complete.
This head start on the Project Display Board can make finishing up the project for the fair or class assignment deadline a breeze!
In the Project Display Board resource, students will also find information on materials and construction (what to use and how to make it all stick), a gallery of samples, and a checklist that can help guide the process of putting together the board.
See also: Perfecting the Project Display Board and Putting Together a Science Fair Project Display Board
You Might Also Enjoy These Related Posts:
- Spring Science Projects: 26 Science Experiments for Spring
- 6 Picks for St. Patrick's Day STEM
- Why Do Science Projects: Elevate Your Science Classroom: Taking Independent Student Science Projects to the Next Level
- Free science project support in the Ask an Expert forums
- Ahead of the Curve: A Science Teacher's Guide to Proactive Science Project Planning
- 2024 Rubber Band Car Engineering Challenge—10 Steps to Success
- Why Integrate Science Projects in the Classroom—A Teacher's Perspective
- 10 Reasons to Do the Rubber Band Car Engineering Challenge