Abstract
Have you ever made your own ice cream? If you have, you probably know that you need to get the ice cream mixture really cold to freeze it quickly. Ice cubes alone will not do the job, but if you add chemicals, such as salt or sugar, to the ice cubes that surround the ice cream container, the mixture gets cold enough to freeze. Why does that work? How does adding salt or sugar affect the freezing point of water? Find out with this ice-cold science project and use your results to make your own delicious ice cream!
Summary
Understanding the concepts of molecular weight and moles.
A kit for this project is available from our partner Home Science Tools®. See the Materials section for details.
Be careful when handling the glass test tubes. Exposing them to very cold temperatures or rapid temperature changes makes them more vulnerable to breakage, especially when they get bumped or handled roughly.
/-/https/i.ytimg.com/vi/i_IMvzu9BD0/maxresdefault.jpg)
Objective
In this science project, you will investigate how dissolving chemicals in water changes the freezing point of a solution, and use your results to make delicious ice cream.
Introduction
/-/https/www.sciencebuddies.org/cdn/Files/7597/8/scooping-chocolate-ice-cream.jpg)
If you have ever made ice cream with an old-fashioned hand-crank machine, you probably packed a mixture of ice and rock salt around the container holding the cream. The salt allows the ice-salt mixture to get colder than pure water ice. This extra-cold ice-salt mixture freezes the cream in the ice cream machine.
If you live in a cold climate, you may also have seen trucks spreading salt or sand on the streets to prevent roads from getting icy after a snowfall. This is because the salt lowers the temperature at which water freezes, so ice can melt even when the temperature is below the normal freezing point of water.
In both cases, salt is used to lower the temperature at which water freezes, a temperature called the freezing point. The decrease in freezing point that happens when salt is added to water is called freezing point depression. Pure water freezes at 0° Celsius (C), but water mixed with salt freezes at less than 0° C.
Freezing point depression is not unique to water and salt; it happens with all solutions. To make a solution, you dissolve a solute in a solvent. The solvent does the dissolving, and the solute is the thing that is dissolved. In this science project, you will use water as the solvent and sodium chloride (table salt) and sucrose (granulated sugar) as the solutes.
Adding a solute, like salt, to a solvent, like water, lowers the freezing point of the solvent. But, by how much? One degree? Ten degrees? The answer to that question depends on three things: the molality of the solution, the Van 't Hoff factor of the solute, and the molal freezing-point-depression constant of the solvent. We will take a look at each of these factors.
Molality, m, is defined as moles (mol) solute per kilograms (kg) solvent, as shown in Equation 1:
Equation 1:
We care about molality because freezing point depression is a colligative property, a property that depends on how many solute particles are in the solvent, not the kind of solute particles. Molality, m, is one piece of this "how many solute particles are present?" question. The Van 't Hoff factor is the second part of the "how many solute particles are present?" question.
The Van 't Hoff factor, i, deals with how a molecule of solute dissociates, or breaks apart, in the solvent. Covalent compounds, like sucrose (C12H22O11), do not dissociate in a solution. These compounds have Van 't Hoff factors i = 1. Ionic compounds, like table salt (NaCl), dissociate when in a solution. Table salt (NaCl) has a Van 't Hoff factor i = 2 because it dissociates into two ions in a solution, Na+ and Cl-.
The third factor, the molal freezing-point-depression constant, Kf, is different for every solvent. It has units of (°C/m), and it tells us how much 1 mol of solute added to 1 kg of solvent will lower the solvent's freezing point. For pure water, Kf = 1.86°C/m.
You can combine these three factors—molality, m, Van 't Hoff factor, i, and molal freezing-point-depression constant, Kf—into an equation that predicts how much the freezing point of a solvent will decrease, ΔT, when a certain amount of solute is added. Equation 2 is the freezing point depression equation:
Equation 2:
Degrees Freezing Point is Depressed (°C) = Molal Freezing-Point-Depression Constant (°C/m) × molality of solution (mol solute/kg solvent) × Van 't Hoff Factor (unitless)
|
If you want to know the new freezing point of a solution, Tn, you subtract the change in temperature, ΔT, from the original freezing point, Tf, as shown in Equation 3, the solution freezing point equation:
Equation 3:
Solution Freezing Point (°C) = Solvent Freezing Point (°C) - Degrees Freezing Point is Depressed (°C)
|
In this science project, you will investigate how the freezing point of a solution changes depending on the concentration and kind of solute in the solution. You will also compare the results from your experiments with the results predicted by Equation 3, the new freezing point equation. At the end, you can make your own delicious ice cream using the same principles that you applied in the project.
Terms and Concepts
To do this project, you should do research that enables you to understand the following terms and concepts:
- Freezing point
- Freezing point depression
- Solution
- Solvent
- Solute
- Molality
- Mole (chemistry)
- Colligative properties
- Van 't Hoff factor
- Dissociate
- Molal freezing-point-depression constant
- Molecular weight
Questions
- When sodium chloride dissolves in water, how many solute molecules result from each molecule of solid dissolved?
- When sucrose dissolves in water, how many solute molecules result from each molecule of solid dissolved?
Bibliography
For more information on colligative properties, see:
- Academic Kids Staff. (n.d.). Colligative properties. Retrieved August 20, 2014.
For information on Avogadro's number and molecular weight, see:
- Lachish, U. (2000). Avogadro's Number, Atomic and Molecular Weight. Retrieved August 13, 2012.
The idea for this Project Idea came from this source.
- MacQuade, J., et al. (1986). It's Getting Colder (Freezing Point Depression).
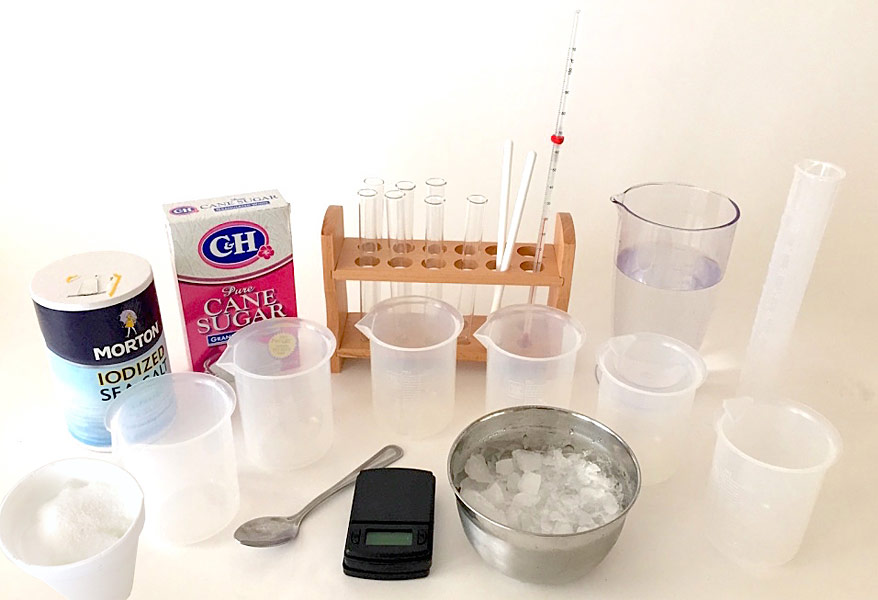
Materials and Equipment 
Recommended Project Supplies
/-/https/www.sciencebuddies.org/cdn/Files/9141/14/chemistry-ice-cream-making-kit-hst.jpeg)
- Chemistry of Ice Cream Making Kit, available from our partner Home Science Tools®. You will need these items from the kit:
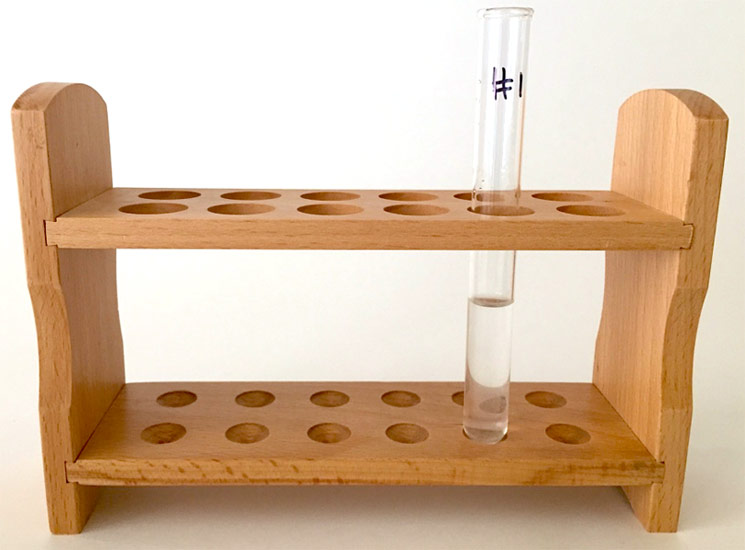
- Test tubes, 16 millimeters (mm) by 150 mm (7)
- Test tube rack
- 250 mL beakers (6)
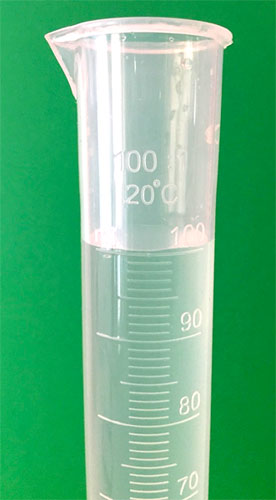
- 100 mL graduated cylinder
- Gram balance, accurate to 0.1 grams
- Thermometer, minimum range −10°C
- Stir rods (2)
- Large Styrofoam® cup (12 ounces [oz] or more)
- You will also need to gather these items, not included in the kit:
- Water
- Ice
- Permanent marker
- Table or sea salt (sodium chloride, NaCl) (500 g or 18 oz)
- Granulated sugar (sucrose) (360 g or 13 oz)
- Small spoon or scoop, for scooping up salt and sugar
- Lab notebook
These are the optional materials for making your own ice cream:
- Measuring spoons
- Measuring cup
- Extra granulated sugar (1 tablespoon)
- Extra table or sea salt (½ cup)
- Half-and-half; alternatively, milk or whipping cream may be used (½ cup)
- Vanilla extract (¼ teaspoon)
- Ice cubes (4–8 cups)
- Small, pint-sized sealable baggie (one per ice cream portion)
-
Gallon-sized sealable baggie
-
Oven mitts or a small towel
-
Timer or clock
Disclaimer: Science Buddies participates in affiliate programs with Home Science Tools®, Amazon.com, Carolina Biological, and Jameco Electronics. Proceeds from the affiliate programs help support Science Buddies, a 501(c)(3) public charity, and keep our resources free for everyone. Our top priority is student learning. If you have any comments (positive or negative) related to purchases you've made for science projects from recommendations on our site, please let us know. Write to us at [email protected].
Experimental Procedure
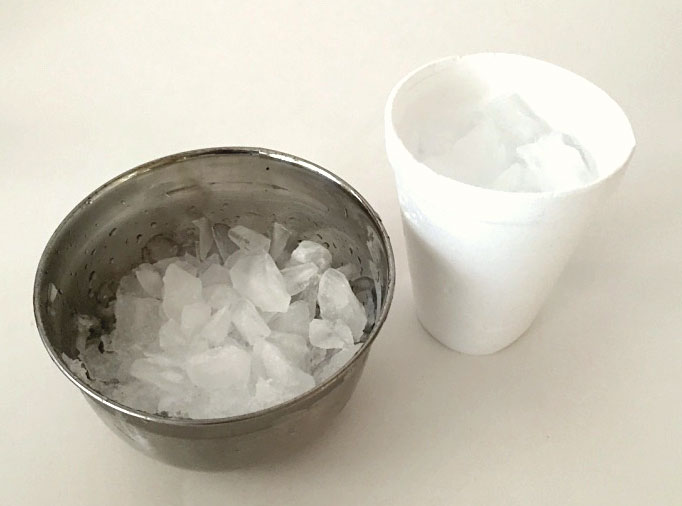
Preparing the Ice Bath
Follow these step-by-step instructions and click through the slideshow to see how the ice bath should be prepared.
/-/https/www.sciencebuddies.org/cdn/Files/7794/10/slideshow-5-preparing-ice-temperature-ice-salt-mix.jpg)
/-/https/www.sciencebuddies.org/cdn/Files/7790/12/slideshow-1-preparing-ice-materials-new.jpg)
/-/https/www.sciencebuddies.org/cdn/Files/7791/11/slideshow-2-preparing-ice-in-cup.jpg)
/-/https/www.sciencebuddies.org/cdn/Files/7792/10/slideshow-3-preparing-ice-salt-on-ice.jpg)
/-/https/www.sciencebuddies.org/cdn/Files/7793/11/slideshow-4-preparing-ice-stir-ice-salt-mix.jpg)
/-/https/www.sciencebuddies.org/cdn/Files/7789/12/slideshow-0-preparing-ice-holder.jpg)
Slideshow with step-by-step instructions viewable online.
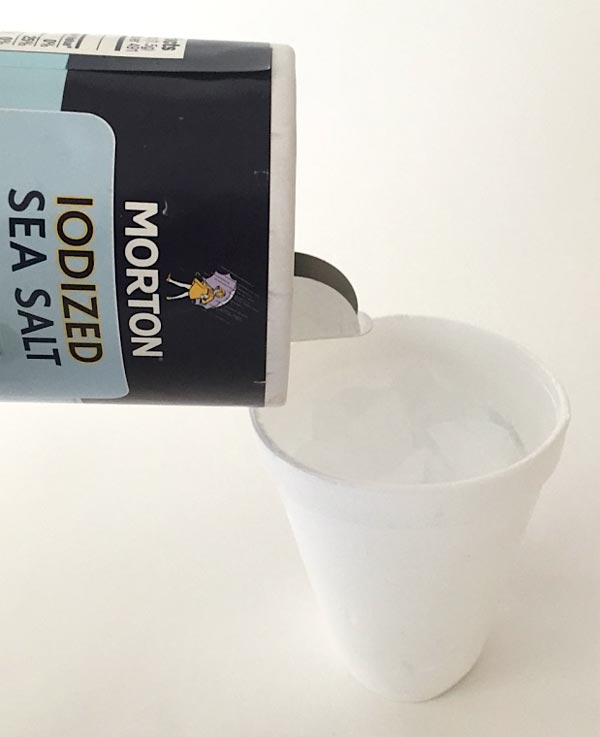
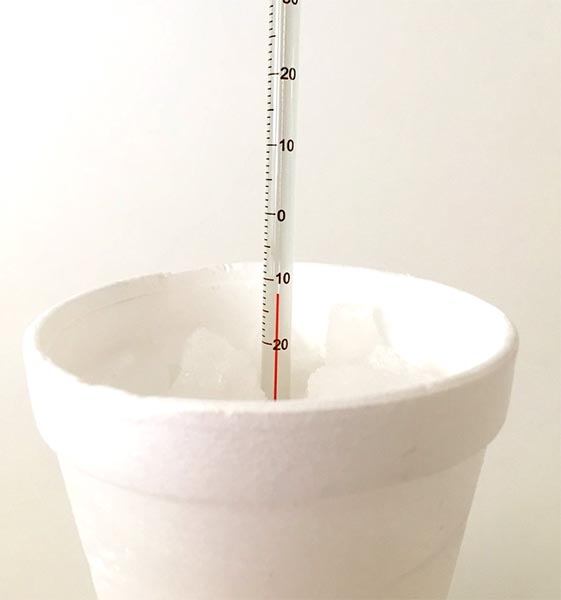
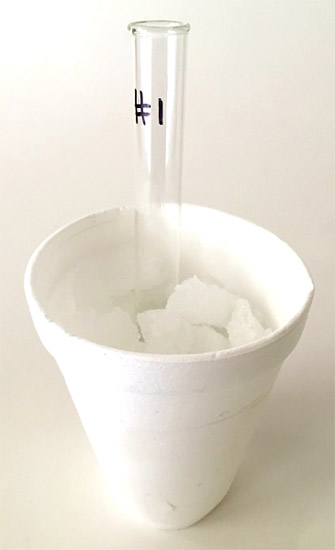
- Fill the Styrofoam cup ¾ full with ice and cover the ice with ¼–½ inches of table or sea salt.
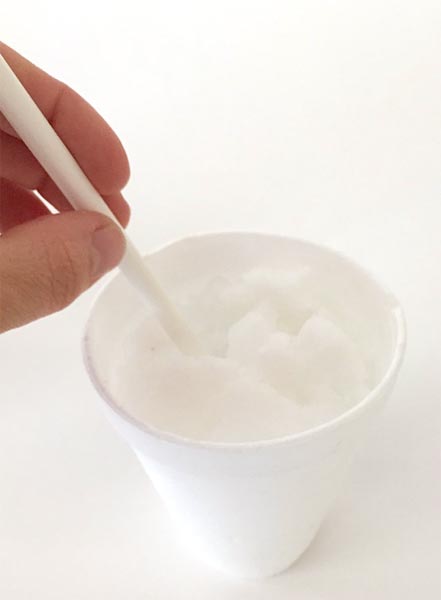
- Stir this ice-salt mixture with a spoon or stirring rod.
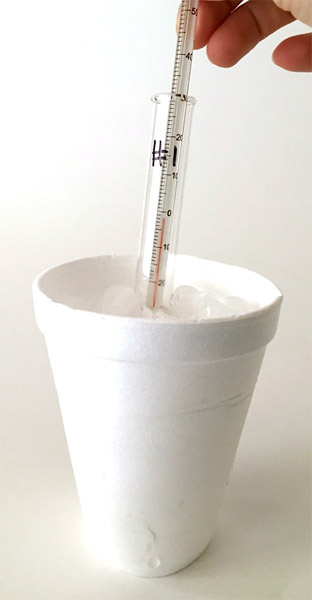
- Use the thermometer to check the temperature of the ice-salt mixture. It should be close to −10°C.
- You will use this ice bath to freeze several test liquids. During the course of your experiments, you may need to pour melted water out of the ice bath and replenish the ice and salt. When you do this, wait until the temperature of the ice bath drops again to about −10°C before continuing your experiment.
- Tip: Check the temperature of the ice bath before freezing each of your test liquids.
- Always carefully rinse and dry the thermometer before using it to measure the freezing point of your test liquids. You do not want the thermometer to carry salt water into your test liquids!
Determining the Freezing Points of Test Liquids
The following instructions and the slideshow will guide you through each individual step for preparing and testing your samples.
/-/https/www.sciencebuddies.org/cdn/Files/7805/10/slideshow-15-sample-make-sugar-solution.jpg)
/-/https/www.sciencebuddies.org/cdn/Files/7796/10/slideshow-6-sample-label-beaker-test-tube.jpg)
/-/https/www.sciencebuddies.org/cdn/Files/7797/10/slideshow-7-sample-make-salt-solution.jpg)
/-/https/www.sciencebuddies.org/cdn/Files/7798/10/slideshow-8-sample-weigh-salt.jpg)
/-/https/www.sciencebuddies.org/cdn/Files/7799/10/slideshow-9-sample-measure-water.jpg)
/-/https/www.sciencebuddies.org/cdn/Files/7800/10/slideshow-10-sample-stir-salt-solution.jpg)
/-/https/www.sciencebuddies.org/cdn/Files/7801/11/slideshow-11-sample-fill-test-tube.jpg)
/-/https/www.sciencebuddies.org/cdn/Files/7802/11/slideshow-12-sample-test-tube-in-water-bath.jpg)
/-/https/www.sciencebuddies.org/cdn/Files/7803/10/slideshow-13-sample-monitor-temperature.jpg)
/-/https/www.sciencebuddies.org/cdn/Files/7804/10/slideshow-14-sample-observe-ice-crystals.jpg)
/-/https/www.sciencebuddies.org/cdn/Files/7795/10/slideshow-0-sample-testing-holder.jpg)
Slideshow with step-by-step instructions viewable online.
- You will measure the freezing point of seven different test liquids: three salt solutions, three sucrose (sugar) solutions, and a pure water control. The pure water control is important for determining the freezing point of the water in your experiment, which may or may not be exactly 0°C.
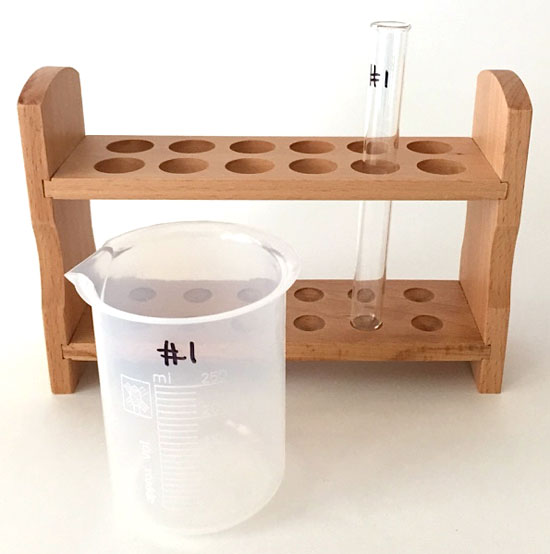
- Use a permanent marker to label one of the test tubes and one of the 250 mL beakers as "#1".
- Prepare your first test liquid in the beaker labeled #1.
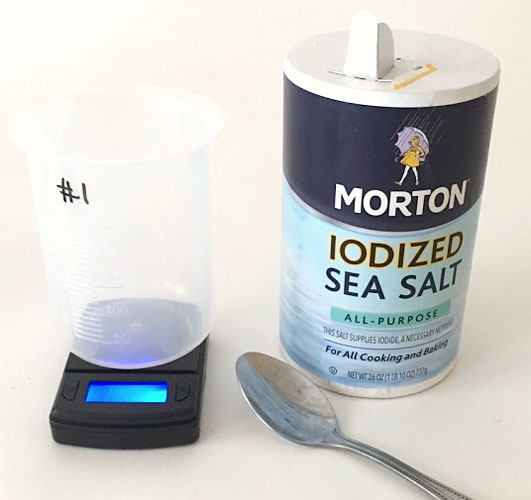
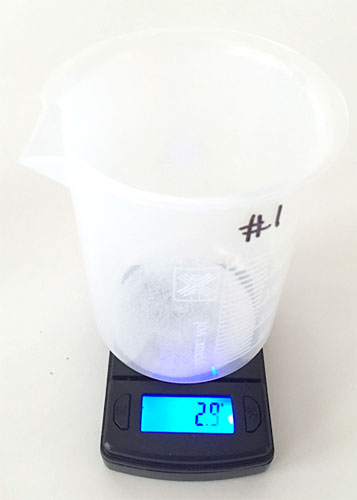
- Use the digital scale to weigh 2.9 g of table or sea salt (NaCl) into the beaker.
- Tip: Some scales, like the one in the Science Buddies kit, have a cover over the weighing surface. This should be removed before using the scale.
- Measure 100 mL of water in a graduated cylinder, and pour it into the beaker with the salt. Stir with a stirring rod until all of the crystals are dissolved.
- Rinse the stirring rod with water. You do not want to contaminate the other test liquids.
- Use the digital scale to weigh 2.9 g of table or sea salt (NaCl) into the beaker.
- Fill test tube #1 one-third full with test liquid #1. Place the test tube in the Styrofoam cup with the ice and salt.
- The liquid in the test tube should be below the level of the ice and salt in the cup.
- Do not allow any ice or salt from the cup to get into the test tube.
- Stir the test liquid in the test tube gently with a thermometer while keeping track of the temperature.
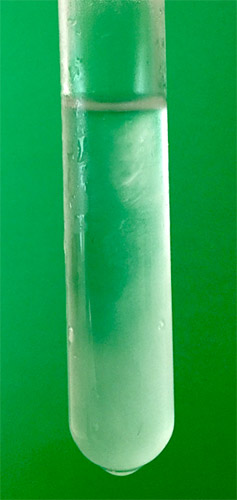
- Check the test tube frequently during the first 5 minutes for appearing crystals, then go on to check every minute after that for at least 45 minutes. Figure 1 shows what ice crystals look like. Note: The exact amount of time before crystals form will depend on the particular circumstances of your test. You should, however, see crystals form quickly in the majority of your tests, but may notice that test liquid 6 takes substantially longer to form crystals.
/-/https/www.sciencebuddies.org/cdn/Files/3359/18/frozen-crystalline-regions-test-tube.jpg)
Figure 1. The opaque, white regions of this liquid are frozen. You know that you have reached the freezing point when the transparent liquid develops opaque, crystalline regions.
- When the first ice crystals appear on the inside wall of the test tube, record the temperature in your lab notebook. This is the freezing point of the test liquid.
- Melt the ice again by rolling the test tube in your hand and empty the contents of the test tube down the drain. (Important: Be especially careful when handling the very cold glass test tubes, as they are very brittle. Exposing them to rapid temperature changes makes them more prone to breakage.) Next, refill the same test tube with fresh test liquid #1. Repeat steps 4–7 with a fresh sample. Then empty and refill the test tube again, repeating steps 4–7 for a third time. You should have a total of three replicates for test solution #1, all carried out in the same test tube.
- If you need to make more of the test liquid, simply repeat step 3.
- Repeat steps 2–8 for each of the remaining test liquids, making sure to use a different beaker and test tube for each of the test liquids. You do not want the residue from one test liquid to contaminate the other test liquids. Make sure to label the beakers so that you know which test liquid is in which beaker.
- Test liquid #2 = 5.8 g NaCl in 100 mL water
- Test liquid #3 = 11.7 g NaCl in 100 mL water
- Test liquid #4 = 17.1 g sucrose in 100 mL water
- Test liquid #5 = 34.2 g sucrose in 100 mL water
- Test liquid #6 = 68.5 g sucrose in 100 mL water
- Test liquid #7 = 100 mL water (simply measure 100 mL of water in the graduated cylinder and store the water in the graduated cylinder)
Analyzing your Data
- Calculate the freezing point depression, ΔT, for all three replicates of each of the NaCl and sucrose solutions. Record these values for ΔT in your lab notebook.
- First, average the freezing point temperatures you observed for plain water, test liquid #7. This averaged temperature will be the solvent freezing temperature.
-
Then calculate ΔT. Use the equation below, which was derived from rearranging the terms in Equation 3 of the Introduction.
- Average the freezing point depression, ΔT, for each of the NaCl and sucrose solutions. Record these averages in your lab notebook.
- Calculate the molalities of the NaCl and sucrose solutions.
- Molality is defined as the number of moles of a substance, divided by the weight (in kilograms) of the solvent, as shown in Equation 1 in the Introduction.
- The number of moles of a substance is defined as the weight of the substance (in grams) divided by the gram molecular weight of the substance.
- The gram molecular weight of NaCl is 58.443 g.
- The gram molecular weight of sucrose is 342.3 g.
- 100 mL of water weighs 0.1 kg.
- Make a data table of your results, like the example shown in Table 1.
| Solution | Grams of the Substance | Molecular Weight of the Substance (g) |
Amount of Water (kg) | Molality (mol/kg) |
|---|---|---|---|---|
| Test liquid #1 | 2.9 g NaCl | 58.443 | 0.1 | 0.50 |
| Test liquid #2 | 5.8 g NaCl | 58.443 | 0.1 | 0.99 |
Table 1. Table for calculating the molality of NaCl and sucrose solutions.
- How do the molalities of the NaCl and sucrose solutions compare?
- For each of your NaCl and sucrose solutions, graph the molality of the solution (x-axis) versus the average amount of freezing point depression, ΔT (y-axis). What trend do you notice?
- Use Equation 2 in the Introduction to calculate the expected freezing point depression for each of the NaCl and sucrose solutions. Make a second data table to help you with these calculations. Table 2 shows what that table might look like.
| Solution | Substance | Van 't Hoff Factor | Molality | Kf for Water (°C/m) |
Expected Freezing Point Depression (°C) |
|---|---|---|---|---|---|
| Test liquid #1 | NaCl | 2 | 0.50 | 1.86 | |
| Test liquid #1 | NaCl | 2 | 0.99 | 1.86 | |
| Test liquid #1 | NaCl | 2 | 1.86 | ||
| Test liquid #2 | Sucrose | 1 | 1.86 | ||
| Test liquid #2 | Sucrose | 1 | 1.86 | ||
| Test liquid #2 | Sucrose | 1 | 1.86 |
Table 2. Table for calculating expected freezing point depression using Equation 2.
- Compare the experimentally measured freezing point depression to the calculated freezing point depression for each of the NaCl and sucrose solutions. How close are the experimental and calculated values? What do you think causes any differences between the measured and calculated values? Hint: The real Van 't Hoff factors for solutes in solution are often less than their ideal values due to interactions between the ions in a solution.
Optional: Applying Your Results to Make Your Own Ice Cream
One of the keys to creamy ice cream is making sure that your ice cream freezing process is really fast. A fast freezing process means that smaller ice crystals are formed and the smaller the ice crystals, the creamier your ice cream will be. The easiest way to freeze ice cream quickly is to put it in an environment that is as cold as possible. The following procedure describes how you can make your own ice cream using the same principles that you have applied during the experiment for lowering the freezing temperature of different solutions. For this add-on experiment you will need all the optional materials that are listed in the Materials and Equipment section. Follow these steps and watch this video to see how to make your own ice cream.
- Prepare your ice cream mix by adding 1 tablespoon of sugar, ½ cup of half-and-half (or milk or heavy whipping cream), and ¼ teaspoon of vanilla extract to a small sealable baggie.
- Add 4 cups of ice cubes or crushed ice to a large, gallon-sized baggie. The ice in this baggie is used to freeze your prepared ice cream mix as fast as possible. Depending on your previous results, decide if you want to add ½ cup of sugar or salt to the ice cubes for the best freezing results. Note: Remember, that you want this ice-salt or ice-sugar mixture to be as cold as possible for the best and creamiest ice cream results. In your previous experiment, which mixture (water-salt or water-sugar) got coldest and resulted in the lowest freezing point?
- Once you have added the salt or sugar to the large baggie, put the small baggie with the prepared ice cream mixture into the large baggie with the ice cubes. Be sure both baggies are sealed shut.
- Put on oven mitts or wrap the baggie in a small towel and then shake the bag for 5 minutes. Every couple of minutes, feel the smaller baggie and take a quick peek at it.
- When you are done shaking, carefully open the large baggie and remove the small baggie with the ice cream mix. Did the mixture turn into delicious, creamy ice cream? If so, enjoy it now as a tasty reward for your chemistry challenge! If not, revisit your previous results and repeat this procedure, but this time modify the substance that you add to the large baggie with the ice cubes. Note: You can also try to modify this procedure to make even creamier ice cream or to create different ice cream flavors.
Troubleshooting
For troubleshooting tips, please read our FAQ: Chemistry of Ice-Cream Making: Lowering the Freezing Point of Water.
Ask an Expert
Variations
- Try doing the experiment with calcium chloride (CaCl2) or magnesium chloride (MgCl2), seasonally available at hardware stores, often sold as ice melt. How do the results from these chemicals compare with those from sucrose and NaCl?
- Try doing the experiment with both higher and lower concentrations of NaCl or sucrose. Does the difference between the experimental and calculated values for freezing point depression change with the concentration of NaCl or sucrose?
- For some other chilly experiments, see the Science Buddies projects:
Frequently Asked Questions (FAQ)
Careers
If you like this project, you might enjoy exploring these related careers:
/-/https/careerdiscovery.sciencebuddies.org/cdn/Files/1107/19/pexels-photo-3938023.jpg)
/-/https/careerdiscovery.sciencebuddies.org/cdn/Files/1316/17/unsplash-ePJQise0OkQ.jpg)
/-/https/careerdiscovery.sciencebuddies.org/cdn/Files/1309/18/unsplash-vGA1ei1yxos.jpg)
/-/https/careerdiscovery.sciencebuddies.org/cdn/Files/1100/18/unsplash-NP6JLl_2C-c.jpg)
Contact Us
Our kits are developed in partnership with Home Science Tools®. If you have purchased a kit for this project, Home Science Tools® is pleased to answer any questions not addressed by the FAQ above.In your email, please follow these instructions:
- Include your Home Science Tools® order number.
- Please describe how you need help as thoroughly as possible:
Examples
Good Question I'm trying to do Experimental Procedure step #5, "Scrape the insulation from the wire. . ." How do I know when I've scraped enough?
Good Question I'm at Experimental Procedure step #7, "Move the magnet back and forth . . ." and the LED is not lighting up.
Bad Question I don't understand the instructions. Help!
Good Question I am purchasing my materials. Can I substitute a 1N34 diode for the 1N25 diode called for in the material list?
Bad Question Can I use a different part?
Contact Support

/-/https/img.youtube.com/vi/Djzx54j-2ZU/0.jpg)
/-/https/img.youtube.com/vi/jr3BOE_EpOk/0.jpg)
/-/https/img.youtube.com/vi/ksG87OUZOkA/0.jpg)