Abstract
Everything on our planet is connected together, linked by a giant recycling system called the biogeochemical cycle. It is an amazing process. You can actually investigate how our planet recycles and reuses everything needed to support life by making a small model of the biosphere. What will be important to include in your miniature system so that it can support different types of life?Summary
Teisha Rowland, PhD, Science Buddies
Sara Agee, PhD, Science Buddies
/-/https/www.sciencebuddies.org/cdn/Files/3168/5/Geo_img057.jpg)
Objective
Make a miniature biosphere, called a Winogradsky column, to test how including different nutrients affect which soil microorganisms grow in it.
Introduction
Did you know that nature reuses and recycles? To live and grow, organisms need specific nutrients (which are chemicals) nearby for them to eat. How do the nutrients end up there? Most of the nutrients that organisms need in the living part of the earth, or biosphere, get there by being moved along through a biogeochemical cycle. A biogeochemical cycle is a pathway that moves nutrients and other chemicals through the living and nonliving parts of the Earth (which are called the biotic and abiotic parts, respectively). The biogeochemical cycle is also what is known as a closed system, which means that these nutrients are not lost or created, but are constantly being reused and recycled. Basically, all organisms depend on nutrients from other living creatures and from nonliving components of the planet, and these nutrients are constantly being moved around. Knowing this, you can probably see how biogeochemical cycles are important for both ecology and earth science.
A given ecosystem (which is a system with living and nonliving parts that interact together) may have several biogeochemical cycles going on within it. Nutrients (and other chemicals) move through the living parts of an ecosystem by being part of organisms. Nutrients also move through nonliving parts of ecosystems, like water, land, and the air. (These parts make up the hydrosphere, lithosphere, and atmosphere, respectively.) Some important nutrients that are recycled through an ecosystem are phosphorus, nitrogen, oxygen, carbon, and sulfur.
Some examples of biogeochemical cycles are the water cycle, the carbon cycle, and the nitrogen cycle. Figure 1, below, shows the nitrogen cycle. You can see how nitrogen is recycled through the production of different nitrogen-based compounds, such as ammonium (NH4+) and nitrates (NO3-). These different compounds are used by different organisms, such as different types of bacteria.
/-/https/www.sciencebuddies.org/cdn/Files/3168/5/Geo_img057.jpg)
Diagram shows how nitrogen is recycled and used within a garden. Nitrogen in the air is absorbed into the soil and nurishes plants while also being converted to ammonium. Bacteria convert the ammonium to nitrites that plants can use to grow, or bacteria can break down to release nitrogen back into the atmosphere. Decomposers such as fungi can also breakdown decaying plant material into ammonium-- a vital part of the nitrogen cycle.
Figure 1. Here you can see how one important nutrient, nitrogen, is cycled through the environment in a biogeochemical cycle. (EPA)
One of the pioneers of the "Cycle of Life" concept was a Ukrainian-Russian microbiologist named Sergei Winogradsky. By studying the unique microbes that live in different soil conditions, he discovered how nitrogen was recycled in a process called nitrification. He went on to study different soil microbes that each recycle different nutrients in the biosphere, like nitrogen, phosphorus, sulfur, carbon, and oxygen. Sound familiar? These are all important nutrients in the Earth's biosphere, recycled by biogeochemical cycles. Now you know why those soil-dwelling microbes are all so important!
One of the tools that Sergei invented to study these processes was a long, sealed column of muddy soil, now called a Winogradsky column, after his important discoveries. Figure 2 below shows an example of a Winogradsky column. Within a Winogradsky column, different gradients are formed. For example, over time, there is more oxygen at the top of the column, next to the air, than at the bottom. Similarly, if sunlight is shining more on the top of the column than the bottom, then there can also be a sunlight gradient from the top to the bottom.
/-/https/www.sciencebuddies.org/cdn/Files/5024/5/Winogradsky_img.jpg)
Figure 2. This is an example of a Winogradsky column. Although Winogradsky columns can come in different sizes and shapes (some are even flat), all of them have mud and water inside that is allowed to sit for weeks. Over time, different layers and patches of color may appear, which are made up of different types of bacteria.)
The gradients of oxygen and sunlight in a Winogradsky column affect where different microbes can live in it. For example, it might sound strange to us, but a lot of bacteria actually cannot live in the presence of free oxygen. They are called anaerobic bacteria. There are several different types of anaerobic bacteria, and they usually live further down in the column. Bacteria that need oxygen, or make oxygen, such as cyanobacteria, usually live near the top of the column. Bacteria that need free oxygen are called aerobic bacteria. Similarly, several different types of bacteria need sunlight so they can get energy (through photosynthesis or a similar process). Those bacteria will want to be where they can get sunlight in the column.
An interesting interaction that can happen in a Winogradsky column involves a gradient of hydrogen sulfide. It has to do with a common type of anaerobic bacteria called sulfate reducing bacteria. This bacteria actually eats sulfur and turns it into hydrogen sulfide. Hydrogen sulfide is a poisonous gas that is responsible for the characteristic smell of rotten eggs. The sulfate reducing bacteria sometimes live at the bottom of Winogradsky columns, making a hydrogen sulfide gradient in the column with high amounts at the bottom and low amounts near the top. The hydrogen sulfide, while toxic to humans (but not in the quantities in your Winogradsky column), is actually eaten by other types of anaerobic bacteria, such as green sulfur bacteria and purple sulfur bacteria. To thrive, these bacteria need energy from sunlight in addition to the hydrogen sulfide.
In this science project, you will make your own Winogradsky columns to study soil samples and investigate how including different nutrients affects the bacteria that grow in it. Each column will model the biosphere. By adding a source of sulfur or carbon to each column, you will test how each nutrient affects bacterial life in your miniature biosphere. Including carbon may affect a group of anaerobic bacteria called purple non-sulfur bacteria, which are bacteria that need sunlight and a carbon source. To help you identify the bacteria, Table 1, below, shows the main groups of bacteria that you may find in a Winogradsky column, along with the general order in which they appear (from the top to the bottom of the column) and what color they usually are. Note that some types of bacteria, such as the purple non-sulfur bacteria, can come in many different colors (there are many different species).
How will adding sulfur or carbon cause the populations of soil-dwelling microbes to change? Will some of the bacteria be unable to grow? Will some grow even better? Get ready to load some bottles with mud to make your own Winogradsky columns and find out!
| Column Position | Bacteria | Color |
|
Top Bottom |
Cyanobacteria | Green |
| Purple non-sulfur bacteria | Red, purple, orange, or brown | |
| Purple sulfur bacteria | Red/purple | |
| Green sulfur bacteria | Green | |
| Sulfate reducing bacteria | Black |
Terms and Concepts
- Nutrients
- Biosphere
- Biogeochemical cycle
- Closed system
- Ecosystem
- Oxygen
- Carbon
- Sulfur
- Winogradsky column
- Gradients
- Anaerobic bacteria
- Cyanobacteria
- Aerobic bacteria
- Photosynthesis
- Hydrogen sulfide
- Sulfate reducing bacteria
- Green sulfur bacteria
- Purple sulfur bacteria
- Purple non-sulfur bacteria
Questions
- After a Winogradsky column has been sitting for a few weeks, where do you think the most oxygen will be?
- How do you think the oxygen gradient in a Winogradsky column will affect where different microbes are living in it?
- If there is a lot of sulfur in a Winogradsky column, what types of bacteria do you expect to see more of? Do you expect to see less of any other types of bacteria?
- How are sulfate reducing bacteria different from green sulfur bacteria and purple sulfur bacteria? How are all of these bacteria types similar?
Bibliography
Here are two video resources showing the construction of a Winogradsky Column:
- Scalice, D., and Dodson, K. (2006). Building A Winogradsky Column Video Demonstration. NASA Quest: National Aeronautics and Space Administration (NASA). Retrieved December 6, 2007.
- Perry, et. al. (2002). The Winogradsky Column. Microbial Life. First Edition, Sinauer Associates and Sumanas, Inc. Retrieved December 6, 2007.
Read this resource to learn about the structure of a Winogradsky column and the different microbes that can be found in one:
- Lennox, John E. (n.d.). Winogradsky Columns. The Pennsylvania State University. Retrieved August 8, 2013.
Materials and Equipment
- Clean, 500 mL water or soda bottles (12). Use bottles with smooth sides (not ridges, as this can trap air and make viewing more difficult). Taller, narrower bottles should work better than shorter ones. If they did not previously contain only water, be sure to wash out the bottles before using them, but do not use any soap, as this could kill the microbes.
- Scissors
- Optional: Knife
- Permanent marker
- Ruler, metric
- Optional: Rubber boots and old clothes that can get muddy
- Access to a muddy stream, pond, lake, or marsh
- Gloves. Can be purchased at a local drug store or pharmacy, or through an online supplier like Carolina Biological Supply Company. If you are allergic to latex, use vinyl or polyethylene gloves.
- Shovel or trowel
- Bucket, at least 2-gal
- Clean, plastic 1-gal jugs with lids (2) or a second bucket
- Optional: Distilled water (2 gal.)
- Newspaper (half a sheet) or a sheet of plain paper
- Egg (1)
- Bowls (2)
- Optional: Large spoon or stick to stir the mud
- Large mixing bowl. You can use one and clean it during the Procedure, or have two available.
- Plastic or Pyrex beaker, 500 mL or 1 L. Beakers are available through scientific supply stores or online stores such as Carolina Biological Supply Company. Alternatively, a measuring cup may be used.
- Wide stick, for packing the mud in the bottles
- Optional: Medicine dropper
- Measuring tablespoon
- Adjustable desk lamp with 13 W compact fluorescent bulb
- Plastic wrap
- Thermometer, for measuring room temperature; available locally or through online suppliers such as Carolina Biological Supply Company.
- A large, empty surface, such as a desk or table, that is out of the way and at a warm room temperature, or about 72°F to 78°F, and not below 65°F. You will need to use it for testing the bottles for 6 to 8 weeks. It should not receive any direct sunlight because this will heat the bottles up too much.
- Plastic trash bags or grocery bags
- Rubber bands (12). These will need to fit tightly around the bottles.
- Cardboard box. It must be large enough to fit around three of the bottles, standing upright. Alternatively, you can use a large brown paper bag.
- Flashlight, preferably a bright one, such as an LED flashlight
- Optional: Colored pencils, pens, or crayons
- Lab notebook
Disclaimer: Science Buddies participates in affiliate programs with Home Science Tools®, Amazon.com, Carolina Biological, and Jameco Electronics. Proceeds from the affiliate programs help support Science Buddies, a 501(c)(3) public charity, and keep our resources free for everyone. Our top priority is student learning. If you have any comments (positive or negative) related to purchases you've made for science projects from recommendations on our site, please let us know. Write to us at [email protected].
Experimental Procedure
For health and safety reasons, science fairs regulate what kinds of biological materials can be used in science fair projects. You should check with your science fair's Scientific Review Committee before starting this experiment to make sure your science fair project complies with all local rules. Many science fairs follow Regeneron International Science and Engineering Fair (ISEF) regulations. For more information, visit these Science Buddies pages: Project Involving Potentially Hazardous Biological Agents and Scientific Review Committee. You can also visit the webpage ISEF Rules & Guidelines directly.
-
First prepare your bottles so that they are ready to turn into Winogradsky columns once you have collected your mud.
-
Remove any wrappers from the bottle as best you can, as shown in Figure 3, below.
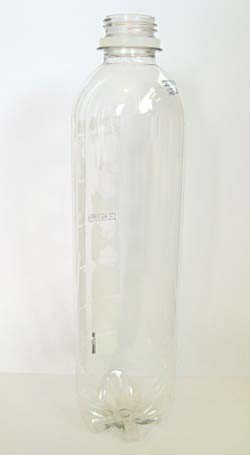
Figure 3. First remove the wrappers from your bottles.
-
Carefully cut the tops off of your bottles, as shown in Figure 4, below. This will make it easier to add the mud to.
- You may need to use scissors and a knife to do this, and an adult may be needed to help.
- Keep the bottles as tall as you can by cutting no lower than where the bottle starts curving inward near the top.
- Save the tops to use as funnels later.
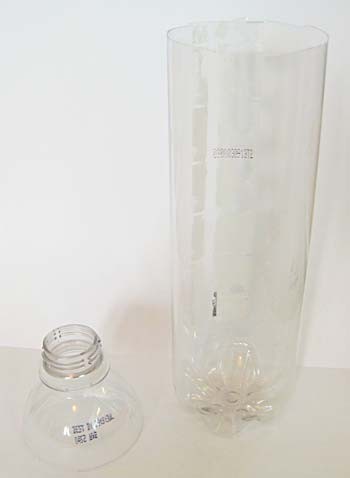
Figure 4. Carefully cut the tops of the bottles off.
-
Using a permanent marker, make a small mark on each bottle where it would be 85% full, as shown in Figure 5, below. You will fill the bottle this full with mud.
- For example, if your bottle is 17.5 centimeters (cm) tall (with its top cut off), you would make a mark at 14.9 cm up from the bottom (since 17.5 cm times 85%, or 0.85, is 14.9 cm).
-
Remove any wrappers from the bottle as best you can, as shown in Figure 3, below.
/-/https/www.sciencebuddies.org/cdn/Files/5025/5/Winogradsky_column_microbes_img.jpg)
/-/https/www.sciencebuddies.org/cdn/Files/5026/5/Winogradsky_column_microbes_cut_img.jpg)
/-/https/www.sciencebuddies.org/cdn/Files/5027/5/Winogradsky_column_microbes_marked_img.jpg)
Figure 5. Mark where your bottles would be 85% full.
-
Now go out and collect some mud from a muddy stream, pond, lake, or marsh. You may want to first put on some rubber boots and old clothes that can get muddy.
-
Put on some gloves and use a shovel or trowel to scoop the mud into a large bucket. Collect most of your mud from just below the water's surface. You will want enough mud to fill all of your bottles mostly full.
- A good amount to aim for is 6 liters (L) (or about 1.6 gallons [gal]) so you have extra mud if you need it.
- Avoid collecting rocks and sticks in your mud.
-
Also collect about 7.5 L (2 gal) of water, from the same location. You may need to add some of this water to your mud once you get home.
- Using two 1-gal, cleaned plastic jugs (with lids) works well for this. Alternatively, a second bucket could be used, just be sure it will not spill the water!
- Instead of this water, you could use distilled water.
- Bring your containers home and go wash your hands (and possibly your clothes)!
- Until you use them, keep your bucket of mud and containers or water shaded so they do not get too hot. You should use the mud to set up your Winogradsky columns the same day that you collected it.
-
Put on some gloves and use a shovel or trowel to scoop the mud into a large bucket. Collect most of your mud from just below the water's surface. You will want enough mud to fill all of your bottles mostly full.
-
Next, prepare your additives. To each Winogradsky column, you will be adding newspaper (or paper), egg yolk, or neither. The newspaper (or paper) will serve as a carbon source and the egg yolk will serve as a sulfur source.
- Prepare the newspaper: Into a bowl, cut half a sheet of newspaper or a sheet of paper into thin strips. Then cut the strips into tiny rectangles, as shown in Figure 6, below.
-
Prepare the egg yolk: You can use a raw egg or a hard-boiled egg. Put the egg yolk in a bowl.
- If you are using a raw egg, one way to only get the yolk is by gently cracking the egg's shell in the middle, carefully breaking it open to create two similarly sized shell halves, and pouring the egg yolk back and forth from one shell half to the other while letting the egg white drain out.
- If you are using a hard-boiled egg, mash the yolk into a dry powder.
/-/https/www.sciencebuddies.org/cdn/Files/5028/5/Winogradsky_column_microbes_newspaper_img.jpg)
Figure 6. Cut up half a sheet of newspaper (or a sheet of paper) into thin strips.
-
Prepare your Winogradsky Columns:
-
Using a permanent marker, label your bottles with what will be going into them.
- Three bottles will have egg yolk added. You could just label them "E" for egg yolk. For example, they could be labeled "E1," E2," and "E3."
- Three bottles will have newspaper. You could label them "N" for newspaper, such as "N1," "N2," and "N3."
- Six bottles will have neither (just plain mud). Three of these will be in the dark. You could label these three "PD" for plain dark, such as "PD1," "PD2," and "PD3." The other three bottles could just be "P1," "P2," and "P3."
-
Put on some gloves and get your bucket with your mud. While stirring, slowly add the water (which you collected) to the soil until your mixture becomes like a milkshake. The amount of water you need to add will depend on how wet your soil is at the start. Be sure the mud is wet enough that it will flow easily through the funnel.
- Important: Also while stirring, be sure to pick out all sticks, leaves, and rocks from the mud. You do not want any solid objects like these in your Winogradsky columns because they could disrupt the oxygen gradient.
-
Fill the three bottles you labeled as having egg yolk added.
- In a large, clean mixing bowl, add 1.5 L (6.3 cups) of the mud you prepared.
- To the bowl, add the egg yolk you prepared in step 3 and mix it in well.
- Using the cut-off top of one of the bottles as a funnel, as shown in Figure 7 below, pour approximately 2 cm to 3 cm of the mud mixed with egg yolk into one of the bottles you labeled as having egg yolk added.
- Tap the bottle on a hard surface to pack the mud down. Also use a wide stick to pack the mud in the bottle. This is important to make sure air bubbles are not trapped in the bottle; you do not want any air bubbles. Note: Do not mix the mud when you add it to the bottle because this can introduce air bubbles.
- Repeat steps 4.c.iii. to 4.c.iv. until you fill the bottle 85% full, which should be up to the mark you made on it in step 1.c.
- Let the bottle sit for 30 minutes. Then measure how much water is on the top of the mud. You want the water to be 0.6 cm to 2 cm deep. If needed, add more water (from the water you collected) or carefully remove some water. (You could use a medicine dropper to remove water without disrupting the mud.) Leave at least 0.5 cm of empty space at the top of the bottle.
- Repeat steps 4.c.iii. to 4.c.vi. until all three bottles that should have egg yolk added to them have been prepared.
- If you used a raw egg, be sure to wash your hands and clean any surfaces that came in contact with the raw egg since they can carry Salmonella.
-
Fill the three bottles you labeled as having newspaper added.
- In a large, clean mixing bowl, add 1.5 L of the mud you prepared in step 4b. You may need to briefly re-mix it if the water has settled on top. (You can use a new, clean mixing bowl for this step or clean the one you used in step 4c. If you reuse the bowl, be sure to clean it without soap!)
- To the bowl, add 1 tablespoon (Tbsp.) of the shredded newspaper. Mix it in well.
- Repeat steps 4.c.iii. to 4.c.vi. but this time use the mud you prepared with newspaper and the bottles you labeled as having newspaper added.
-
Fill the six bottles you labeled as having plain mud (neither egg yolk nor newspaper added).
- You may need to briefly re-mix the bucket of mud you prepared in step 4b if the water has settled on top.
- Repeat steps 4.c.iii. to 4.c.vi. but this time use the plain mud right from the bucket and the bottles you labeled as having plain mud.
-
Using a permanent marker, label your bottles with what will be going into them.
/-/https/www.sciencebuddies.org/cdn/Files/5029/5/Winogradsky_column_microbes_funnel_img.jpg)
Figure 7. Use the cut-off top of a bottle as a funnel to pour the mud into the bottles.
-
Prepare the area where you will be testing the bottles.
-
This should be a large, empty surface, such as a desk or table, that is out of the way and at a warm room temperature, or about 72°F to 78°F, and not below 65°F. It does not need to receive any sunlight because you will be using a desk lamp as your light source. It should not receive any direct sunlight because this will heat the bottles up too much.
- Alternatively, you could use an area near a sunny window instead of a desk lamp for your source of sunlight. The window should be very sunny but no direct light should actually touch the bottles. This should work as a light source, but it is preferable to use the desk lamp so that lighting conditions are more consistent.
- Cover the surface with plastic trash bags or grocery bags. This will protect the surface from being damaged if any water leaks out of the Winogradsky columns.
- Set up a desk lamp (with a 13 W fluorescent bulb) so that it will be 50 cm away from, and directly lighting up, where the bottles will be.
-
This should be a large, empty surface, such as a desk or table, that is out of the way and at a warm room temperature, or about 72°F to 78°F, and not below 65°F. It does not need to receive any sunlight because you will be using a desk lamp as your light source. It should not receive any direct sunlight because this will heat the bottles up too much.
- Carefully take your bottles to the testing area you have prepared. Be careful not to spill the bottles when you move them!
- Cover each bottle tightly with plastic wrap, secured with rubber bands. Your bottles are now ready to be tested as Winogradsky columns.
- Take the three plain Winogradsky columns that will be in the dark and set them aside for now.
-
Arrange the Winogradsky columns (not including the ones that will be in the dark) so that they are each 50 cm away from the light bulb in the lamp desk, and will be receiving direct light from it. To do this, it may be easiest to arrange the columns in a curved line away from the light.
- Try to make sure each column receives a similar amount of light. Also spread out the three columns that are testing the same additive (such as the three columns that have newspaper) so that they are not grouped together.
- Using a permanent marker, make a small mark on the side of each column that is facing the light. (For example, you could write a small "L" on that side.) In case the columns are moved, this will help you know which side was facing the light. The same side should always be facing the light.
- Set the three plain Winogradsky columns that will be in the dark on a surface that will also be at room temperature. Place a cardboard box upside down around these columns so that no sunlight reaches them.
- With warm water and soap, wash your hands and clean anything that came into contact with the mud.
-
For the next 6-8 weeks, leave the Winogradsky columns in their selected locations. Keep the desk lamp turned on 24 hours a day. Observe the columns once a week, looking for color changes in them. Each area of coloring should be a group of the same type of microbes. Record your observations in your lab notebook.
- Draw, label, and possibly color a picture of each of the columns each week.
-
Also make a data table to record your results for each column each week. Observations you may want to record include:
- Colors observed in each column.
- Whether the colors were arranged in defined layers or patches/spots.
- Where in the column the colors appeared.
- Whether you saw organisms other than microbes in the column, such as worms, shrimp, or snails.
- How much water was remaining at the top of the column, and whether the water was clear or cloudy.
- When observing the columns, be sure to compare them to each other. Do some have similar coloring patterns? Are some coloring patterns different?
- Tip: When observing the columns, try turning off the lamp desk and shining a bright flashlight at the columns. This may help you see the colors better, especially if the rest of the room is not well lit.
- Tip: You should see some green coloring appear on some of the columns after one to two weeks. You may need to look closely for it. If you do not see any green coloring on any of the columns, they may not be receiving enough light. You could try moving the lamp desk closer to the columns.
- Note: If you notice that a plastic wrap lid has come loose from one of the Winogradsky columns, do not panic! Reattach the plastic wrap with a rubber band and make a note of this in your lab notebook.
-
Analyze your results.
- Did some Winogradsky columns have similar coloring patterns as each other, meaning they had similar microbe colonies? Did some have different patterns? Why do you think this is?
-
How do the plain columns that were in the light compare to the ones that were kept in the dark? Why do you think this is?
- Can you explain your results in terms of how the bacteria might need sunlight as an energy source? Hint: Try re-reading the Introduction.
-
Does it look like adding newspaper (as a carbon source) or egg yolk (as a sulfur source) changed the types, or amounts, of bacteria that grew in the column? Why do you think this is? Hint: Remember you need to evaluate one variable at a time, so compare the newspaper in the light to the plain in the light and the egg yolk in the light to the plain in the light.
- Tip: For some help on figuring out what type of bacteria the different colorings are, try re-reading the Introduction. The Introduction also gives information on these bacteria that can help you figure out why you got the results that you did.
- Can you correlate your results to the gradients of different nutrients (such as oxygen and sulfur) that may be in the different columns?
- Note: If the mud you used had a lot of carbon or sulfur in it already, then adding additional carbon or sulfur may not have had a significant effect.
- Overall, what do your results tell you about how the distribution of different nutrients in a biosphere affects what grows there? Can you relate your results to a biogeochemical cycle?
Ask an Expert
Global Goals
The United Nations Sustainable Development Goals (UNSDGs) are a blueprint to achieve a better and more sustainable future for all.
/-/https/www.sciencebuddies.org/cdn/Files/19758/6/E-WEB-Goal-15.png)
Variations
- Test several different sources of mud or soil to see if the microbial growth will be different from location to location. You could even do something like include beach sand. What do you think this says about the soil quality and microbes that live at each site?
- Test different kinds of additives to look for microbes that live in unique and challenging environments:
- Salt Lovers (Halophiles) - You can test for salt tolerance in different microbes by increasing the amount of salt added to a series of bottles.
- Acid Lovers (Acidophiles) - You can test for differences in pH tolerance by changing the pH of each bottle by adding an acid (vinegar) or a base (baking soda).
- Heat Lovers (Thermophiles) - You can place the bottles at different temperatures to find organisms that like heat (near a heat vent) or cold (in the refrigerator).
- Sun Lovers - Test how the microbes respond to light or dark by placing one bottle in a window and the other under a box.
- Do further research on Winogradsky columns and what types of additives people sometimes include. For example, sometimes powdered chalk is included as a source of calcium sulfate, or blood meal (which is available from nurseries or garden centers) is included as a nitrogen source. Try making columns with these different additives and compare the microbial communities that grow in each. You could even try combining multiple additives and varying the ratios of each. What types of microbes grow with the addition of the different additives? Can you find the best conditions for growing a certain type of soil bacteria?
- Test how the color of light affects the types of microbes that grow in the Winogradsky column. Do the microbes grow better with some light colors compared to others?
Careers
If you like this project, you might enjoy exploring these related careers:
/-/https/careerdiscovery.sciencebuddies.org/cdn/Files/1783/17/nrcseprd423668.jpg)
/-/https/careerdiscovery.sciencebuddies.org/cdn/Files/1288/18/Career-Map-Environmental-Scientist.jpg)
/-/https/careerdiscovery.sciencebuddies.org/cdn/Files/860/17/pexels-photo-5230966.jpg)

/-/https/img.youtube.com/vi/KMzc3NE9FcI/0.jpg)
/-/https/img.youtube.com/vi/rbhzoCb0xWM/0.jpg)
/-/https/img.youtube.com/vi/adxTvOFhtCM/0.jpg)