Abstract
Astronomers can figure out what distant stars are made of (in other words, their atomic composition) by measuring what type of light is emitted by the star. In this science project, you can do something similar by observing the color of flames when various chemicals are burned.
Summary
None
A kit is available from our partner Home Science Tools®. See the Materials section for details.
Adult supervision is required. This science project involves creating small, controlled fires. Make sure you follow all the safety guidelines in the Procedure.
Andrew Olson, PhD, Science Buddies
Justin Spahn, Science Buddies
Sandra Slutz, PhD, Science Buddies
Teisha Rowland, PhD, Science Buddies
Sources
This science project is based on an entry to the 2007 San Mateo County (California) science fair (author names not published).
/-/https/i.ytimg.com/vi/O_u_jYB_abY/maxresdefault.jpg)
Objective
To investigate the colors produced when different chemicals are burned.
Introduction
All matter is made of atoms. Atoms have a nucleus, which consists of protons and neutrons, and is surrounded by electrons. The nucleus is concentrated in a very small space, about 10-15 m. An entire atom is on the order of 10-10 m, so the electrons are relatively far from the nucleus, and, strangely enough, atoms are mostly empty space.
Physicists have found that the electrons traveling around the atomic nucleus can have only certain amounts of energy, called energy levels. In other words, the energy levels of atomic electrons are quantized. If electrons gain energy, they can move from one energy level up to a higher level, but these different energy levels are not continuous—they come in discrete steps. (Watch the animation in Figure 1 to see an electron gain energy and move up to a higher energy level.) This fundamental discovery is known as quantum mechanics. Quantum mechanics describes how an atom's electrons interact with electrons of other atoms and with photons.

Figure 1. In this animation, the red circle represents an atom's nucleus and the blue circle is an electron orbiting around the atom. The black rings are different energy levels at which the electron can be. When the electron gains energy (represented by the red arrow going toward the electron), the electron moves to a higher energy level. When the electron loses energy (represented by the red arrow moving away from the electron), the electron moves to a lower energy level. (Animation credits: Kurzon)
Atomic electrons at higher energy levels can also lose energy, dropping down to a lower energy level. (You can also see this in the animation in Figure 1.) Again, the electron moves from one allowed energy state to another. The lost energy can be carried away in the form of heat (vibrational energy) or in the form of light—when the electron reverts to a lower energy state, a photon of light is produced. The photon produced will have an energy equal to the difference between the electron's initial high energy state and the later lower-energy state. For visible light, we perceive these differences in photon energy as differences in the color of the light. Because different types of atoms have different gaps between their energy levels, they make light of different colors when their electrons lose energy.
Not only can astronomers use this knowledge to figure out the atomic composition of distant stars, but it can also be used to create fireworks shows. Have you ever watched a fireworks show and wondered how all the different colors—amazing reds, yellows, oranges, blues, purples, greens, and more—are made? The color, or colors, that a firework makes depends on what chemicals are in the firework. These chemicals are various metal compounds that burn when the firework goes off, and burning the compounds is what makes the colors, like the ones shown in Figure 2.
/-/https/www.sciencebuddies.org/cdn/Files/6147/9/fireworks_show.jpg)
Figure 2. The beautiful colors of fireworks, like the ones shown here, are the result of atomic electrons emitting energy as light. (Image credits: Semnoz)
In this science project, you will use a procedure that is similar to flame photometry or a flame test to observe the color of light produced when various metal compounds are burned. You will need an adult to help you with this experiment, and you will have to perform the experiment extremely carefully so that the flames stay small and under control. What colors will different chemical compounds produce?
Terms and Concepts
- Atom
- Proton
- Neutron
- Electron
- Photon
- Fireworks
- Metal
- Flame photometry
- Flame test
- Spectral lines
Questions
- How are the colors produced by a chemical when it burns related to the atomic structure of the chemical?
- What is flame spectrometry and how is it used by physicists and chemists?
- How does this science project relate to what astronomers do when they are trying to identify the atomic makeup of a star?
- In the chemicals used in this science project, which elements in the compounds are metals?
Bibliography
Here are some good references to get you started with your background research on spectral lines and flame tests:
- Wikipedia Contributors. (2012, October 15). Spectral Lines. Wikipedia: The Free Encyclopedia. Retrieved October 16, 2012.
- Mineralogy Database. (n.d.). Flame Coloration by Element. Retrieved June 3, 2014.
Materials and Equipment 
Recommended Project Supplies
/-/https/www.sciencebuddies.org/cdn/Files/9149/13/rainbow-fire-kit-2018.jpg)
- Rainbow Fire Kit, available from our partner Home Science Tools®. You will need these items from the kit:
- Solid fuel tablets (2). These are sometimes alternatively called fire starters or fire starting tinder.
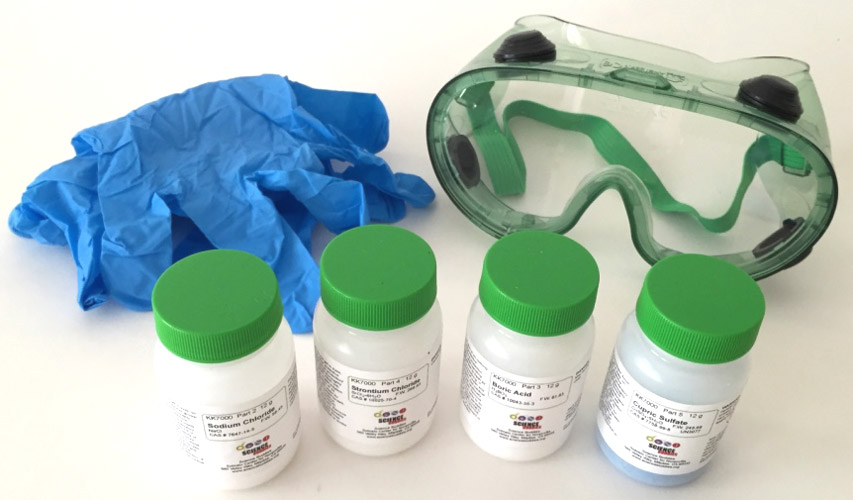
- Disposable gloves (2 pairs), for handling chemicals
- Chemical safety goggles
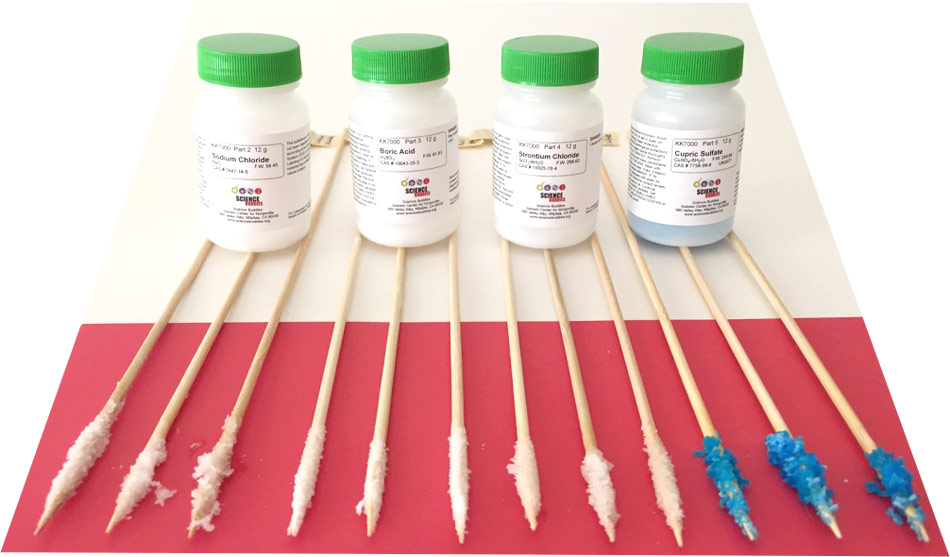
- Chemicals; 30 grams (g) each of:
- Copper sulfate
- Strontium chloride
- Boric acid
- Sodium chloride
- You will also need to gather these items, not included in the kit:
- White glue (1 small bottle)
- Bamboo skewers (12)
- Masking tape
- Pen or marker
- Aluminum foil
- Matches
- Hard nonflammable outdoor surface, like a sidewalk, driveway, or brick/concrete patio
- Container of water
- Heat-resistant bowl (1); a soup or cereal bowl would work well
- Piece of scrap paper on which to rest your 12 skewers as they dry
- Lab notebook
- Optional: Video camera or digital camera and tripod
- Optional: Flashlight
Disclaimer: Science Buddies participates in affiliate programs with Home Science Tools®, Amazon.com, Carolina Biological, and Jameco Electronics. Proceeds from the affiliate programs help support Science Buddies, a 501(c)(3) public charity, and keep our resources free for everyone. Our top priority is student learning. If you have any comments (positive or negative) related to purchases you've made for science projects from recommendations on our site, please let us know. Write to us at [email protected].
Experimental Procedure
Safety Note: This experiment requires adult supervision. Do not breathe in dust from the chemicals, and wear gloves when handling them to prevent contact with skin. Also, avoid breathing combustion fumes produced during this experiment.
The results will be most clear in the dark. We suggest performing this science experiment outside in the evening on a nonflammable surface like brick, concrete, cement, or other driveway surface. Make sure that there are no flammable materials nearby. Be prepared for an emergency with a container of water. A fire extinguisher would also be a great alternative.
Preparing the Chemical Skewers
Follow the step-by-step instructions below to see how to prepare the chemical skewers. The process is also illustrated in the following slideshow:
/-/https/www.sciencebuddies.org/cdn/Files/7823/7/slideshow-11-preparing-skewers-all-loaded.jpg)
/-/https/www.sciencebuddies.org/cdn/Files/7812/7/slideshow-1-preparing-skewers-materials.jpg)
/-/https/www.sciencebuddies.org/cdn/Files/7814/7/slideshow-2-preparing-skewers-label-on.jpg)
/-/https/www.sciencebuddies.org/cdn/Files/7815/7/slideshow-3-preparing-skewers-labeled.jpg)
/-/https/www.sciencebuddies.org/cdn/Files/7816/7/slideshow-4-preparing-skewers-labeled-all.jpg)
/-/https/www.sciencebuddies.org/cdn/Files/7817/7/slideshow-5-preparing-skewers-glue.jpg)
/-/https/www.sciencebuddies.org/cdn/Files/7818/7/slideshow-6-preparing-skewers-chemical-safety.jpg)
/-/https/www.sciencebuddies.org/cdn/Files/7819/7/slideshow-7-preparing-skewers-pick-chemical.jpg)
/-/https/www.sciencebuddies.org/cdn/Files/7820/7/slideshow-8-preparing-skewers-in-chemical.jpg)
/-/https/www.sciencebuddies.org/cdn/Files/7821/7/slideshow-9-preparing-skewers-with-chemical.jpg)
/-/https/www.sciencebuddies.org/cdn/Files/7822/7/slideshow-10-preparing-skewers-all-with-chemicals.jpg)
/-/https/www.sciencebuddies.org/cdn/Files/7813/7/slideshow-0-preparing-skewers-holder.jpg)
Slideshow with step-by-step instructions viewable online.
- Do your background research so that you are knowledgeable about the terms, concepts, and questions in the Background section.
- Have an adult present when you do the experiment, and follow all of the safety precautions mentioned at the beginning of the Procedure.
- Several hours before sunset (a day or more is also fine), prepare the bamboo skewers.
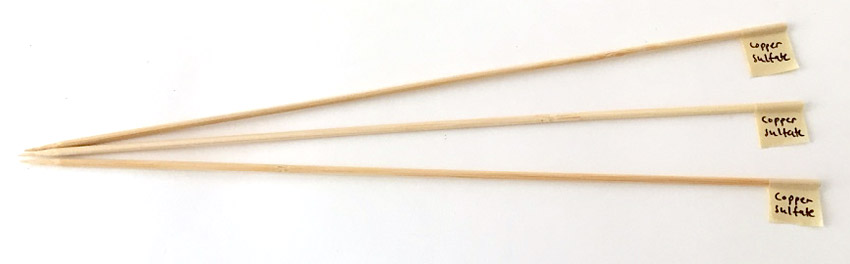
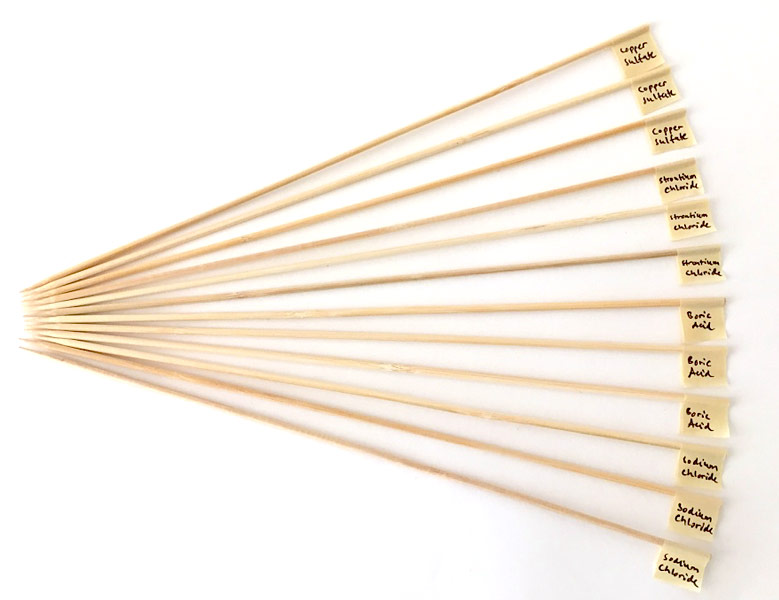
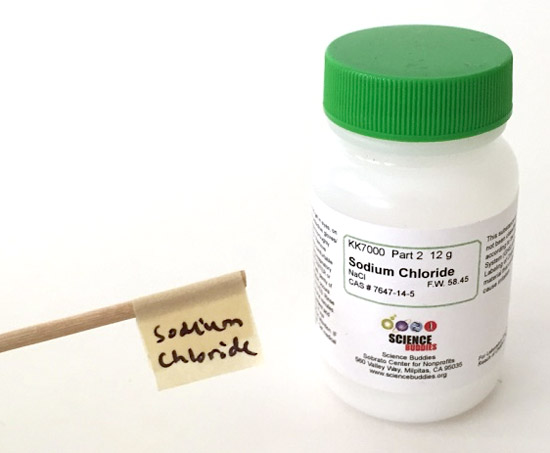
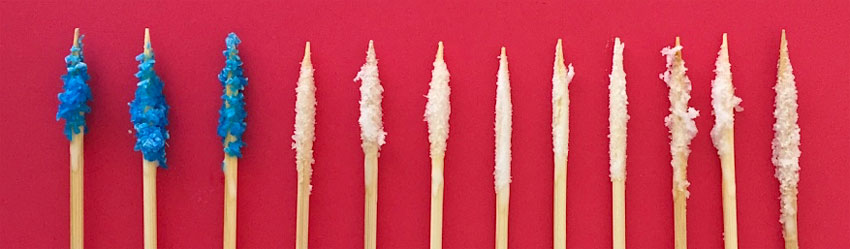
- Fold a piece of masking tape around the blunt end of each skewer to make labels (a total of 12 skewers) and write the name of a chemical on each skewer's label. You should label three skewers for each chemical.
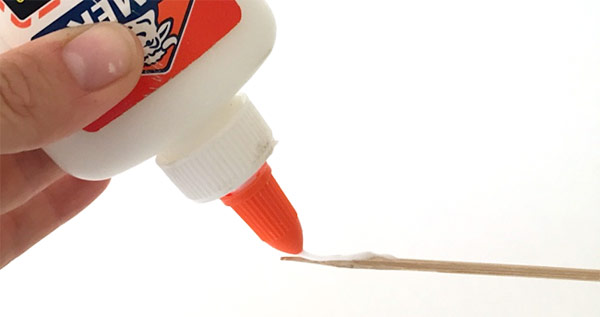
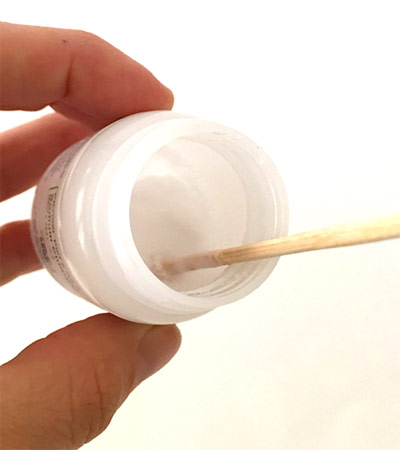
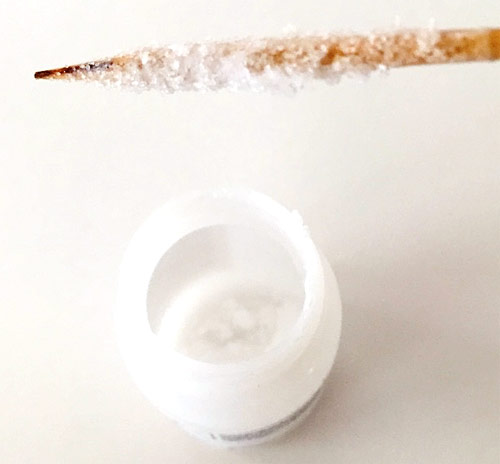
- Apply a thin layer of glue to the last 2–3 centimeters (cm) of the tip of a skewer. You can squeeze the glue directly from the glue bottle onto the skewer.
- While wearing the chemical goggles and disposable gloves, dip the glue-coated tip end of the skewer in the jar of chemical. Twist the skewer back and forth a bit to evenly coat the skewer with the chemical. Set it on a piece of scrap paper to dry. Important: Be sure to keep the scrap paper away from all children and pets as the skewers dry.
- Make sure the name of the chemical on the skewer label is a match for the chemical you are using.
- If you are not using the Science Buddies Kit, you may need to put your chemicals into vials or small baggies to do this step. The Science Buddies Kit chemical jars are just the right size to coat the skewer in.
- Repeat steps 5 and 6 until you have made three skewers for each of the chemicals.
- Let the skewers dry for at least 2 hours before performing the flame tests.
Conducting the Flame Tests
Follow the step-by-step instructions below and click through the slideshow to see how to conduct the flame tests.
/-/https/www.sciencebuddies.org/cdn/Files/7829/7/slideshow-16-flame-test-extinguish-fuel-tablet.jpg)
/-/https/www.sciencebuddies.org/cdn/Files/7824/7/slideshow-12-flame-test-fuel-tablet-foil.jpg)
/-/https/www.sciencebuddies.org/cdn/Files/7826/7/slideshow-13-flame-test-safety-fire.jpg)
/-/https/www.sciencebuddies.org/cdn/Files/7827/7/slideshow-14-flame-test-lighting-fuel-tablet.jpg)
/-/https/www.sciencebuddies.org/cdn/Files/7828/7/slideshow-15-flame-test-flame-chemicals.jpg)
/-/https/www.sciencebuddies.org/cdn/Files/7825/7/slideshow-0-flame-test-holder.jpg)
Slideshow with step-by-step instructions viewable online.
- The flame test should be conducted outside, in the dark (or at twilight). Adult supervision is needed.
- Find a hard, nonflammable surface outside for the flame test. A driveway, sidewalk, or brick/concrete/cement patio are all examples of a good testing surface.
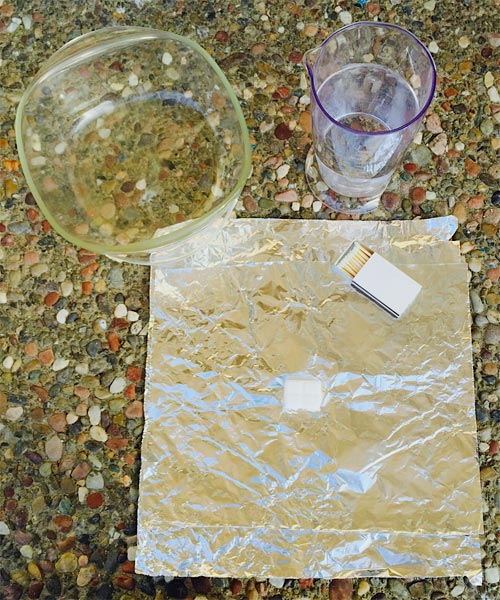
- Bring the dried chemical skewers (make sure they have dried for at least 2 hours first) and all other materials outside. You may find it easiest to use a flashlight or other outdoor light while you are getting set up. When you are done setting up and you are ready to test the skewers, make sure to turn off the light(s).
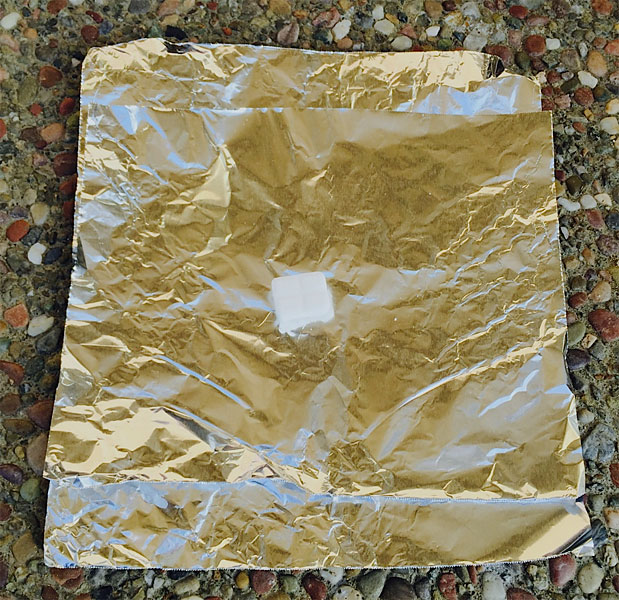
- Place a solid fuel tablet on a square of aluminum foil on your nonflammable surface.
- As a safety precaution, make sure to have a container of water with you. A fire extinguisher would be a great alternative. If you are using a video camera, start recording.
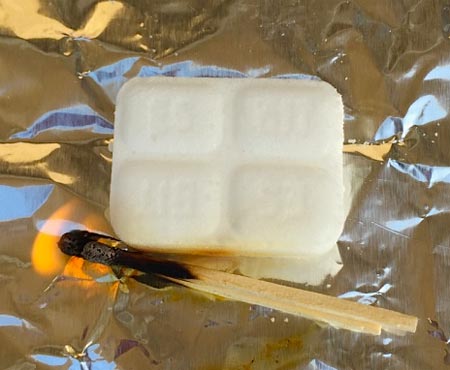
- Have an adult use a match to light the solid fuel tablet. You may find that laying the lighted match on the foil next to the tablet is the easiest way to get the tablet to start burning. Note the color of the flame in your lab notebook. If you are using a digital camera to document your experiment, take a picture of the burning tablet.
- Once the solid fuel tablet is burning, carefully take a skewer and hold the chemical-coated end in the flame. Be sure not to breathe the fumes or smoke from the burning skewer. Observe the flame color and record it in your lab notebook. Take a photo if you are using a digital camera for documentation.
- Tip: You may be able to see the color in the tablet's flame, or by holding the skewer away from the flame (once the chemical has caught on fire) and looking at the flame on the chemical-coated end of the skewer.
- The skewer may also catch fire after a few moments. Simply remove it from the flame and blow it out like a birthday candle. You can also extinguish the skewer in the container of water.
- Repeat step 7 for all 12 skewers (3 per chemical). Record all your observations in your lab notebook.
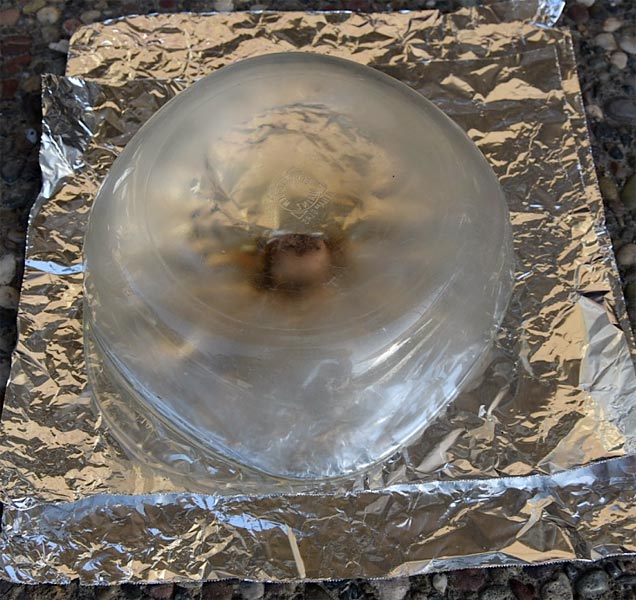
- When you are done, either wait for the solid fuel tablet to burn itself out, or extinguish it by carefully putting a heat-resistant bowl over the tablet.
- When you are sure everything has been extinguished, you can dispose of the aluminum foil, used chemical-coated skewers, and spent fuel tablet in the garbage.
- What colors were produced as each chemical burned?
- Sodium chloride (table salt) and strontium chloride both have chloride, but have a different metal (sodium versus strontium). Are the flame colors produced by these two compounds similar or different? What does this tell you about the source of the color?
Ask an Expert
Variations
- You could try this science project using other metal compounds known to produce certain flame colors when burned. Check out the resources in the Bibliography section for some ideas on how to do this. Be sure to always look into and follow all proper safety precautions when handling and burning different chemicals. What colors do other metal compounds make when burned?
Careers
If you like this project, you might enjoy exploring these related careers:
/-/https/careerdiscovery.sciencebuddies.org/cdn/Files/1107/19/pexels-photo-3938023.jpg)
/-/https/careerdiscovery.sciencebuddies.org/cdn/Files/1640/26/Fyysikot_tyossaan.jpg)
/-/https/careerdiscovery.sciencebuddies.org/cdn/Files/1649/17/pexels-photo-1181398.jpg)
/-/https/careerdiscovery.sciencebuddies.org/cdn/Files/1113/21/iStock-498128575.jpg)
Contact Us
Our kits are developed in partnership with Home Science Tools®. If you have purchased a kit for this project, Home Science Tools® is pleased to answer any questions.In your email, please follow these instructions:
- Include your Home Science Tools® order number.
- Please describe how you need help as thoroughly as possible:
Examples
Good Question I'm trying to do Experimental Procedure step #5, "Scrape the insulation from the wire. . ." How do I know when I've scraped enough?
Good Question I'm at Experimental Procedure step #7, "Move the magnet back and forth . . ." and the LED is not lighting up.
Bad Question I don't understand the instructions. Help!
Good Question I am purchasing my materials. Can I substitute a 1N34 diode for the 1N25 diode called for in the material list?
Bad Question Can I use a different part?
Contact Support

/-/https/img.youtube.com/vi/Wa8CjGsOFzY/0.jpg)
/-/https/img.youtube.com/vi/qZSP5-jYW34/0.jpg)
/-/https/img.youtube.com/vi/gaKbI2lU2SY/0.jpg)