A Trick of the Eye for Halloween
Exhaust your eye cones in just the right way, and you can enjoy the spookiness of seeing something that isn't really there!
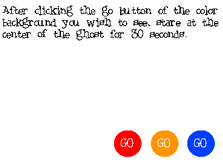
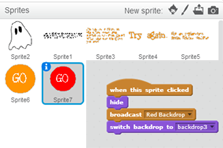
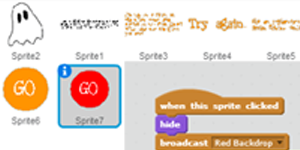
The screenshots above are from a project a student created using Scratch to demonstrate afterimages.
Spooky.
But I wasn't imagining it.
It was there, looking through the window at me and at several oversized pumpkins that must weigh a hundred or so pounds each.
Something you don't expect to see and suddenly do can be eerie. But when it comes to how your eyes work (and how your eyes and brain work together), what you see, at times, might actually be a neurological response—and not really there.
The science of visual perception can be fascinating, and you can have a lot of fun with your kids, students, and friends by exploring (or creating) visual illusions. (How many faces do you see in the tree? That's one that has been going around these days.) But an easy way to learn more about how the eyes work, and how "fatigued" different cones in the eyes may become when staring at something, is to set up a really simple test where you stare at a certain image for a period of time (like 30 seconds) and then glance over at a blank piece of paper. If you really focused your eyes on the initial image for the whole thirty seconds, you should see a version of the image reflected on the blank page—an image that isn't really there. Your eyes seem to be still seeing what they were initially looking at, just in a different color.
Maybe you have tried this with a giant colored circle—or even a small one?
Simple Science at Home
With Halloween coming, I made a mental note to corral the kids into helping with a ghostly version of the "Are Your Eyes Playing Tricks on You? Discover the Science Behind Afterimages!" project so that I could share a Halloween-infused version of the visual perception activity here on the Science Buddies blog. With younger kids, having them draw (or cut out) a large ghost or pumpkin and experiment with afterimages makes sense. My kids are a bit older, and as I thought about testing this with them for the blog, I realized that the directions for the activity (and the sample circle you stare at) at Science Buddies are online... this visual test works both with a digital images or with a sheet of paper in front of you. Given that, I started thinking that maybe I didn't need to force my middle schooler to draw a ghost.
I quickly spiraled down a path of having my student instead set up a digital simulation using Scratch as a way to show how afterimages work and as a way to encourage a bit of Scratch manipulation. Challenged to set up a simple program to demonstrate after-effects using a ghost image and a bit of computer logic to facilitate timing and the automatic changing of screens and display of information to the user, my student created a Scratch program and then took it a step farther, adding in the option for the user to choose an initial background color. This is a cool enhancement and lets you compare what colors you see as an afterimage depending on what colors are in the initial image. Note: in our Scratch version, you are staring at a white ghost, so you don't see a complementary color when you flip to a blank screen. So what do you see? And why? Questions for you to explore!
You and your students can certainly take the Scratch idea even further. You might have the user change the color of the ghost instead of the background. Or, you might add in different levels of color selection to really explore the complementary aspect of afterimages. Or, you could add a storytelling angle to the project: put a backdrop in place on the screen that appears after the user stares at an image, and you will create an interesting animation of sorts—one that partly isn't really there!
We had fun talking about afterimages, putting together the simple Scratch program, and testing it out. I hope you and your students are inspired to give afterimages a try and either experiment with your own Scratch program or make some construction paper ghosts, pumpkins, or bats.
For more information about visual perception, see:
- Are Your Eyes Playing Tricks on You? Discover the Science Behind Afterimages! (independent student project)
- Discovering the Colors Behind Afterimages (classroom project with both educator and student guide)
For more information about using Scratch and encouraging kids to explore computer logic with a tool like Scratch, see:
- Playful Programming and Cool Code: From Tech User to Tech Creator
- Super Scratch Succeeds in Scratching the Surface of Code with Cartoon Fun
- Scratch User Guide: Introduction
Categories:
You Might Also Enjoy These Related Posts:
- 15 STEM Gifts & Science Kits You'll Feel Good About Giving
- 13 Boat Science and Submarine Science Projects and Experiments
- July 4th STEM! Summer Science Picks for Independence Day!
- 12 Science Kits for Summer Science Experiments and Discovery
- 15 Science Projects to Make and Give for Father's Day
- Ready, Set, Go! (Awesome Summer Science Experiments)
- Awesome Summer Science Experiments
- 10 STEM Activities with Cardboard Tubes


