Building a Halloween Brushbot: Family Robotics
An orange scrub brush gives a family science activity a boost of jack-o-lantern-inspired fun and leads to a great robotics exploration.
Ever since the new Brushbot family science activity launched at Science Buddies, with electronics components conveniently bundled in a multi-project kit, I have had it on my "must make" list for my kids.
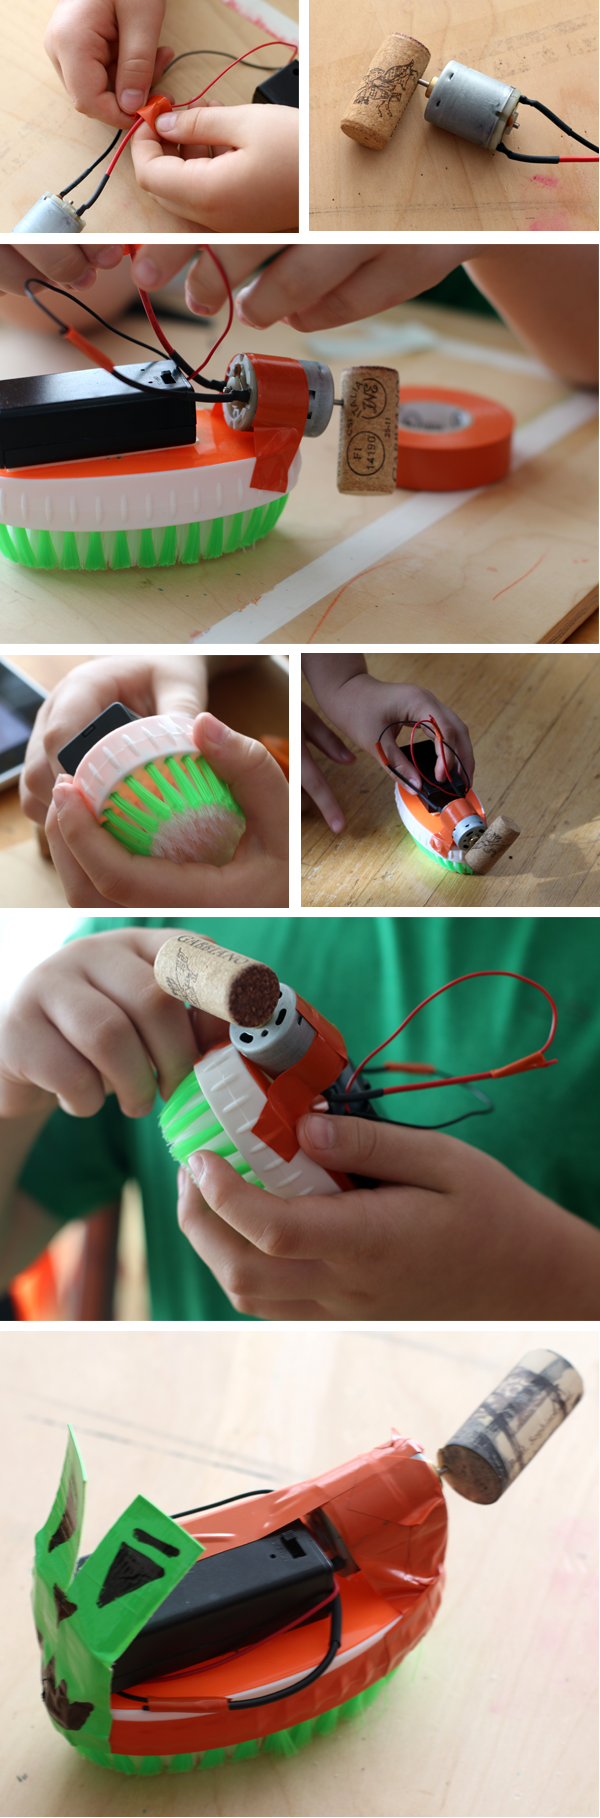
Thinking it would be cool to couple trick-or-treat month and the robotics project, I decided we would make a Halloween-themed Brushbot. Intent on tying our bot into October's mix of pumpkins, ghosts, and ghouls, I dug around online until I (finally) turned up a small scrub brush that seemed just right in terms of color. (It is harder than you might expect to find an orange scrub brush! Plus, for this project, you need a scrub brush without a handle.)
A Simple but Successful Build
On a roadmap of robotics projects, the Brushbot is a stepping stone early in the path, right there with the friendly toothbrush head Bristlebots. Despite the googly eye charm of the sample shown in the Science Buddies activity, with its simple circuit and limited number of parts, I worried that it might be a bit too easy of a build (compared to working with a breadboard) to capture my student's interest.
I was wrong!
A Blueprint for Success
The steps of the Brushbot activity are very simple to follow. There are a limited number of pieces involved in hooking things together, and the activity does an excellent job of providing easy-to-follow directions (with photos).
In minutes, my son had the circuit complete and was wriggling the cork onto the motor. A few minutes after that, he was able to flip the brushbot on and see it go.
Unfortunately, after a few seconds of scuttling to one side, the brushbot fell over. He set it upright and let it loose again. It fell over. Time after time, the brushbot fell over almost immediately.
Rather than being a stumbling block or a "fail" in terms of the science activity, his brushbot's initial lack of stability was actually a wonderful fulcrum for exploration. He had positioned his cork the way the directions instruct, but he was seeing unexpected behavior from his brushbot.
He hypothesized why he thought it was falling over—and he started testing to see if he could improve and stabilize the movement of the bot.
A Robot in Hand
Contrary to the basic bristlebot and the light-tracking bristlebot, both of which we made last year, the brushbot is chunky. It is hand-sized. Its few and large parts are also easy to tinker with. The positioning and placement of the cork on the motor, for example, offers ample room for experimentation and testing that offers immediate, clear, and visible results for a young robotics engineer. How fast does it move? Does it move in one direction only? Does it stay upright? Does it move in a circle or in a line?
My student tried a number of positions for the cork, noting how the bot's movement changed each time. He also experimented with adding a good bit of extra electrical tape to secure the motor more firmly to the brush. (This did improve the balance and movement of his brushbot.)
Even after the initial "project" was over, throughout the day, he picked the brushbot up again several times, watched it scuttle around on the floor, and tinkered a bit more. He tried more than one cork (they vary in size and thickness), too, to see what difference those variables might make.
Great Introductory Robotics
Because the circuitry is less complicated than other bots we have built, there was less need to worry about the intricacies of the electronics components and the circuit. Instead of making the project too easy, this seems to have invited my student to spend more time tinkering with the brushbot and putting the engineering design process in action.
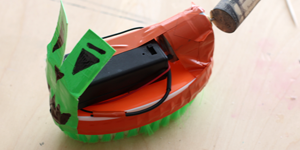
We didn't have googly eyes on hand. But we improvised some pumpkin-shaped eyes and mouth on pieces of duct tape that we attached to the front. (Admittedly, this was more important to me than to him. Your success with decorating your bot will vary based on your student!)
No matter how you decorate it or what color brush you use, the brushbot has potential to have a lot of personality and individual pizzazz, but it also offers a lot of hands on engineering satisfaction for students--and fast gratification.
There is not much that can "go wrong" with a robotics project like this one, which makes it a great entry point project for families and kids just beginning to experiment with robotics and electronics.
Extend the Fun
If your students enjoy making the Brushbot, be sure and check these other posts and projects:
- Building Bristlebots: Basic Toothbrush Robotics
- Dive Into Robotics with Robotics: Discover the Science and Technology of the Future
- Nick and Tesla Explore Robotics
- Family Robotics: Toothbrush Bots that Follow the Light
- Create a Carnival of Robot Critters this Summer
- Project: Racing Bristlebots: On Your Mark. Get Set. Go!
- Project: Art Bot: Build a Wobbly Robot That Creates Art
- Project: Build a Light-Tracking Robot Critter
- Project: Flippy, the Dancing Robot
- Project: Build a Self-Driving Robot that Can Automatically Follow a Line
- Project: Design and 3D-Print Your Own Robot! *
Categories:
You Might Also Enjoy These Related Posts:
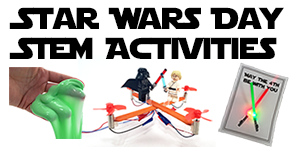
- Star Wars Projects for May the 4th Be With You Science
- Spring Science Projects: 26 Science Experiments for Spring
- 5 STEM Activities with Marshmallow Peeps
- 6 Picks for St. Patrick's Day STEM
- 12 STEM Activities for Lunar New Year - Year of the Dragon Science
- Winter Science Projects, Lessons, and STEM Activities
- Make Some New Year's Noise with Science Projects!
- Holiday STEM Projects to Make and Give