Creative Paper Circuits with Copper Tape
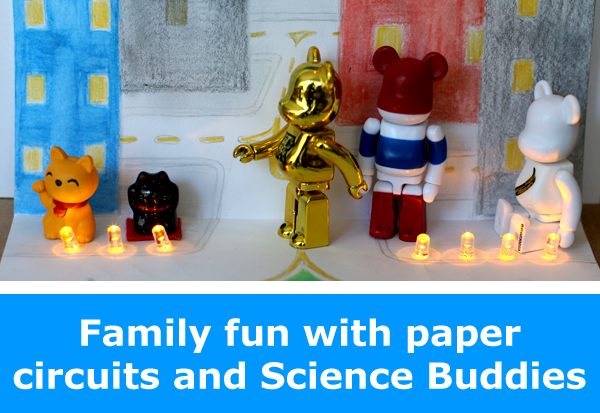
With paper, markers, LEDs, and copper tape, kids can get a hands-on introduction to electronics and circuits and turn their own drawings and creative projects into ones that light up!

The intersection between art and science is one that holds particular interest for me, and I very much appreciate when my kids have the opportunity to do projects that support their creativity as well as let them get hands-on with science, technology, engineering, and math. These combo art and science projects are sometimes referred to as STEAM, and especially for hands-on STEM activities at home, adding in the "art" component can be especially fun.
A new "paper circuits" activity at Science Buddies is a wonderful example of a hands-on learning activity that lets kids blend creativity and basic electronics to create something that is immediately rewarding—it lights up! That you can configure the end project to light up when a button is pressed (completing the circuit) makes the activity even more fun because the student controls the circuit and the effect. It doesn't stay lit up on its own unless you want it to (if you paperclip the circuit closed, for example). Instead, in a very simple paper circuit, the light(s) may go on and off with something that resembles the press of a button when you close the circuit. This puts the student in direct control in ways that are empowering, exciting, and gratifying.
When it works, you know it!
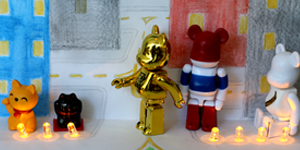
Lighting Up a Paper City
We did several paper circuit activities at home. The whimsical play scene shown above was initially drawn by one student as a simple cityscape with a roadway for a tiny toy car. After the circuitry was in place, my younger student had a surprisingly good time gathering up small figurines from around the house and putting them into the playscape for our photos. (Your collection of LEGO mini figurines would be great in this context!) Ultimately, by pressing the battery in the corner into place, they can effortlessly transform the city scene from day to night. If we had carried the project even further, we could have set up a more sophisticated press button "light it up" mechanism that extended off the edge of the paper.
Our roadway experiment turned out very cool. But not all of our attempts were immediately successful. Even the roadway took some additional tinkering, in the end, to get all the LEDs to light at once.
Paper Circuits Tips for Success
Based on our experience with paper circuits, my best advice is to not get too ambitious or too complicated to start. Especially with younger students or students with little prior experience with circuits, you want your students to really see and understand how the copper tape circuit works. There are two different paths of copper tape, and they do not touch. Why? The paths each lead to one side of the battery. Why? The tape needs to be bent back (or miter folded) if you make a "turn" with your path. Why? It matters which leg of the LED touches which path of the copper tape. Why? What kinds of problems might cause one LED to light up but not all of them?
Start simple. One or two lights is sufficient for an introductory project and will give students an understanding of the process and circuitry as well as lead to a positive experience. Similarly, start with a single, flat (not folded like a greeting card) piece of paper. After a successful start with a relatively simple design, adding complexity in the form of more LEDs, more complicated circuit traces, additional triggers that can be used to connect the circuit, or 3D creations can be a lot of fun for additional challenge and next steps.
My second user tip for working with paper circuits with your kids at home involves putting sufficient pressure on the tape that holds your LED legs in place. If you find that your LEDs don't light up when the circuit is connected unless you specifically press down near the LEDs, you may need to turn your paper over and really firmly press tape in place around each leg to ensure the leads are making good contact. With one of our projects, we had such a difficult time getting all our LEDs to light up at once, despite really pressing the tape tightly in place around each leg, that we ended up adding another layer of electrical tape across the legs on the back of the art to really lock things in place.
Keep in mind, as with all electronics or robotics activities you might try with your kids, you may find that things don't work the first time or right away. Be prepared to ask troubleshooting questions with your kids, to try again, and to keep working together to figure things out. With paper circuits, there are some immediate questions you can ask when something isn't working. Is the conductive side of the copper tape touching at all folds and where it connects to the battery? Are the legs of each LED taped in the right orientation for the positive and negative paths of the circuit? Does the battery work?
Tinkering with the project at hand is often part of the process with family electronics—and part of the learning experience.
Electronics for Creative Kids
In concept, paper circuits fall in line with other introductory electronics projects like working with conductive dough (Squishy Circuits) or working with wearable electronics and sewn circuits. Paper circuits may be an even easier way to get started because in the simplest examples, everything is flat. The "trace" you create using copper tape to lead to the positive and negative terminals of a coin cell battery are easy to understand and typically easy to keep separate. This makes adding a light-up effect to a drawing or greeting card a relatively straightforward process.
To get started with paper circuits, see the new Make a Paper Circuit family science activity from the STEM Activities for Kids area. If your kids get hooked on this concept, and you want to explore other introductory electronics, see the following:
We would love to see what you and your students create!
Categories:
You Might Also Enjoy These Related Posts:
- Star Wars Projects for May the 4th Be With You Science
- Spring Science Projects: 26 Science Experiments for Spring
- 5 STEM Activities with Marshmallow Peeps
- 6 Picks for St. Patrick's Day STEM
- 12 STEM Activities for Lunar New Year - Year of the Dragon Science
- Winter Science Projects, Lessons, and STEM Activities
- Make Some New Year's Noise with Science Projects!
- Holiday STEM Projects to Make and Give