Electronics and Play Dough: Fun, Tactile Family Science
With a new group of electronics Project Ideas and a cool kit from the Science Buddies Store, you can turn ordinary play dough modeling into a great hands-on electronics activity with your kids.
Since the trio of "electric play dough" projects launched at Science Buddies, I have wanted to give these hands-on science projects a try as a weekend science activity with my kids. The idea of rigging up an electronics-friendly batch of dough to some LEDs has undeniable allure. It just sounds cool, and the sample photos in the projects are very compelling.
Whether you love the tactile angle of working with a squishy dough, just like when the kids were little, or like the idea of an easy light-up electronics project, the "squishy circuits" approach invites users of all ages and backgrounds. The premise is simple—by making and using conductive and insulating dough, you can create your own light-up 2D and 3D sculptures. To get there, you follow the step-by-step, progressive, directions, and make some simple dough samples that will help you learn about open and closed circuits, series and parallel circuits, and short circuits.
Halloween Circuits
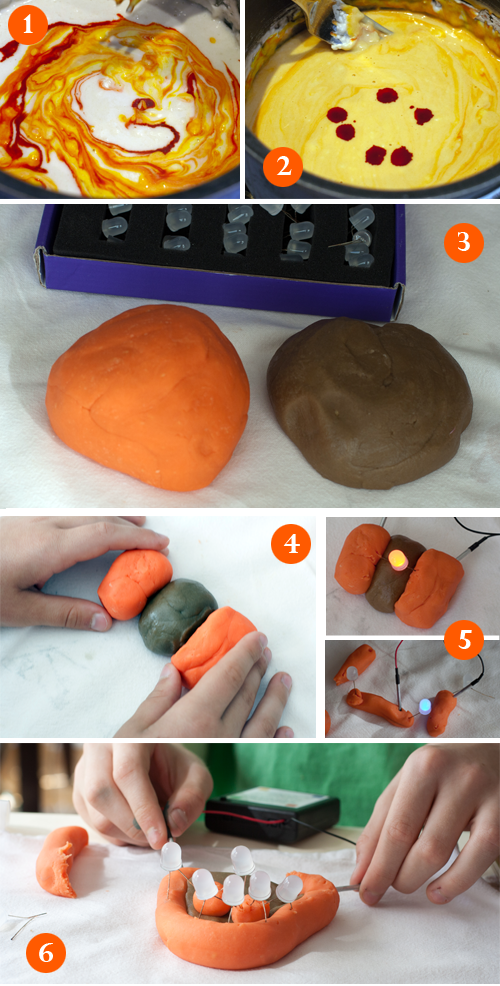
All of the samples for this project seem to be green, but with Halloween coming, we thought we would experiment with some ghost- and pumpkin-themed squishy circuitry. Our orange conductive dough came out nice. Basic color mixing theory with our red and yellow food dye worked as expected. My kids wanted to make our insulating dough black. I did caution that with the food coloring we had on hand, we might get brown, but even I didn't quite expect what we got. As you can see from the photos, our insulating dough came out a really gnarly, nasty, icky brown. Yuck! (Tip: the directions do not talk about adding coloring to the insulating dough. We decided this may be because the insulating dough is much drier in the bowl since you add the distilled water last. The coloring worked and did mix in, but you may find it best to add it after you've added most of the water needed to reach the desired consistency.)
We were not thrilled with our brown dough, but that's what we had, brown and orange. So, with ghosts, goblins, and jack-o'-lanterns in mind, we got started.
Read the Procedure
Especially because we were doing this as an informal activity, I knew the kids would not be following the experimental procedures verbatim. We didn't need to record data. We didn't need to turn anything in. We simply wanted to play around with the dough and LEDs. Before I let them loose with the dough, though, we pulled up the directions and each read through the background information for Electric Play Dough 1 and Electric Play Dough 2.
And then they were off!
They worked through the examples first and had great luck with series and parallel circuits. Then they started making their own sculptures. Both did more elaborate parallel circuit examples and then attempted 3D models.
Not everything worked. We had some misfires, some miswires, and even some dough structures that looked like they should work and never did. But we had a great time, and there was lots of hands-on learning going on—and lots of troubleshooting. Watching them process how to step back (or backtrack) and test at each stage of a circuit to find out where the trouble began when a more complicated design was not conducting electricity the way they expected was wonderful—and important.
It was a hot day, and our dough seemed to get a bit weepy in the warmth, starting to feel (and look) tacky and damp as we continued debugging our final projects. The two kinds of dough also tend to want to stick together, which led to some interesting discussions about what happens if, in fact, you mix them. Having done the "Sliding Light: How to Make a Dimmer Switch" project in the past, one of my kids immediately had a theory about how a mixed dough might perform. (It's an idea to put to the test sometime, especially with some of your used dough!)
Afterthoughts
I have no doubt that the kids now understand the concept of series and parallel circuits in a way that they didn't before starting. Me, too! I wish we had ended up with a great pumpkin to share, but when you do projects as a family, things often take an unexpected path. That's okay!
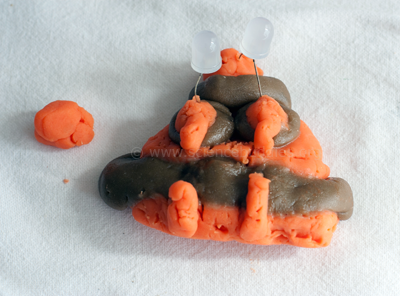
When a 3D project went awry, one of my kids decided to go for a play dough burger instead. It is 3D, though arguably it's really just a larger example of a parallel circuit. (I think it looks like a space thing.) With the disco burger in the works on one side of the table, my other son co-opted most of the remaining dough for his own pumpkin-eque project. While they worked, I played around with some of the scrap dough that was left. (There wasn't much!)
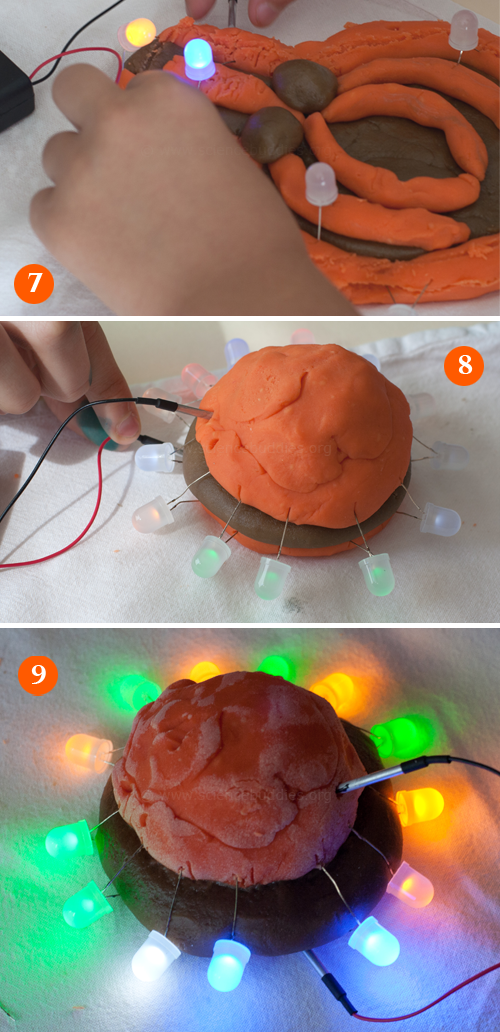
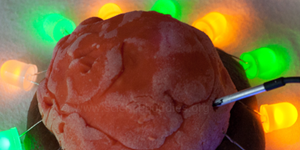
My 3D pumpkin proved to be a great electronics puzzle and gave me lots of time to experiment through trial and error as I tried to combine what we'd been doing into one conceptual example. In the warmth, and with the small amount of dough I had, my pumpkin kept collapsing. The more times I stuck the probes in it trying to troubleshoot and test the circuit, the more it collapsed. Finally, I left it flat. In the end, it's a pretty scary looking something. (The photo of it here shows it after I'd removed a number of LEDs during my testing.) Admittedly, I was the last one sitting at the table—and the one left to clean up.
We plan to experiment with the squishy dough again in the future, working through some of the challenges we ran into and conquering some of the design issues we had—and emerging victorious with something 3D. Maybe this time we'll aim for a slightly less tacky dough, too. I think drier dough would have helped us a lot.
This is definitely an electronics and engineering experiment worth repeating. Once you have a squishy circuits kit, you can reuse the components over and over with new batches of dough.
What will you create?
You and Your Kids Can Do Electronics!
Afraid to tackle an electronics project with your kids? Don't be!
The first two electric play dough projects are written as introductory electronics projects, projects suitable for even the youngest of elementary students. This makes them great for independent science projects, but it also makes them excellent for family science or even classroom science. No matter what your expertise, familiarity, or comfort level with electronics, chances are good that you can read through the background information for each project and come away with a solid understanding of the core concepts.
After that, you and your kids can start experimenting. What should you make? We recommend working through the first examples (e.g., lighting up a single light bulb), so that you see how the circuits work. As you continue to experiment and add more bulbs, you will build upon your knowledge of circuits and see the information about series and parallel circuits play out in the dough in front of you.
To get started, you really just need to be able to roll up three wads of dough—two conductive and one insulating. If you keep the two conductive ones separate, you don't even need the insulating dough to start, just stick the legs of an LED in the two balls and hook up the battery pack. The LED should light up. If it doesn't, check to make sure your long LED leg is on the same side as the red wire and try again. (You will have learned something important by doing that!) Once you've successfully lit up a single LED, try the same process with a couple of LEDs and watch the brightness of the LEDs start to fade in a series. Then roll out two dough snakes and experiment with parallel circuits. You will be learning more and more about circuits with each sample you make!
What next? Your imagination is the limit to what you can do with dough, but you will need to apply what you learned about circuits to make sure your LEDs light up. It can be a trial and error process, but it is lots of fun!
Directions for STEM Projects, Activities, and NGSS-aligned Lesson
Projects:
- Electric Play Dough Project 1: Make Your Play Dough Light Up, Buzz, & Move!
- Electric Play Dough Project 2: Rig Your Creations With Lots of Lights!
- Electric Play Dough Project 3: Light Up Your Sculptures!
Activity:
Lesson Plan:
The kit:
Categories:
You Might Also Enjoy These Related Posts:
- 15 STEM Gifts & Science Kits You'll Feel Good About Giving
- 13 Boat Science and Submarine Science Projects and Experiments
- July 4th STEM! Summer Science Picks for Independence Day!
- 12 Science Kits for Summer Science Experiments and Discovery
- 15 Science Projects to Make and Give for Father's Day
- Ready, Set, Go! (Awesome Summer Science Experiments)
- Awesome Summer Science Experiments
- 10 STEM Activities with Cardboard Tubes