Processed Cheese, Please! Get Your Grilled Cheese Oooey Gooey Instead of Oily and Gloppy
Abstract
A delicious and quick lunch is a cup of tomato soup and a grilled cheese sandwich. Biting into the toasty, butter-soaked bread and gooey cheese is very comforting. But what makes the cheese melt so nicely? Do all cheeses melt this way? In this cooking and food science fair project, you will experiment with making and determining the best recipe for processed cheese.Summary
Michelle Maranowski, PhD, Science Buddies
Objective
To use different recipes to make processed cheese, and to determine which recipe results in the best-melting and best-looking cheese.
Introduction
Cheese making is one of the most ancient forms of manmade foods. There is evidence that humans in Egypt and Europe were making cheese in 3000 BC! For ancient man, cheese was a way to preserve and store milk. Milk spoils if it's left out too long, but some cheeses, like Mimolette, can keep for more than a year! Since cows and sheep usually give milk in the spring and summer months, cheese was a way for ancient humans to eat dairy in the winter months.
Cheese making is thought to have originated in the Middle East by Arab nomads. Legend has it that an Arab nomad stored some milk in a container made from the stomach of an animal. As he traveled, the galloping of the horse, the hot sun, and the rennet from the stomach served to separate the milk into curds and whey. Imagine the nomad's surprise when he discovered his milk had changed to nutritious curds and refreshing whey!
In 1903, James Kraft moved from Canada to Chicago and started selling cheese. To reduce waste, due to the cheese spoiling, he tried packaging cheese in jars, and then began experimenting with canning cheese. His goal was to provide a pasteurized and emulsified cheese that could be stored for long periods of time, without losing quality. Pasteurization is a process that slows the growth of microbes (disease-causing germs) in food. It does not completely eliminate them, but it reduces the amount to a level that will not cause people to get sick. An emulsion is a mixture of two liquids that usually don't blend together, like oil and water. He experimented by shredding cheese, repasteurizing it, and mixing in a chemical called sodium phosphate (which you'll read more about in just a minute). Eventually, he created a cheese that was stable, mild, and melted well. He patented his creation in 1916 and a household name and brand, Kraft, was born. Kraft also developed a method for slicing the processed cheese and for wrapping individual slices, which, as you might know, is still a packaging method used today.
Making processed cheese requires the use of emulsifying salts, which have two functions. The first is to remove and bind the calcium from the casein, one of the main proteins in milk. The second function is to control the pH of the cheese. If the pH is not within the correct range, the cheese can be too acidic or too basic and won't taste good. Once the calcium is all bound together and separated from the casein, the casein can move to the oil (a type of fat) and water emulsion's border and stabilize the fat so that the fat does not clump together. Thus, when the casein is separated from calcium, it acts as an emulsifier. Emulsions are normally unstable, meaning the components will separate, so the role of an emulsifier is to stabilize the emulsion, allowing the components to combine.
In this cooking and food science fair project, you will use an emulsifying salt, sodium phosphate dibasic, to make a processed cheese out of pure cheddar cheese. You will add different amounts of the emulsifying salt to grated cheddar cheese and determine which recipe makes the best-melting and best-looking cheese.
Terms and Concepts
- Rennet
- Curd
- Whey
- Pasteurization
- Microbe
- Emulsion
- Sodium phosphate
- Emulsifying salt
- Casein
- pH
- Emulsifier
Questions
- What is the difference between an emulsifying salt and an emulsifier?
- What is the purpose of using an emulsifying salt in making processed cheese?
- What is the difference between American processed cheese and Cheez Whiz?
Bibliography
- Wikipedia Contributors. (2009, March 28). Processed Cheese. Wikipedia: The Free Encyclopedia. Retrieved April 7, 2009.
The following site discusses the history of James Kraft and processed cheese:
- Kraft. (n.d.). Our Heritage. Retrieved January 23, 2015.
The following site deals with the regulations established by the U.S. Food and Drug Administration regarding pasteurized processed cheese:
- U.S. Food and Drug Administration, Department of Health and Human Services. (1999). 133.169 Pasteurized Process Cheese. Retrieved April 7, 2009.
Materials and Equipment
- Medium cheddar cheese, 1.2 kilograms (kg)
- Food processor with a shredder attachment, or a box grater
- Large bowl
- Knife
- Cutting board
- Digital kitchen or pocket scale. A digital pocket scale is available online from Carolina Biological Supply Company, item #702357.
- Plastic baggies, 1-quart (qt.) size (24)
- Double boiler. You can make your own double boiler with a metal bowl and a medium-size pot. The metal bowl must sit in the pot without touching the bottom. There shouldn't be any gaps between the bowl and the rim of the pot.
- Glass stirring rod. This item is available online from Carolina Biological Supply Company, item #711307.
- Stopwatch
- Oven mitt
- Coffee cups, paper (12)
- Permanent marker
- Paper
- Sodium phosphate dibasic (Na2HPO4) anhydrous, reagent, powder (you will only need 19.5 g). This item is available as a 500 g bottle at Carolina Biological Supply Company, item #891442.
- Spoon, plastic
- Safety goggles. This item is available online from Carolina Biological Supply Company.
- Gloves, disposable (9 pairs). Can be purchased at a local drug store or pharmacy, or through an online supplier like Carolina Biological Supply Company. If you are allergic to latex, use vinyl or polyethylene gloves.
- Thermometer. This item is available online from Carolina Biological Supply Company, item #745396.
- Apple corer (not a slicer); available at your local home goods store
- Ruler, metric
- Rimmed baking sheet
- Oven
- Hot pad
- Lab notebook
Disclaimer: Science Buddies participates in affiliate programs with Home Science Tools, Amazon.com, Carolina Biological, and Jameco Electronics. Proceeds from the affiliate programs help support Science Buddies, a 501(c)(3) public charity, and keep our resources free for everyone. Our top priority is student learning. If you have any comments (positive or negative) related to purchases you've made for science projects from recommendations on our site, please let us know. Write to us at scibuddy@sciencebuddies.org.
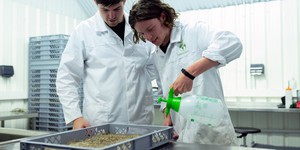
Experimental Procedure
Caution: Since the sodium phosphate dibasic is not a food-grade substance, do not eat any of the resulting processed cheeses.
Preparing the Cheese
- To start this science fair project, wash and dry your hands. Remove the cheddar cheese from its packaging. Set up the food processor with the shredder attachment, or place the box grater in a large bowl.
- Use the knife and cutting board and cut the cheddar cheese into large pieces.
- Turn on the food processor and feed the pieces of cheese into the food processor. Shred all of the cheese. If the food processor bowl gets full, transfer the shredded cheese into the large bowl and continue shredding. If you are using a box grater then just grate the cheese pieces into the bowl.
- Use the digital scale and weigh out 100 g of shredded cheese. Place the 100 g of cheese into a plastic baggie. Repeat this 11 more times until you have 12 baggies, each filled with 100 g of shredded cheese. Place the baggies in the refrigerator until you are ready to use the cheese.
- Read the instructions that come with the double boiler. If you are using the pot and metal bowl as a substitute, then fill the pot with 1–2 inches of water and set the bowl on top of the pot. The bowl should not touch the water. This setup allows you to use an indirect source of heat to slowly and carefully melt the cheese. Steam from the boiling water will melt the cheese, rather than placing cheese in a pot directly over a flame.
- Take one baggie of cheese from the refrigerator and place the cheese in the metal bowl. Turn on the stovetop and allow the water in the pot to come to a simmer/boil. Make sure that the boiling water doesn't touch the bottom of the metal bowl.
- Use the glass rod to stir the cheese. Stir the cheese and maintain the water in the pot at a simmer/boil until the cheese melts and is at 150°F. Use the thermometer to confirm the temperature of the cheese. Keep the cheese at 150°F for 30 seconds. Observe how the melted cheese looks. Record all of your observations in a data table, like the one shown below.
| Percent of Sodium Phosphate Dibasic | Trial | Observations During Stovetop Melting | Observations at Coring | Observations During Oven Melting |
| 0% | 1 | |||
| 2 | ||||
| 3 | ||||
| 0.5% | 1 | |||
| 2 | ||||
| 3 | ||||
| 2% | 1 | |||
| 2 | ||||
| 3 | ||||
| 4% | 1 | |||
| 2 | ||||
| 3 |
- Once the cheese has completely melted, use the oven mitt and carefully pour the cheese from the hot bowl into a paper cup. Have an adult nearby to help. Use the permanent marker to mark the side of the cup with the trial number and the percentage of sodium phosphate (0% for this trial). Let the cheese cool down and then store it in the refrigerator.
- Clean and dry all of your equipment.
- Place a piece of paper on the digital scale and put on safety gloves and safety goggles. Use the plastic spoon and weigh out 1/2 g of sodium phosphate dibasic.
- Refill the pot with 1–2 inches of water. Replace the bowl on top of the pot. Take another baggie of cheese from the refrigerator and place the cheese in the metal bowl. Sprinkle the 1/2 g of sodium phosphate dibasic over the cheese and use the glass rod to stir it into the cheese. Turn on the stovetop and bring the water to a simmer/boil. Melt the cheese and bring it to 150°F. Keep it at 150°F for 30 seconds. Make sure that you stir the mixture completely so that the sodium phosphate dibasic gets incorporated. Record any observations that you make about the melting in your lab notebook.
- Once the cheese is completely melted, use the oven mitt to handle the hot bowl and carefully pour the cheese into a paper cup. Mark the paper cup with the trial number and the percentage of sodium phosphate dibasic added, by weight. Let the cheese cool down and then store it in the refrigerator.
- Clean and dry all of your equipment.
- Repeat steps 10–13 using 2 g of sodium phosphate dibasic.
- Repeat steps 10–13 using 4 g of sodium phosphate dibasic.
- Repeat steps 6–15 two more times with clean equipment. This ensures that your results are accurate and repeatable. Record all of your observations in your lab notebook.
- Once all of the samples have cooled in the refrigerator, use the apple corer to take a core from each cup. Store each core in a new plastic baggie, and use the marker to record the trial number and percentage of sodium phosphate dibasic used, on the baggie. What is the appearance and texture of each core? How hard are the cores? Record your observations in your lab notebook. Put the baggies back into the refrigerator until you are ready to use them for the next section.
Remelting the Cheese
- Preheat the oven to 350°F.
- Retrieve the four samples from Trial 1 from the refrigerator. Set out the four core samples on the cutting board. Make sure that you know which sample corresponds to which experimental condition. Using the knife and ruler, carefully trim each core so that they have similar dimensions. The cores should be about 2.5 centimeters (cm) in length.
- Now place each of the cores on the rimmed baking sheet. Stand each core on end. The cores should be about 3 cm away from each other; don't bunch them together.
- Place the baking sheet in the preheated oven.
- Start the stopwatch. Stop the stopwatch after 1 minute, open the oven door, and observe the cores. Have any of the cores started to melt? Have any melted completely yet? What does the melted cheese look like? Try to make your observations as quickly as possible. Close the oven door as soon as you are through making your observations, because you don't want the temperature of the oven to dip too much below 350°F. Record your observations in your lab notebook.
- Repeat step 5 at least six times, making observations every minute, until all of the cores have completely melted. Record in your lab notebook, in a data table like the one shown below, the time when each core starts melt and the time at which the each core has completely melted.Which core took the least time to melt? Which core took the longest time to melt?
| Percent of Sodium Phosphate Dibasic | Trial | Time When Core Started to Melt | Time When Core Completely Melted | Average Time Cores Started to Melt | Average Time When Cores Completed Melted |
| 0% | 1 | ||||
| 2 | |||||
| 3 | |||||
| 0.5% | 1 | ||||
| 2 | |||||
| 3 | |||||
| 2% | 1 | ||||
| 2 | |||||
| 3 | |||||
| 4% | 1 | ||||
| 2 | |||||
| 3 |
- After the samples have melted, remove the baking sheet from the oven onto a hot pad, and using your oven mitt and a spoon or knife, carefully scrape off the melted cheese. Clean and dry the baking sheet.
- Repeat steps 2–7 for the samples from trial 2 and from trial 3 to ensure that your results are accurate and repeatable. Remember to record all of your observations in your lab notebook. Once you collect all of the data, average the time it took for the cores to start melting and the time it took for the cores to completely melt.
- Compare your observations across the different amounts of sodium phosphate dibasic. Does adding this emulsifying salt have an effect on the texture and melting of the cheese to which it was added? What is the legal limit of the addition of emulsifying salts to cheese, as determined by the U.S. Food and Drug Administration? Hint: examine one of the references in the Bibliography.
- Plot the average data on a graph. You can make your plots by hand or, if you would like to do your graphs online, try the Create a Graph website. Label the x-axis Percent Sodium Phosphate Dibasic and the y-axis Average Time for Cores to Start Melting. Make a second graph with the same x-axis, but label the y-axis Average Time for Cores to Completely Melt. Do you see a trend?
Ask an Expert
Global Connections
The United Nations Sustainable Development Goals (UNSDGs) are a blueprint to achieve a better and more sustainable future for all.

Variations
- How does the pH vary with the percentage of sodium phosphate dibasic? Measure the pH when the cheese is melted. You can buy pH paper from Carolina Biological Supply Company.
- Try adding the emulsifying salt to different-aged cheddar cheeses. Do you get similar results when using a sharp cheddar cheese or a mild cheddar cheese?
- Try adding the emulsifying salt to different varieties of cheeses to make different varieties of processed cheese.
- In one of the steps in this science fair project, you are asked to determine if there is a dependence of hardness on the amount of emulsifying salts. You can quantify the hardness of the cheese cores by using a cheese cutter, a paper cup, and coins, as detailed in the following Science Buddies science fair project: Tough Beans: Which Cooking Liquids Slow Softening the Most. You can use the same method, or modify to suit this purpose.
Careers
If you like this project, you might enjoy exploring these related careers: