Abstract
Plants move—not very quickly compared to animals, but they do move. Their roots grow downward in response to gravity, and their stems grow upward toward the Sun. In this plant biology science fair project, you will investigate how young plants respond through movement to light.Summary
David Whyte, PhD, Science Buddies

Objective
The objective of this plant biology science fair project is to determine how the amount of light affects a plant's phototropic response.Introduction
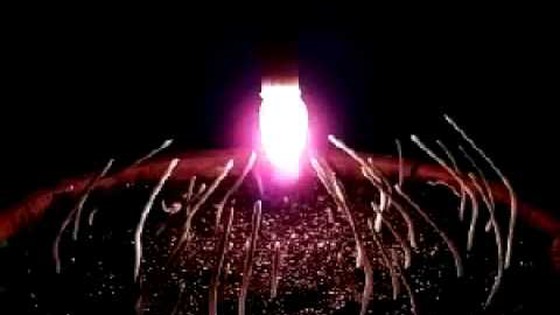
Did you know that plants can move? They do it all the time, but so slowly that we often don't notice it. Plants respond to a number of different cues in their environment with movement. These movements are called tropisms. Some examples of tropisms include gravitropism (response to gravity), hydrotropism (response to water), thigmotropism (response to touch), and phototropism (response to light). These tropisms are vital to plants' survival. Roots respond to the direction of gravity by growing downward, an example of gravitropism. Roots also grow toward a water source, displaying hydrotropism. The wrapping of a vine's tendrils around a solid support is an example of thigmotropism. You can see lots of examples of phototropism in the plants around you—branches in trees grow toward openings that have the most light, and the stems of young plants bend toward a source of light. Watch this time-lapse video to see corn seedlings display phototropism.
When a seed germinates, the roots grow downward, and the stem grows upward. If you expose the growing stems to light from one direction, they start to grow in that direction. In 1809, Swiss botanist Augustin Pyrame de Candolle studied the growth of plants toward a light source and stated that it was caused by an unequal growth on only one part of the plant. Later, in 1880, Charles Darwin (the father of the theory of evolution), discovered that it was actually the tips of the sprouting seedlings that were influenced by the direction of the light source. He discovered that when he covered the tips of growing seedlings, they no longer responded to the light. When he covered the part of the stem below the tip, but not the tip itself, the stems responded normally to light. Examine Figure 1, below.
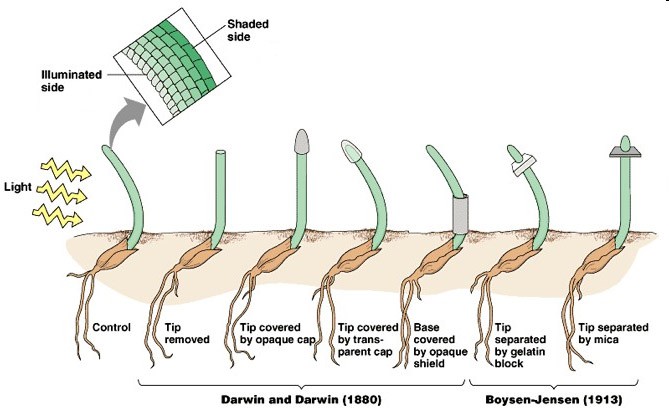
Figure 1. This diagram depicts early experiments with phototropism. Darwin showed that the phototropic response was lost when the tip of the emerging plant was cut off or covered with an opaque cap. Covering the base of the stem did not block phototropic bending. Dutch plant physiologist Boysen-Jensen showed in 1913 that placing a block of gelatin between the tip and the base did not block the response, showing that something was able to diffuse from the tip, through the gel, and into the base. When the tip was separated from the base with a piece of mica, which blocks anything from flowing through, the response is blocked. Note that there is more auxin growth hormone on the shaded side (green color in the small picture insert). (Wikispaces, 2008.)
The Dutch botanist Frits W. Went established a connection between phototropism and a plant hormone, called auxin, in the 1920s. He discovered that plants make a chemical in their tips that stimulates growth. Usually this growth hormone spreads evenly around the stem, so the stem grows upward. But if light hits the plant from one direction, the growth hormone is distributed unevenly. In fact, more auxin flows down the "shady" side, causing it to grow faster than the "sunny" side of the plant. This unequal concentration of auxin results in differential growth and the curving of the plant toward the light source.
In summary, the stem bends toward the light because the side of the stem that is away from the light grows faster than the side of the stem facing the light. This uneven growth pushes the tip toward the light source. The growth of new plant cells is stimulated by the plant chemical auxin. The growing stem responds to light from a certain direction by decreasing the amount of auxin on the side of the stem facing the light, relative to the opposite "shady" side. In this plant biology science fair project, you will study how the amount of light affects the degree of bending in young plant stems.
Terms and Concepts
- Tropism
- Gravitropism
- Hydrotropism
- Thigmotropism
- Phototropism
- Germination
- Auxin
- Plant cell
Questions
- What did Charles Darwin contribute to our understanding of phototropism?
- Based on your research, what is heliotropism and how is it different from phototropism?
- Based on your research, what effects does auxin have on plant tissue?
- What is the chemical name for auxin?
- Why don't gardeners use natural auxin?
Bibliography
- Koning, Ross E. (1994). Auxins. Retrieved March 31, 2009.
- Kimball, J. (2009, March 30). The Mechanism of Phototropism. Retrieved April 2, 2009.
- Hangarter, R. (n.d.). Worshiping the Light. Plants-In-Motion. Retrieved February 28, 2012.
Materials and Equipment
- Small milk cartons, 1-pint (5, or 15 if you are running all three trials at once); should be thoroughly cleaned and dried before use
- You could also use a different kind of box or container if you prefer. The purpose of the container is to block surrounding light from the plant, except for where you place several small holes.
- Permanent marker
- Seeds, radish or lima bean (1 package)
- Potting soil (1 bag)
- Optional: Grow lamp
- Tape, clear
- Aluminum foil
- Hole punch
- Protractor
- Eye dropper
- Top of a shoebox, or a similar item to serve as a tray for the plants (3 if you are running all the trials at once)
- Optional: Lamp
- Lab notebook
- Ruler, metric
- Graph paper
Experimental Procedure
Important Notes Before You Begin
- Because of the natural variability in plant growth, you may need to adjust this procedure in order to get good results. For example, you may need to expose the plants to light for more or less time than is recommended in the procedure. Adjust the procedure to find the conditions that work best for you.
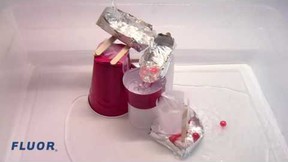
- The objective of this science fair project is to expose the plants to different amounts of light, with the light coming from the side, so that the plants will bend toward it. To begin, you'll label the milk cartons 1–5, add soil to them, and then plant four seeds in each carton. Note: The plants need to grow for a period of time before being exposed to light. This way, the stems will be growing vertically when they are exposed to light from one side.
- Ultimately, you will need three trials of this project to make sure your results are consistent. You can either run them one at a time, or run them concurrently.
Preparing the Cartons
- Using the permanent marker, label the sides of the milk cartons with the numbers 1–5.
- For carton # 1, cut off the top of the carton with the scissors.
- The plants in this carton will grow in normal lighting.
- For carton # 2, do not make any holes.
- The plants in this carton should germinate and start to grow, but will be kept in total darkness.
- For the following cartons, use the hole punch to make holes in one side of each carton, about 6 cm from the bottom. You will need to open the top of the milk carton to make the holes.
- Carton #3: One hole
- Carton #4: Two holes; should be near each other, but not overlapping
- Carton #5: Four holes; should be near each other, in a cluster
- Be sure to write in your lab notebook the number of holes in each carton, and what each carton's conditions will be once the experiment begins (lighting).
- Now make some additional holes to allow air into the cartons and excess water to drain out. Punch 10 holes in the bottom of each carton using a pen. Each hole should be about 5 mm in diameter.
Planting the Seeds
- Put about 3 centimeters (cm) of moist potting soil into each carton. Keep the amount of soil equal in each carton.
- Moisten the potting soil with water. It should just be moist, not saturated.
- Put four seeds in each carton. Bury the seeds to a depth of about 1 cm, or follow the directions on the seed package for the recommended depth. Plant all of the seeds at the same depth.
- Use the permanent marker to put a letter on the side of the carton near each seed so that you can identify them as they grow. For example, label them A, B, C and D, with markings inside the carton.
- Close cartons 2–5 and seal them with clear tape.
- Wrap the tops and sides of cartons 2–5 in aluminum foil to block light from reaching the plants. Don't cover the holes in the bottom.
- Write the number of the carton onto the aluminum foil with the permanent marker.
- Record the time and date that the seeds were planted in your lab notebook.
Making Your Observations
- Check carton #1 each day. Wait until the seeds in carton #1 have germinated and grown about 3 cm. Then begin the exposure to light for the plants in cartons 3–5 (remember, carton #2 stays sealed). Note: Start the exposure to light in the morning so that the plants have a full day of light on the first day.
- Using the scissors, remove the foil only from over the hole in carton #3. Leave the rest of the foil in place to keep the plant in darkness, except for the light from the one hole.
- Remove the foil only from over the holes in cartons #4 and #5. Leave the rest of the foil in place to keep the plant in darkness, except for the light from the holes.
- Record the time and date that the plants were exposed to light in your lab notebook.
- Use the clear tape to hold the aluminum foil in place around the holes, if desired.
- Place the cartons in a well-lit room, but out of direct sunlight. Record the time and date in your lab notebook
- As an option, you can use a grow lamp as a light source.
- Expose the plants to light during the day. Keep them in darkness at night.
- Record how long the plants receive light from the holes in the carton.
- The next morning (day 1), take the all of the cartons to a dimly lit room, open the cartons, and observe the plants.
- Use the protractor to measure the angle of the stems. If the protractor is too big to fit into the cartons, use a twist tie to obtain the angle for the stem. Position a twist tie parallel to the base of the stem to be measured. Bend the twist tie to match the angle of the bend in the stem. Use the protractor to record the angle of the twist tie.
- Record your observations of the plants from all five cartons in your lab notebook.
- As an option, check the plants more often than once per day in the morning. Keep the light exposure to a minimum while taking measurements.
- Do not let the soil dry out. If needed, add some water (equal amounts) to each plant, using an eye dropper.
- Return the cartons to their original states (covered or uncovered), place them in the light again, and allow them to grow for another day.
- The next morning (day 2), again take the cartons to a dimly lit room, open the cartons and observe the plants. Repeat steps 6–7. Note: Remember to treat all of the plants exactly the same. The only difference between the plants in the different cartons should be the amount of light to which they are exposed.
- Repeat steps 6–7 until you feel you have enough data. Five days worth of data will probably be sufficient, but use your judgment about when to stop the experiment.
- For each day you collected data on the angles of the plants, graph the angle of the stems vs. the amount of light (the number of holes) to which the plants were exposed.
- You can graph the data for each plant individually, or graph the average of the angles within a carton.
- Repeat the entire procedure at least two more times so that you have a minimum of three trials. The different trials can run concurrently. Graph the data for each trial separately.
- Note: The goal is to determine how exposure to different amounts of light affects the growth of the plants. You may need to experiment with the amount of light (the number of holes), the duration of exposure, the height of the holes, or other factors to get a clear result.
Ask an Expert
Global Connections
The United Nations Sustainable Development Goals (UNSDGs) are a blueprint to achieve a better and more sustainable future for all.

Variations
- Keep the number of holes the same and vary the time of light exposure. For example, use a carton with four holes and expose the plant to light for 1/2, 1, 2, 4, and 8 hours per day for three days. What is the minimum amount of time required to observe initial growth toward the light?
- The holes in the carton let in both light and air. It is theoretically possible the air from the holes is affecting the growth of the plants. Alter the procedure to block air (but not light) from entering through the holes.
- Devise a way to determine if the color of the light affects the phototropic effect.
- Try different kinds of lamps. For example, a grow lamp, a fluorescent lamp, and an incandescent lamp.
- Which is more effective for producing the phototropic response: a bright light with a short exposure, or a dim light with a long exposure? For example, try comparing eight holes for 1 hour, and one hole for 8 hours.
- Cut off the tips of the growing stems before you expose them to light. What is the minimum size you need to cut off to block the phototropic response?
- Use a light meter, such as the Light Meter LX1010B,50,000 Lux Luxmeter with lcd display, available at Amazon.com, to measure the amount of light to which the plant is exposed. Graph the stem angle vs. lux.
- Add growth hormone to the cut surfaces of three stems that have had their tops cut off. Place a small piece of gelatin that contains growth hormone (available from a plant nursery) on top of the stem. What if the piece of gelatin with the hormone is placed on an edge of the cut?
- What happens if you put one hole on one side of the carton, and two holes on the opposite side? Or two holes each on opposite sides? Keep the surrounding light uniform.
Careers
If you like this project, you might enjoy exploring these related careers:
Related Links
- Science Fair Project Guide
- Other Ideas Like This
- Plant Biology Project Ideas
- My Favorites
- Measuring Plant Growth