Summary

Introduction
Don't you hate it when you have an itch you can't reach right in the middle of your back? Engineer a solution to the problem and build your own back scratcher in this fun activity!
Materials
- Pencil and paper
- Straws
- Popsicle sticks
- Cardboard
- Duct tape
- Glue
- Scissors
- Volunteers to try your back scratcher
Instructions
- Before you start building, sketch a few design ideas for a back scratcher on paper. This is an important part of the engineering design process—it might be tempting to start building right away, but you should have a plan first!
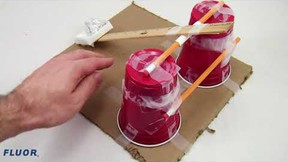
- If you need some help getting started, think about it like this. In general, your back scratcher should probably have three parts: the handle or grip (the part that you hold onto), an extension (the part that makes it longer), and the scratching part (the part that actually touches your back). The picture shows a few different options.
- Label the materials you would use to build each design. Think about the properties of each material. For example, what properties does a good handle need? What properties should the scratching material have?
- Compare your designs and think about which one will work the best. Choose a single design to build.
- Build a prototype of your design. As you build, you might discover that your design doesn't work as planned. For example, your handle might not be stiff enough. That's OK! You can always iterate and go back to make changes to your design.
- Try your back scratcher yourself. Does it work like you expected? What changes could you make to improve it?
- Based on your initial testing, see if you can make any changes to improve your back scratcher. Remember that it's OK if your design doesn't perfectly match your initial design that you drew on paper!
- Let a few volunteers test your revised back scratcher. Do they have any feedback? What other changes or improvements could you make?
Image Credit: Svenja Lohner, Science Buddies / Science Buddies
What Happened?
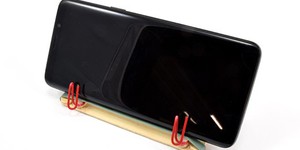
You probably found that long, lightweight, and stiff materials—like straws or popsicle sticks—worked well for the handle of your back scratcher. However, you have to be careful about the joints between these materials. For example, if you tape two popsicle sticks together to make them longer, the joint might be more flexible than if you glued them together. If you make the handle too long or give it too many weak joints, then it won't be stiff enough to work well as a back scratcher.
For the scratching part, you probably found that a material that is firm, and pointy but not too sharp, worked best. For example, cotton balls are far too soft, and won't really work to scratch an itch. At the other end of the spectrum, nails and screws are far too pointy—they'll cut you or your clothes! Something in the middle, like a paper clip or wooden skewer, probably worked well.
Most importantly, you probably found that you had to make some changes to your original design. Real engineers rarely get things perfect on the first try, which is why it's important to build prototypes and test new products. The process of designing, building, and testing new things is called the engineering design process. Repeating parts of the process to get a better result is called iteration.
Digging Deeper
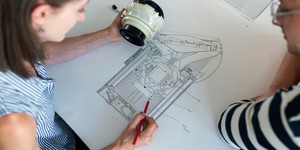
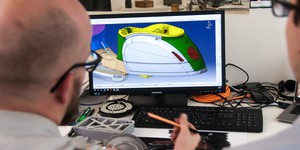
You might think that engineers only design machines with electronics or moving parts, like cars or airplanes. However, engineers are also involved in the design of many everyday consumer products that might seem very simple at first. They take into consideration things like material properties, how something can be manufactured, and even aesthetics—most people don't want to buy something that's ugly!
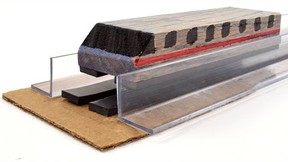
A back scratcher is a good example. It is a relatively simple object with no moving parts. However, a good back scratcher must meet several requirements. For example, it needs to be long enough that you can easily reach the center of your back. It should probably be lightweight so it isn't too hard to lift. However, it also needs to be stiff—if it's too flexible, then you won't be able to exert enough force to scratch that itch. But long, skinny objects are generally very flexible. This creates an engineering challenge! How can you design a handle that's stiff and lightweight, but also long enough? Hopefully you were able to solve that problem in this activity.
 Image Credit: Science Buddies