Summary
Introduction
Have you ever wished your drawings would come alive and the stick figures or objects on your paper could move around? What sounds impossible actually is not! In this activity, you will make your drawing move around by letting it float on water. What makes this possible is the interesting chemistry of dry erase markers. These markers are usually used to write on white boards or glass surfaces and can easily be erased to make space for more writing or drawing. It turns out that they are also perfect for doing science, so let's get ready to start the experiment!
Materials
- Two shallow trays or plates with a smooth surface
- Dry erase markers (different colors)
- Permanent marker
- Cup
- Water
- Rubbing alcohol
- Paper towel
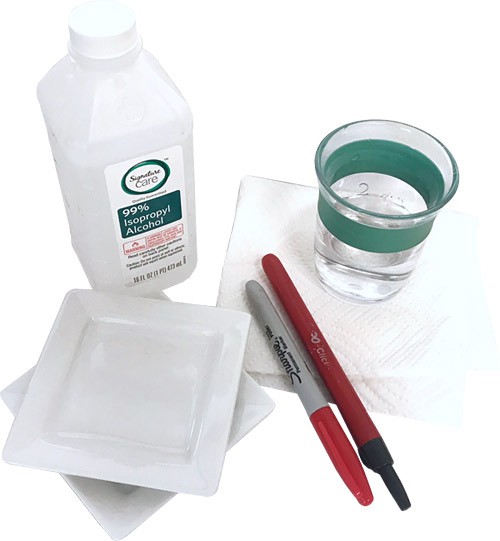 Image Credit: Svenja Lohner, Science Buddies / Science Buddies
Prep Work
- Find a work area that can tolerate water spills.
- Fill your cup with room temperature water and set it next to your trays or plates.
Instructions
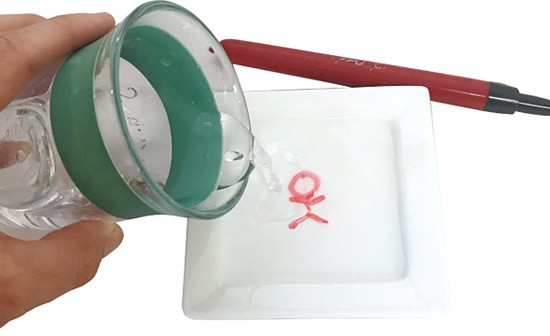
- Choose one color of your dry erase markers and make a drawing on your first plate such as a stick figure, a heart, or text.
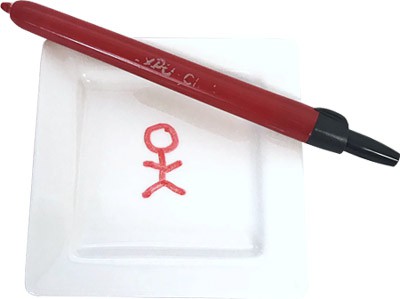 Image Credit: Svenja Lohner, Science Buddies / Science Buddies
- Let it dry for a couple of seconds and then use a dry finger to wipe across your drawing.
 Are you able to wipe the drawing off?
 - If the drawing came off, make a new drawing. Otherwise, keep the old one. Then pour just enough water onto your plate to cover the drawing. Wait and observe. If nothing happens, shake the plate a little bit.
What happens to the drawing?
Image Credit: Svenja Lohner, Science Buddies / Science Buddies
- Next, use a permanent marker and make a drawing on the second plate.
- Again, let it dry for a couple of seconds and use a dry finger to wipe across your drawing.
Does your drawing disappear once you wipe it with your finger? Why or why not?
- If the drawing came off, make a new drawing. Otherwise, keep the old one. Then pour some water on your plate to cover the drawing. Wait and observe.
What happens to the drawing this time? How are your results different from the previous ones? Can you explain your observations?
Cleanup
What Happened?
Did you get your drawings to float? You should have—but only when using the dry erase marker. When you make your drawing on the surface of a smooth plate or tray, the solvent, or alcohol, that dissolves the ink ingredients will evaporate. This leaves the color pigment and polymer behind on the surface. With both the permanent and dry erase marker, it actually looks like the color is sticking. However, when you wipe across your drawing with your finger, only the drawing that you made with the dry erase marker will disappear. This is because the acrylic polymer resin in the permanent marker makes it stick to the surface, while the oily silicone polymer in the dry erase marker prevents it from sticking.
The fun starts when you pour water on your drawing. You should have observed that your dry erase marker drawing magically detached from the plate and rose to the water's surface. There it was floating and moving as if it were alive! The permanent marker drawing should have remained stuck to the plate. Again, this difference is due to the special polymer in the dry erase marker ink. As this ingredient prevents the ink from attaching to the plate, the water can slip underneath, and as the ink is lighter than water, it can float. However, when you pour rubbing alcohol on your drawings, you should have seen them both slowly dissolve. This is because alcohol is used as the solvent in both markers. Finally, you might have found that dry erase marker ink is not erasable on all surfaces. Porous surfaces are able to soak up ink and even the special "release agent" will not help get them out of your clothes again!
Digging Deeper
For hundreds of years, people have used blackboards and chalk for teaching. Teachers used sticks of chalk made of calcium carbonate or calcium sulfate to present their drawings or to write text for their students on a smooth and dark-colored slate of stone. If you still have these in your school, you probably know that chalk can be really messy and creates a lot of dust. This is why since the mid-1990s, the white board has become more and more popular. Cheaper versions of a white board are usually laminated chipboard or melamine, which is a special type of plastic. More expensive white boards, on the other hand, are either made of enamel (porcelain-coated steel) or glass. To draw on these surfaces repeatedly, another invention had to be made: the white board pen or dry erase marker. These markers are made for non-permanent writing or drawing, which means that they can easily be erased from the white board without leaving any marks.
This is possible because dry erase markers contain special chemicals as ingredients. These ingredients include a solvent, which is usually some kind of alcohol. This is used to dissolve the color pigments that determine the color of the marker. In addition, a resin or polymer is added, which is the key to making the ink erasable. In a dry erase marker, the resin is an oily silicone polymer, which acts as a "release agent." It makes the ink of the marker very slippery and prevents it from sticking to the surface of the white board. This is why on a very smooth non-porous surface, the ink can easily be wiped off.
You might know that dry erase markers can stain other surfaces permanently, such as clothes. This is because fabrics don't have a smooth surface, so the ink can get soaked into its pores—staining them forever! In real permanent markers, the resin used is an acrylic polymer that functions as a "binding agent" and makes the ink stick to the surface. It is only the type of polymer used that differentiates a permanent marker from an erasable marker.
Ask an Expert
For Further Exploration
- Make drawings with different colors of dry erase marker. Do all of them behave the same way, or are they different? Which color floats best?
- What happens if you pour rubbing alcohol on top of your drawing instead of water? Does your drawing still float? Are the results the same for a dry erase marker and a permanent marker? Why or why not?
- Dry erase markers work best on smooth, non-porous surfaces. Can you still erase your drawings on other surfaces? Try to write on other surfaces, but make sure to get permission before you do!
- Can you erase your floating drawing? Try to pick up your drawing from the water's surface with your fingers. What happens to it when you pull it out of the water? What do you think the material that you now have in your hand is made of?