The Science of Frescoes
Summary
Introduction
Have you ever looked at pictures of murals on buildings from hundreds of years ago and wondered how they were created? Fresco is a type of painting that has been used for thousands of years and involves painting on wet lime plaster. This activity explores one aspect of the science behind this unusual technique. See how science can help you become a more versatile artist!
Materials
- Pie pan
- Cornstarch
- Water
- Measuring cup
- Liquid food coloring or watercolor paint. One color is enough to do the activity, but several colors will yield a more colorful painting.
- Small bowl to mix food coloring or paint with water, one for each color you use.
- Paint brush(es)
- A sheet of watercolor or construction paper, preferably a light color.
- Cloth or paper towels
- Optional: Sponge
- Optional: Fork
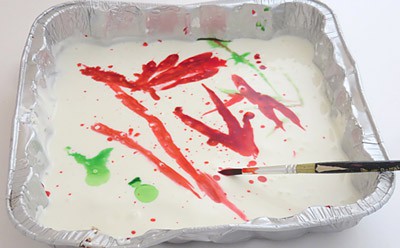
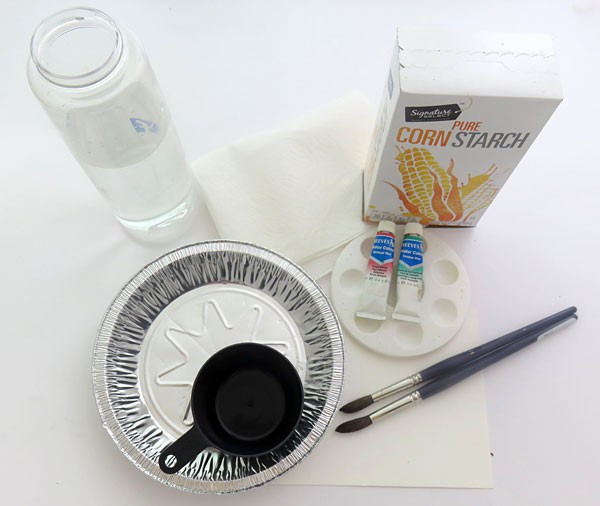 Image Credit: Sabine De Brabandere, Science Buddies / Science Buddies
Prep Work
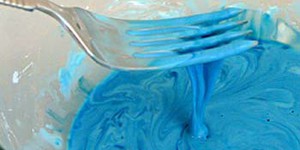
- Slowly mix two cups of cornstarch with one cup of water in the pie pan. If you have a small pan, use half as much. You can use your hands or a fork for mixing. The result should be a glue-like mixture that slowly oozes between your fingers if you pick it up. Add small amounts of water if the substance seems too dry. This mixture is often called Oobleck. Exploring Oobleck is an activity by itself!
- Once you are done playing with the paste, leave it in the middle of the pan and let it sit for at least 15 minutes. Watch how it slowly oozes out and fills the pan.
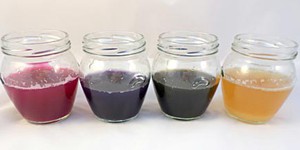
- Mix a few drops of food coloring or watercolor paint with a bit of water in a small bowl. This is your water-based paint.
- Just before you start the activity, let water run over the paper or wet it with a sponge so its surface is wet (but not soaked trough).
Instructions
- In a moment, you will paint a line on the wet paste in the pie pan and on the wet paper.
 Do you expect the lines to look sharp and crisp, or soft and spread out?
 - Take a paintbrush, pick up some paint, and paint a line on the wet paper.
What happens? Why would this be?
- Pick up some more paint and paint a line on the wet paste in the pie pan.
What happens now? Why would this look different?
- Go ahead and paint whatever you feel like on the wet paste and on the wet paper.
Is the effect of the water-based paint on wet paper and on wet paste different? Why would this be?
- Once you are done painting, let both paintings dry and observe the results.
Can you explain why these techniques create such different results?
Cleanup
- Wash all equipment with soapy water and wipe them clean.
- Wash excess paste down the drain with plenty of water. Discard dried paste with the trash.
- Do not forget to wash your hands once you are done.
What Happened?
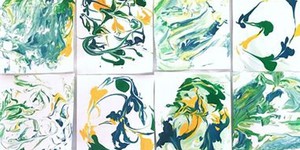
Were your lines soft and spread out on wet paper, and sharp and crisp on the wet paste? That is expected!
Even though the paste is wet, it is not saturated; it can absorb more water. As a result, the water-based paint penetrates the paste, carrying the colorful pigments with it. This leaves a crisp, well-defined line on the surface.
Painting on wet paper is slightly different. The little air pockets between the paper fibers quickly fill up with water. Once the paper is saturated with water, it can absorb no more. Water-based paint applied on a saturated surface floats on top of the paper, carrying the pigments with it. The result is a soft line with crinkly edges.
In both cases, the water evaporates, leaving the pigments and cornstarch or paper behind.
Digging Deeper
Fresco is a wall painting technique that uses water-based paint on wet lime plaster. The technique is a marvelous work of chemistry—but it's not without risk! First, extreme heat (over 800°C or 1,500°F) is applied to limestone (CaCO3), a sedimentary rock found in warm, shallow marine waters. This breaks it down into carbon dioxide (CO2, the gas we breathe out) and quicklime (CaO). Quicklime, a toxic substance in itself, is then dissolved in water to create slaked lime (Ca(OH)2), a substance that can cause chemical burns. Microscopic particles like sand are then mixed in to form the plaster used as a surface to paint on.
These particles play an essential role as they create air pockets inside the mixture, allowing carbon dioxide to creep in and react with the slaked lime to form limestone (CaCO3), the substance we started with! Before letting the plaster dry, painters apply water-based paint, which is a mixture of water and colorful particles called pigments. When applied on wet plaster, the plaster absorbs the water, carrying the pigments in. The water evaporates, the plaster sets, and the pigments become a part of the wall; a fresco is born!
Since the pigments penetrate into the plaster, frescoes are durable. We can still see remnants of frescoes made 1500 BC in Crete, Greece. Other great examples are found in the ruins of the city of Pompeii (ancient Rome), or in Italian renaissance works like Michelangelo's frescoes on the ceiling of the Sistine Chapel in Vatican City.
In this activity, we replace the toxic lime plaster used in traditional frescoes with a homemade cornstarch mixture that is a joy to play with: Oobleck.
Ask an Expert
For Further Exploration
- Use red cabbage juice instead of water to make the paste and to wet your paper. Use white vinegar and/or a mixture of baking soda and water as paint. Do you see how these transparent paints creates color? This activity explains what you just observed. Can you find more substances in the house to paint on this cabbage juice-soaked base?
- Explore how water-based paint works on different types of dry and wet paper. Is printer paper different from construction paper, watercolor paper, or cardboard? What happens if you first make all these types of paper wet? How can you combine both techniques?
Related Resources
Project Ideas

Activities
Links
- Blog Post: Finger Paint Fractals