Summary
Introduction
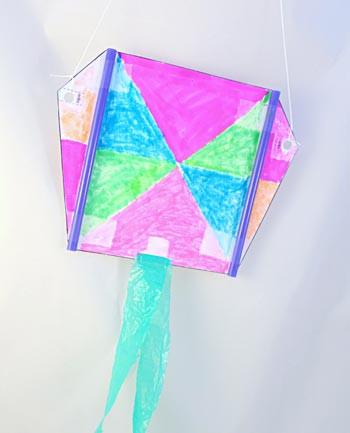
Have you ever tried to build your own kite? Kites have been a source of entertainment for centuries for kids around the world. How do some features of a kite, such as its tail, affect how it flies? In this activity you will have a chance to build your very own kite, a simple sled kite, and use it to investigate how tails help kites fly. How well will your kite fly?Materials
- Printer
- Paper
- Scissors
- Tape
- Hole punch
- Drinking straws (2)
- Kite string
- Measuring tape or ruler
- Paper clip
- Plastic grocery bag or other thin plastic bag
- An open, clear area outside
- Optional: Crayons, markers, or other art supplies for decorating your kite
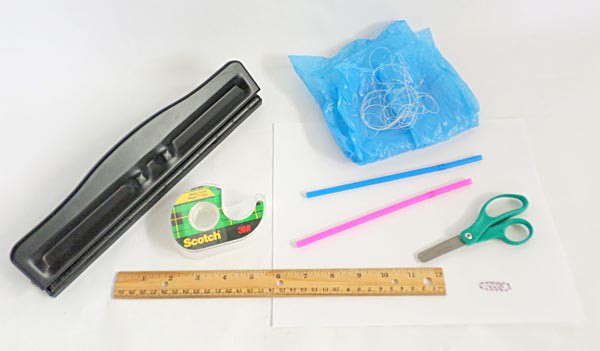 Image Credit: Teisha Rowland, Science Buddies / Science Buddies
Instructions
- Download the Sled Kite Template and print it out on a sheet of 8 ½" x 11" paper.
- Carefully cut out the sled kite. You can decorate it using crayons, markers, or other art supplies.
- Trim the length of the two drinking straws so they will fit in the area marked for the straws. Tape the straws into place.
- Place three pieces of tape in the marked areas covering the black circles to reinforce the holes for the kite string. Using a hole punch, carefully punch the two holes marked by the black circles.
- Cut two pieces of kite string about 18 inches (or 45 centimeters [cm]) long each. Tie a string through each hole. Tie them tight, but not so tight that you tear the paper. Tie the opposite end of both strings together to one end of a paper clip.
- Cut a 40 inch (1 meter)-long piece of kite string. Tie one end of this string to the other end of the paper clip. Your sled kite is ready to fly!
- Try to fly your kite in an open, clear area outside. First walk with it, then try running with it. What does the kite do when you walk and then when you run? How well does it fly?
- To make some tails to test on your kite, take a plastic grocery bag or other thin plastic bag and lay it completely flat.
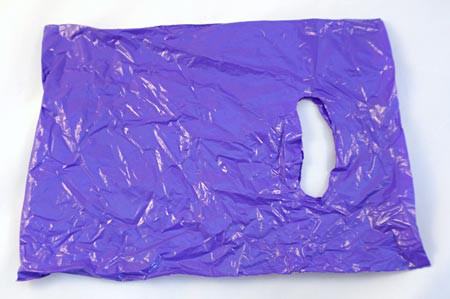 Image Credit: Teisha Rowland, Science Buddies / Science Buddies
- Cut straight across the bottom of the bag to create thin rings (which will look like strips when flat), each about 1 inch (or 3 cm) wide. Keep cutting the bag this way until you have cut up the whole bag.
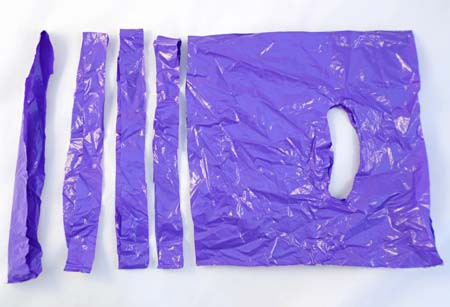 Image Credit: Teisha Rowland, Science Buddies / Science Buddies
- When you get to the handles (if the bag has handles), you can cut around them to make more rings, or cut across the bag to just remove the handles. Discard the handle pieces, and the bottom strip of the bag, but save the rings.
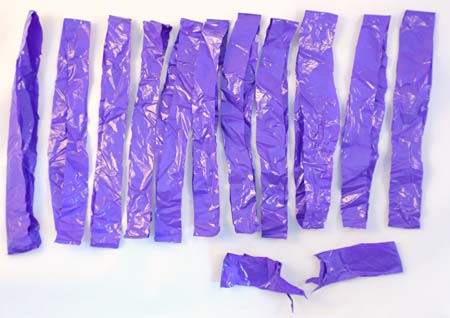 Image Credit: Teisha Rowland, Science Buddies / Science Buddies
- Using the plastic grocery bag rings you made, tape a tail to the bottom of your kite that is 4 inches (10 cm) long. (This will probably be less than one grocery bag ring.) Try to fly your kite outside again, first walking and then running with it.
 How does the kite fly compared to when it had no tail? Why do you think this is?
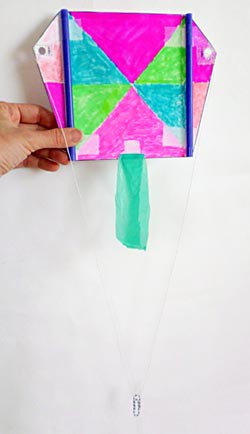 Image Credit: Teisha Rowland, Science Buddies / Science Buddies
- You will now test a tail that is 40 inches (100 cm) long. To make this tail, loop two rings together and gently pull them tight. Attach more rings to the tail this way to make it longer.
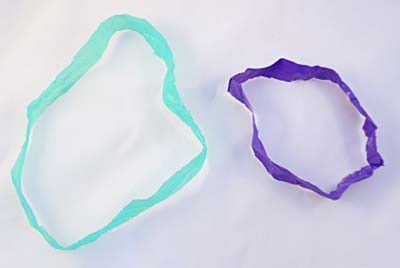 Image Credit: Teisha Rowland, Science Buddies / Science Buddies
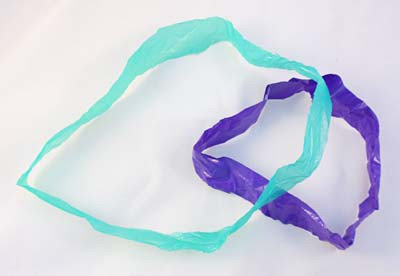 Image Credit: Teisha Rowland, Science Buddies / Science Buddies
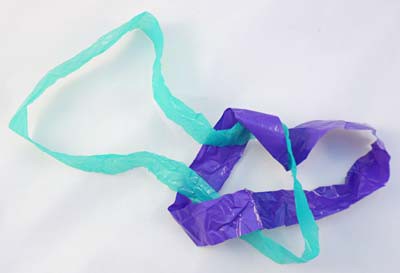 Image Credit: Teisha Rowland, Science Buddies / Science Buddies
 Image Credit: Teisha Rowland, Science Buddies / Science Buddies
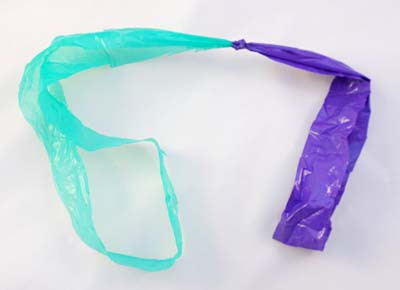 Image Credit: Teisha Rowland, Science Buddies / Science Buddies
- Attach the longer tail to the shorter tail on the kite to give the kite a 40 inch-long tail. Try to fly your kite outside again, first walking and then running with it.
How well does the kite fly with the longer tail compared to the shorter tail or no tail? Why do you think this is?
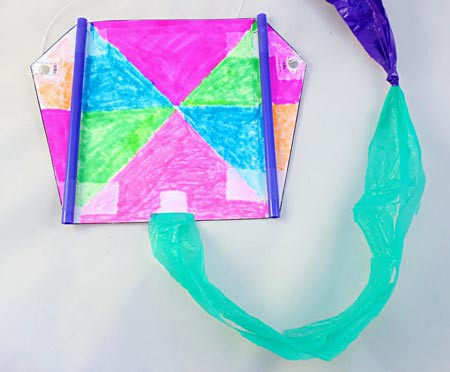 Image Credit: Teisha Rowland, Science Buddies / Science Buddies
- You will now test a tail that is 200 inches (500 cm) long. Again, start making a longer tail by looping two rings together and gently pulling them tight. In this way, make this new tail 160 inches long and then attach it to the 40 inch-long tail already on the kite to give your kite a 200 inch-long tail. Try to fly your kite outside again, first walking and then running with it. How well does the kite fly with the longest tail compared to the other tails or no tail? What differences do you notice? Why do you think this is? 15.
Out of the tails you tested, which tail do you think helped the kite fly the best? Why do you think this is?
What Happened?
Trying to fly a kite without a tail may result in the kite spinning and rolling around a lot because the kite is unstable. Adding a tail to a kite helps make the kite fly more stably by adding some needed mass and drag (which pulls the kite back, in the direction the wind is going) to the lower back area of the kite. Adding a small tail, such as the 4 inch-long tail, may help the kite fly a little more stably, but it will still spin and roll around a lot. Adding a longer tail, such as the 40 inch-long tail, should help the kite fly well, allowing it to get relatively high without rolling much. A very long tail, such as the 200 inch-long tail, will help keep the kite from rolling much, but the tail may be so heavy that it will not let the kite fly very high. Some kite makers recommend adding a tail to your kite that is around 3 to 8 times the length of the kite, but the best way to determine the right length for your kite is to try it out!Digging Deeper
Did you know that one of the most famous kite flyers of all time was a 10-year-old boy? His name was Homan Walsh, and without him the Niagara Falls Bridge may not have been built in 1847. Before the building of the bridge could begin, someone needed to get a line from one side of the gorge to the other. Homan successfully flew a kite from one side to the other, and, after securing his kite string, heavier and heavier line was fed across until a steel cable could be connected across the gorge and bridge construction could begin. Homan was rewarded with a ten-dollar cash prize, a lot of money in 1847!
How does a kite fly, enabling Homan to accomplish his feat? As someone runs with a kite, the wind going head-on into the kite causes a lift force on the kite that is perpendicular to the wind, pushing the kite up. At the same time, the force of drag pulls the kite back, in the direction that the wind is going.
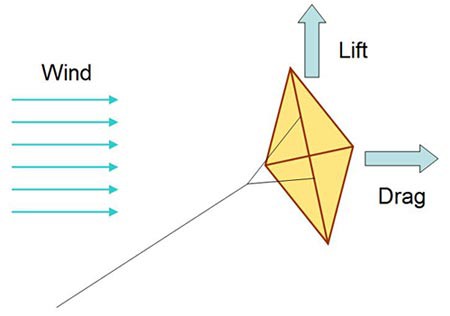 Image Credit: Ben Finio, Science Buddies / Science Buddies
This force diagram shows a kite in flight with the wind blowing from left to right. The kite experiences an upward force called lift while a horizontal force called drag pulls the kite back in the same direction that the wind is blowing.
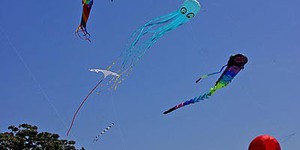
There are may different kite designs. Some are very old, like traditional Chinese and Japanese kites. Some designs are very new, like the dynamic stunt kites used in sport kite flying competitions, and made with modern materials and designs which make them ultra-maneuverable.
Ask an Expert
For Further Exploration
- Do this activity again but instead of comparing different tail lengths, try comparing number of tails. Add them symmetrically to the back end of the kite. How well does the kite fly with no tail, one tail, or two tails?
- In this activity you flew a kite using 1 meter of kite string. What happens when you fly the kite with different lengths of kite string, such as 1 meter, 3 meters, or 5 meters?
- There are a lot of other kite designs. Use the internet or books or magazines at a library to find plans for making different kinds of kites. Then test your new kite designs as you did in this activity. How does the tail length affect how well other kite designs work? What other variables affect how well kite designs work?
Related Resources
Project Ideas
Links
- Blog Post: Kite Science