Summary
Introduction
Have you ever used a compass to help you figure out what direction to go? What about while on a camping trip — have you ever needed a compass to help you navigate your way through a forest? Magnetic compasses work based on Earth's magnetic field. In this science activity, you will get to make your own magnetic compass out of a sewing needle, piece of cork, and cup of water. How well do you think it will work? Get ready to find out!Materials
- A cork
- Scissors for cutting the cork
- A cup, drinking glass, or bowl
- Water
- A magnet. It can be a flat refrigerator magnet or a more powerful magnet, such as a neodymium magnet. A stronger magnet will work better.
- A pair of pliers
- Metal sewing needle
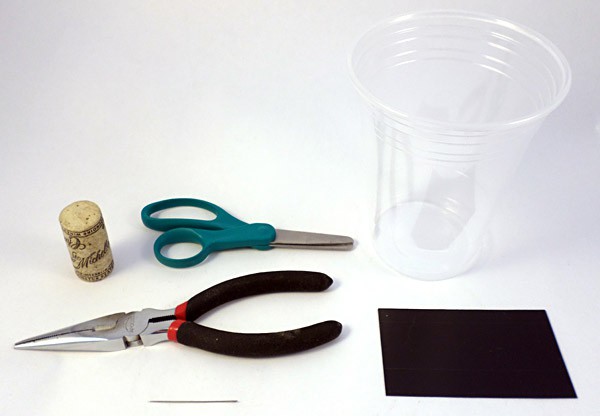 Image Credit: Teisha Rowland, Science Buddies / Science Buddies
Prep Work
- Be careful when handling the magnet, especially if you are using a strong magnet, like a neodymium magnet. Keep the magnet away from other magnets and electronic devices, such as computers, cell phones, and TV screens.
- Use caution when inserting the needle into the cork. Needles are sharp!
Instructions
- Rub the magnet against the sewing needle at least five times. (If you are using a weaker magnet, such as a flat refrigerator magnet, rub the needle at least a dozen times.) Always rub the magnet in the same direction against the needle. Your needle should now be magnetized.
 Image Credit: Teisha Rowland, Science Buddies / Science Buddies
- Now cut off about ¼ inch of the cork from one of its ends, making a small cork disc that is about ¼ inch tall.
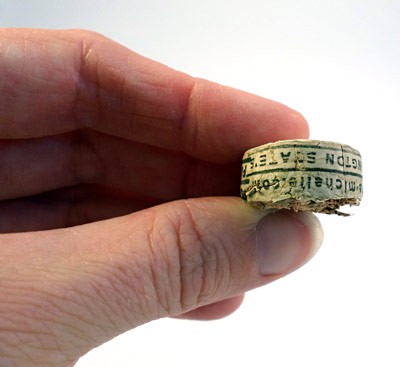 Image Credit: Teisha Rowland, Science Buddies / Science Buddies
- Carefully push the needle through the side of the disc by using the pair of pliers. Push the needle all the way through the disc so that about the same amount of needle shows on either side of the disc.
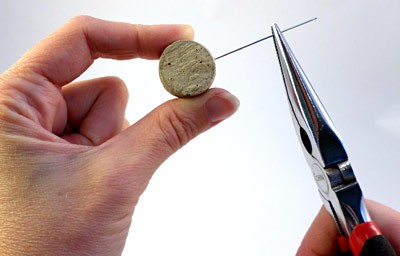 Image Credit: Teisha Rowland, Science Buddies / Science Buddies
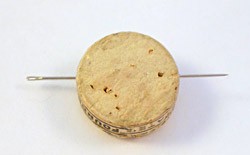 Image Credit: Teisha Rowland, Science Buddies / Science Buddies
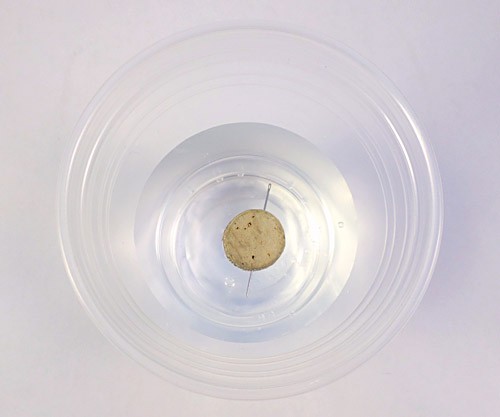
- Fill a cup, drinking glass, or bowl with at least an inch of water.
- Put the cork disc (with the needle) on the water in the cup. Try to keep the disc floating in the center of the water, away from the sides of the cup.
 What does the needle do? When it stops moving, what direction does it point towards?
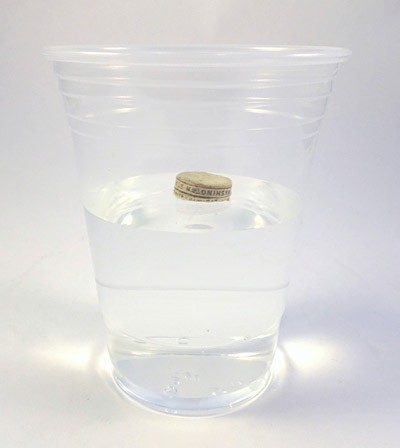 Image Credit: Teisha Rowland, Science Buddies / Science Buddies
Does your homemade compass seem to work well? How is it limited in its use?
Image Credit: Teisha Rowland, Science Buddies / Science Buddies
Does your homemade compass seem to work well? How is it limited in its use?
What Happened?
You should have seen that the needle in the homemade compass aligned itself along the Earth's north and south poles. Why is this? When you rubbed the magnet against the sewing needle, you magnetized the needle, effectively making it a weak, temporary magnet. Because magnets interact with each other (pushing against each other or pulling each other together), the magnetized needle can interact with Earth's magnetic field. Although Earth's magnetic field is relatively weak, it could clearly affect the needle because it was allowed to freely float in the cork disc on the water. Specifically, once it stopped moving, the needle should have aligned itself along Earth's magnetic field, lining up along the north-south axis. This means that one end of the needle should have pointed north, while the other pointed south. The same end should have always pointed the same direction. (You can do some more research to figure out how to make a compass that always has the needle's tip point a specific direction, i.e. either north or south.)Digging Deeper
People have known about magnetism for thousands of years. Because of magnetism, two magnets will push against each other or be pulled together. This can cause amazing things to happen, like making an object hover above the ground because it is being pushed up by the magnetic force. Magnetism can also help people navigate; because the Earth has a magnetic field, compasses can be made using a small magnetized bar or needle that points a certain direction (i.e., north or south) based on the Earth's magnetic field.
But while the phenomenon of magnetism has been known of for a long time, the first magnetic compasses used for navigation were not invented until relatively recently, around 1000 C.E. to 1100 C.E. In this science activity, you get to make your own compass and the process may help you understand some of the challenges that early magnetic compass makers encountered!
Ask an Expert
For Further Exploration
- Put a magnet next to your compass. What happens to the needle as the magnet is moved close to it? How close does the magnet need to be to affect the compass? You could try this with a steel object (such as a nail or possibly the pliers) too.
- If you have magnets with different strengths, such as a flat refrigerator magnet and a neodymium magnet, try making multiple compasses using the different magnets to magnetize the needles. How well do the different compasses work compared to each other?
- There are other ways you can make an inexpensive magnetic compass at home or while you are outdoors. For example, instead of using a piece of cork, you could try using a small leaf and setting the needle on top of the leaf while it floats in still water. How does a compass made using a leaf compare to one made using a piece of cork? How else could you make a magnetic compass?