Summary
/-/https/www.sciencebuddies.org/cdn/Files/17517/5/3D-printing-sand-thumbnail.jpg)
/-/https/i.ytimg.com/vi/OF5UTmlY4cY/maxresdefault.jpg)
Introduction
Don't have your own 3D printer? No problem! In this fun activity you will make your own colorful 3D prints using craft sand and glue. No 3D printer required!
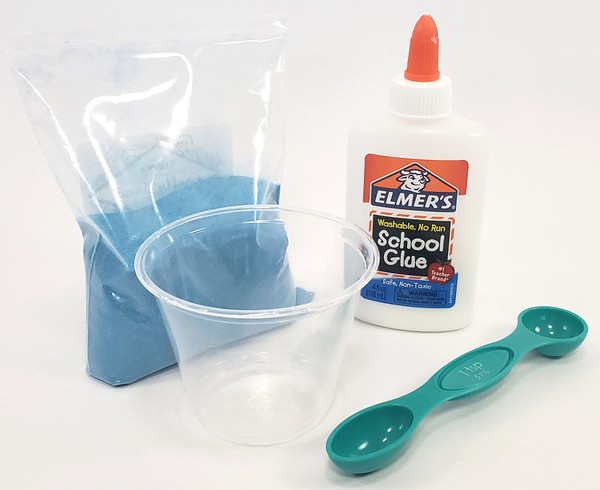
Materials
- Colored craft sand
- White school glue
- Clear plastic cup or food storage container
- Measuring spoons
/-/https/www.sciencebuddies.org/cdn/Files/17518/5/3d-printing-sand-materials.jpg)
Prep Work
Instructions
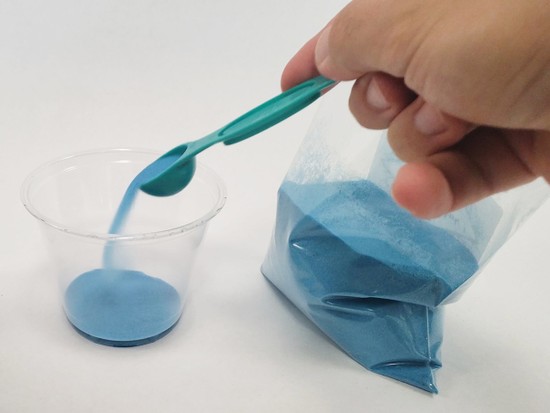
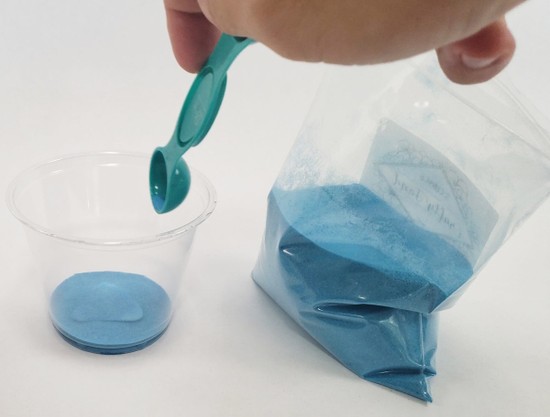
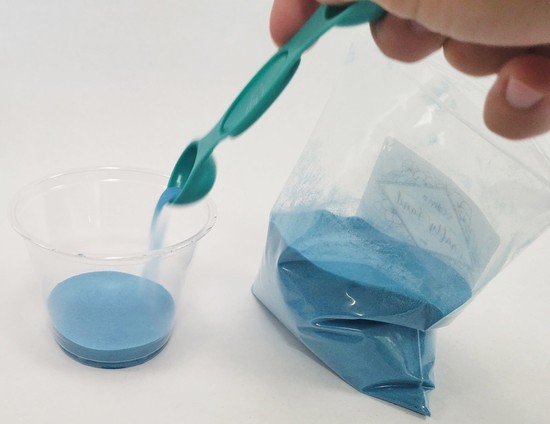
- Scoop a thick, even layer (about 5 mm deep) of sand into the bottom of the cup.
- Use glue to trace a shape in the sand.

- Cover the glue with a thin, even layer of sand. Make sure you can still see the glue shape—do not cover it completely.
- Add another layer of glue—in the same shape—on top of the first layer, then cover it with another thin layer of sand. Repeat this process until your shape reaches its desired height.
- Cover the final layer of glue with a thick layer of sand, so you can no longer see any of the glue shape.
- Wait 24–48 hours and check if your shape has hardened by poking it gently with your finger. If it still feels squishy, you need to wait longer. It will break if you try to remove it before the glue is completely dry.
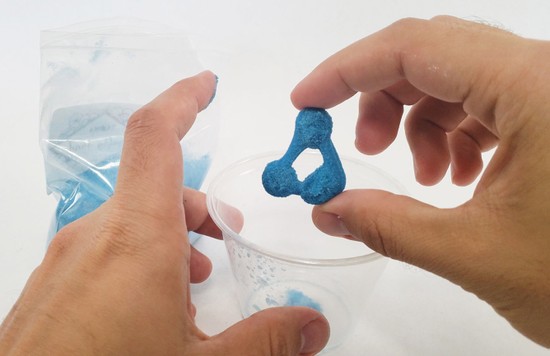
- Pour the cup of sand back into the bag so your shape falls out. Pick your shape up and remove it from the bag.
 What other shapes can you make? Can you make taller shapes with many layers? Try adding more layers to only certain parts of your shape.
/-/https/www.sciencebuddies.org/cdn/Files/17519/5/initial-sand-layer.jpg)
/-/https/www.sciencebuddies.org/cdn/Files/17520/5/glue-shape-trace.jpg)
/-/https/www.sciencebuddies.org/cdn/Files/17521/5/thin-sand-layer.jpg)
/-/https/www.sciencebuddies.org/cdn/Files/17522/5/final-sand-layer.jpg)
/-/https/www.sciencebuddies.org/cdn/Files/17523/6/final-shape.jpg)
Cleanup
What Happened?
You should find that your layers of sand and glue bind together to form a three-dimensional shape. The shape should be sturdy enough that you can pick it up without breaking it. If you try to remove the shape from the cup too early, before the glue is completely dry, it will crumble and break. Read the Digging Deeper section to learn more about how this activity is similar to a real-life 3D printing technology.
Digging Deeper
3D printing is a type of "additive manufacturing": A way to build parts by adding new material, one layer at a time. This is different from subtractive manufacturing, where you start out with a solid block of material (like metal or wood) and cut or carve material away.
There are many different types of 3D printers. The most common "consumer" 3D printers use fused deposition modeling (FDM). They push a spool of plastic through a hot nozzle that briefly melts the plastic, then the plastic quickly cools and solidifies again. This process is repeated in layers to build a 3D part (think of it like squeezing frosting onto a cake, one layer at a time). Other 3D printers use stereolithography (SLA). They start out with a vat of liquid. The liquid is solidified by a laser, one layer at a time, and at the end of the process, all the excess liquid is drained away.
Some 3D printers start with a bed of loose powder, or granular material (like sand!). The bits of powder can be fused together with heat from a laser. This is called selective laser sintering (SLS). Depending on the type of powder, the bits of powder can also be bound together by applying a liquid, or binder. This process is called binder jetting. Either way, at the end of the process, the excess powder is dumped off and you are left with a 3D part.
The process you followed in this activity is most similar to binder jetting. You laid down layers of powder (sand) one at a time, and selectively applied glue to certain areas in order to solidify the sand and bind the grains together (however, the glue did not soak into the sand as much as the liquid binder would for a real 3D printer). You waited for the glue to dry, then shook off the excess sand at the end of the process, leaving you with a solid three-dimensional part made from sand and glue.
Ask an Expert
For Further Exploration
- Can you make a multi-colored print using different colors of sand?
- Try making more-complex shapes with variable cross-sections or hollow areas (for example, an arch, a wireframe cube, or a spiral).
/-/https/www.sciencebuddies.org/cdn/Files/6390/14/artbot-tinkercad-insect.jpg)
/-/https/www.sciencebuddies.org/cdn/Files/17937/5/3D-printing-with-pcing-thumbnail.jpg)
/-/https/www.sciencebuddies.org/cdn/Files/18110/6/3D-printed-snowflakes-thumbnail.jpg)
/-/https/img.youtube.com/vi/xf4Bnm8edAg/0.jpg)
/-/https/img.youtube.com/vi/aLYXJaEAJEE/0.jpg)
/-/https/img.youtube.com/vi/XjR85yEGZQw/0.jpg)