Summary
/-/https/www.sciencebuddies.org/cdn/Files/17668/5/DIY-mini-propeller-car.jpg)
/-/https/i.ytimg.com/vi/UYWBtg_DCb4/maxresdefault.jpg)
Introduction
Build your own mini propeller car with craft materials and a simple circuit in this fun STEM activity!
Materials
- 6x15-mm DC motor with 1–mm shaft
- Mini plastic propeller for 1–mm motor shafts
- 2xAAA battery holder
- AAA batteries (2)
- Toothpicks (2)
- Plastic beads with hole diameters about the size of the toothpick (4)
- Cardstock
- Sandpaper
- Electrical tape
- Googly eyes or other decorations
- Scissors
- Wire strippers
- Needle nose pliers
- Hot glue gun
/-/https/www.sciencebuddies.org/cdn/Files/17667/5/mini-propeller-car-materials.jpg)
Disclaimer: Science Buddies participates in affiliate programs with Home Science Tools®, Amazon.com, Carolina Biological, and Jameco Electronics. Proceeds from the affiliate programs help support Science Buddies, a 501(c)(3) public charity, and keep our resources free for everyone. Our top priority is student learning. If you have any comments (positive or negative) related to purchases you've made for science projects from recommendations on our site, please let us know. Write to us at [email protected].
Instructions
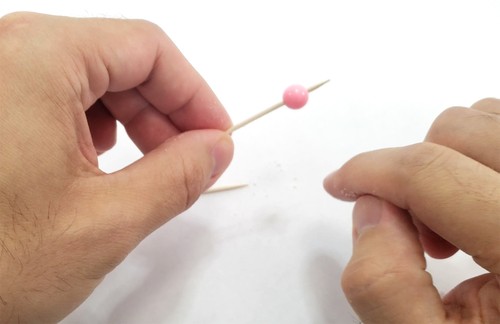
- Slide one of the plastic beads onto the toothpick. If it does not slide on easily and then spin freely, you need to sand the toothpick down. Sand both toothpicks until all four beads can slide onto them easily and spin freely.
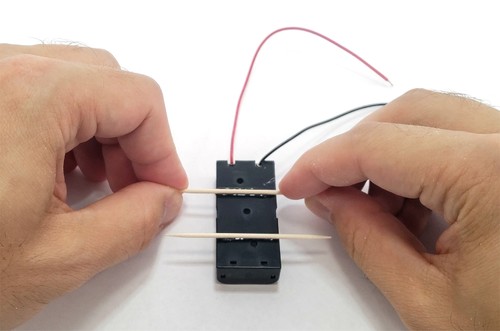
- Use hot glue to attach both toothpicks to the bottom of the battery holder to form axles. Make sure the toothpicks are parallel to each other.
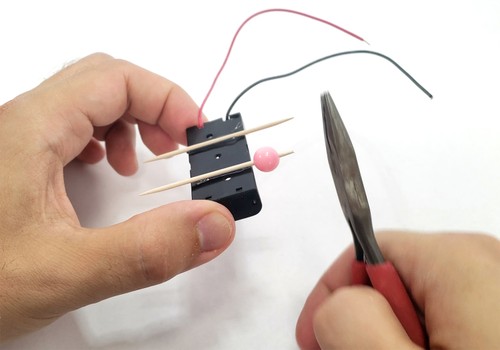
- Slide a plastic bead onto one of the toothpicks.
- Use the needle nose pliers to cut the pointy part off the end of the toothpick.
- Use the needle nose pliers to crimp the end of the toothpick to flatten and widen it. This will prevent the bead from sliding off the axle.
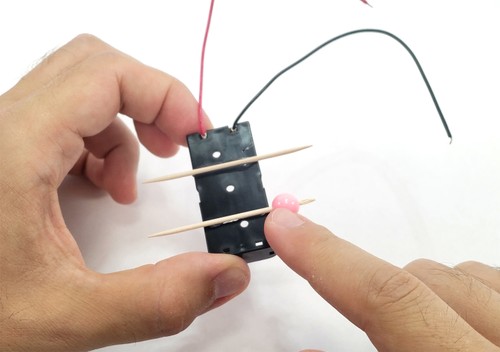
- Repeat steps 3–5 for the other three axles. Make sure your car can roll and the wheels do not get stuck.
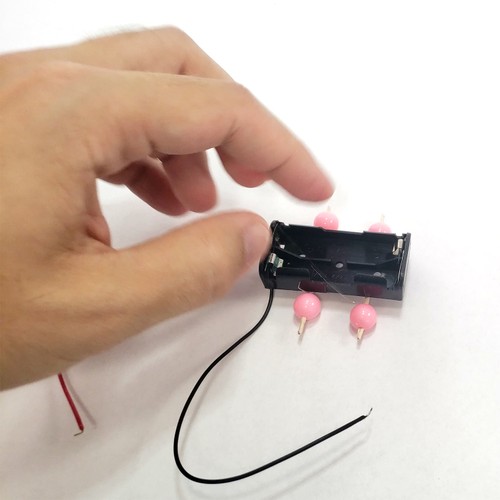
- Use the wire strippers to cut the motor and battery pack wires so they are each a few centimeters long.
- Strip at least 5 mm of insulation off the end of each wire.
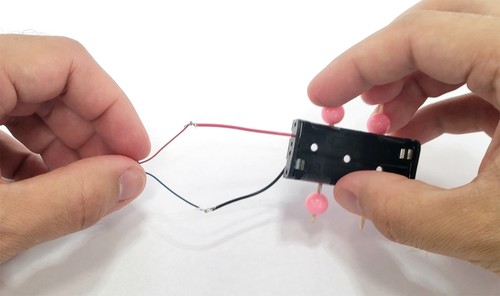
- Twist the wires together to form a circuit. Twist the red wires together, and twist the black wire to the blue wire. Optionally, if you have a soldering iron, you can solder the connections to make them stronger.
- Wrap the connections in electrical tape to prevent short circuits. If you have heat shrink tubing, you can use that instead, but remember you need to put it on the wires before you twist them together.
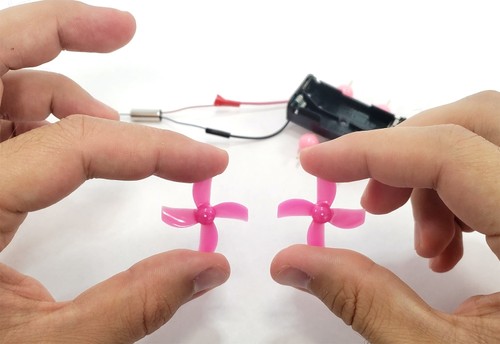
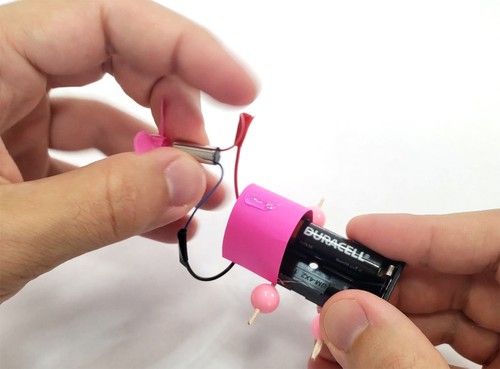
- The propellers come in packs of four because they are intended for use with mini quadcopter drones. There are two clockwise (CW) and two counterclockwise (CCW) propellers. You need a counterclockwise propeller. Hold the propellers as shown in the picture. A counterclockwise propeller's curved leading edge of the top blade faces to your left (the propeller on the left in the picture).
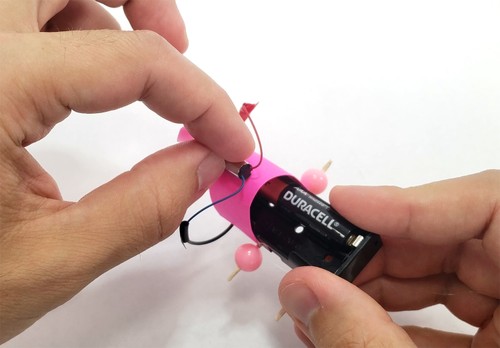
- Firmly press the propeller onto the motor shaft.

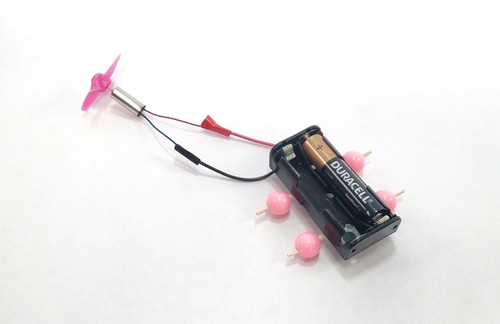
- Put one AAA battery into the battery holder. It should be the battery where the "+" faces toward the back of the car's body (the end with the wires). Look for the "+" sign inside the battery holder and make sure it lines up with the "+" sign on the battery.
- Cut a small piece of cardstock and bend it to form an arch. Glue it to both sides of the back of the battery pack to form a support for the motor.
- Glue the motor to the top of the cardstock, with the propeller facing backward. Bend the wires out of the way so they will not get caught in the propeller.
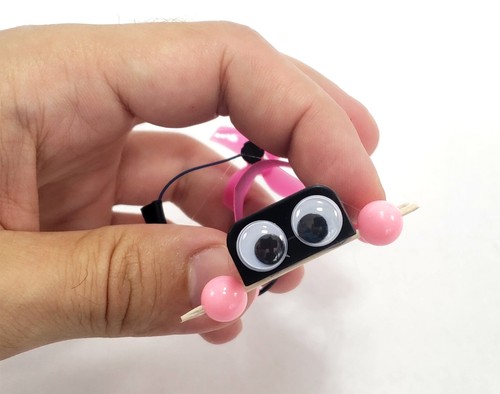
- Add googly eyes or other decorations to your car.
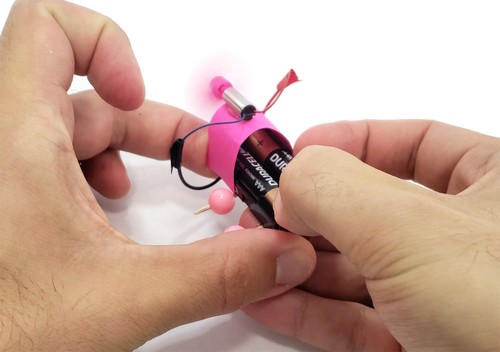
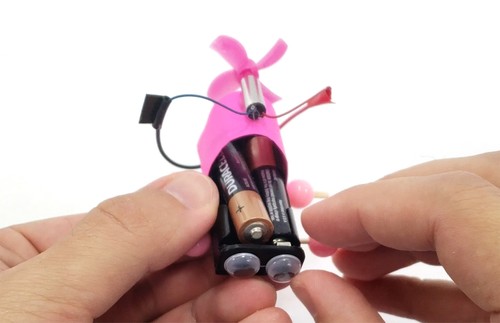
- To start your car, insert the second battery. Watch your fingers! The propeller will start spinning right away.
- Put your car down and watch it go! If it spins in circles instead of going straight, check to make sure one of the wheels is not stuck. This will cause the car to turn to one side.

- To turn your car off, remove one of the batteries.
/-/https/www.sciencebuddies.org/cdn/Files/17669/5/bead-toothpick.jpg)
/-/https/www.sciencebuddies.org/cdn/Files/17670/5/toothpick-axles.jpg)
/-/https/www.sciencebuddies.org/cdn/Files/17671/5/bead-on-axle.jpg)
/-/https/www.sciencebuddies.org/cdn/Files/17672/5/crimped-axle.jpg)
/-/https/www.sciencebuddies.org/cdn/Files/17673/5/car-four-wheels.jpg)
/-/https/www.sciencebuddies.org/cdn/Files/17674/5/motor-battery-wires.jpg)
/-/https/www.sciencebuddies.org/cdn/Files/17675/5/propellers.jpg)
/-/https/www.sciencebuddies.org/cdn/Files/17676/5/propeller-motor-shaft.jpg)
/-/https/www.sciencebuddies.org/cdn/Files/17677/5/single-battery.jpg)
/-/https/www.sciencebuddies.org/cdn/Files/17678/5/cardstock-arch.jpg)
/-/https/www.sciencebuddies.org/cdn/Files/17679/5/motor-glued-to-car.jpg)
/-/https/www.sciencebuddies.org/cdn/Files/17680/5/googly-eyes.jpg)
/-/https/www.sciencebuddies.org/cdn/Files/17681/5/second-battery.jpg)
/-/https/www.sciencebuddies.org/cdn/Files/17682/5/car-going.jpg)
/-/https/www.sciencebuddies.org/cdn/Files/17683/5/remove-battery.jpg)
What Happened?
When you connected the motor to the battery pack and inserted the batteries, you formed a circuit. The batteries sent electrical current through the motor, which made it spin. The spinning propeller pushed air backward, and the resulting reaction force pushed the car forward. Your car might get stuck or go in circles if one or more of the wheels are stuck, but otherwise it can go surprisingly fast for such a tiny car!
Digging Deeper
When you connect the motor and battery pack wires, you form a circuit. However, it is an open circuit until you insert both of the batteries, meaning there is a gap or a break in the circuit, so no current can flow. Once you connect both batteries, you form a closed circuit and current can flow, which makes the motor spin. This is why you only need to remove one battery to turn the circuit off.
When the propeller spins, it pushes air backward. According to Newton's third law of motion, for every action there is an equal and opposite reaction. The resulting reaction force pushes the car forward. If you were to use one of the clockwise propellers from your kit instead of a counterclockwise propeller, then the propeller would push air forward, making the car go backward instead. However, if you want to use a clockwise propeller, you can reverse the connections between the motor and the battery pack wires. This will make the motor spin in the opposite direction.
Ask an Expert
For Further Exploration
- If you do not like having to remove a battery to turn the car off, you can use a battery holder with a built-in switch instead.
- You can use your car for a science project. For example, what happens if you change a variable like the number of batteries? Each battery adds more voltage to the circuit, but also adds more weight to the car. Do you think that will make the car go faster, slower, or stay the same speed? Note that to do this project you will need to purchase different-sized battery holders. We do not recommend using more than three batteries, as too much voltage can burn out your motor.
- You can use the same motors and propellers to build a miniature drone. See the link in the Additional Resources section.
- To build a car using a counterclockwise (CCW) propeller, simply reverse the connections between the motor and the battery pack. This will make the motor spin the other way.
/-/https/www.sciencebuddies.org/cdn/Files/16847/5/DIY-mini-drones-thumbnail.jpg)
/-/https/img.youtube.com/vi/TYDNBvP5dyk/0.jpg)
/-/https/img.youtube.com/vi/ff8EjjW1_2o/0.jpg)
/-/https/img.youtube.com/vi/HkrqrX_PkcI/0.jpg)