Summary
/-/https/www.sciencebuddies.org/cdn/Files/15567/5/crayon-rock-cycle.jpg)
/-/https/i.ytimg.com/vi/WY5abXORFSk/maxresdefault.jpg)
Introduction
Use crayons to model the rock cycle in this fun activity! You will make colorful sedimentary, metamorphic, and igneous "rocks" from crayon shavings.
Materials
- Crayons
- Potato peeler, paring knife, or cheese grater
- Aluminum foil
- Frying pan
- Tongs or oven mitts
- Toothpick
- Small bowls
- Ice water
-

/-/https/www.sciencebuddies.org/cdn/Files/15568/4/crayon-rock-cycle-materials.jpg)
Prep Work
- Peel the paper wrappers off your crayons.
Instructions
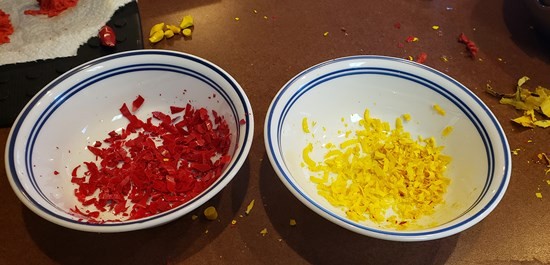
- With adult supervision, use a potato peeler, knife, or cheese grater to make crayon shavings from at least two different color crayons. Keep different colors separated in different bowls.
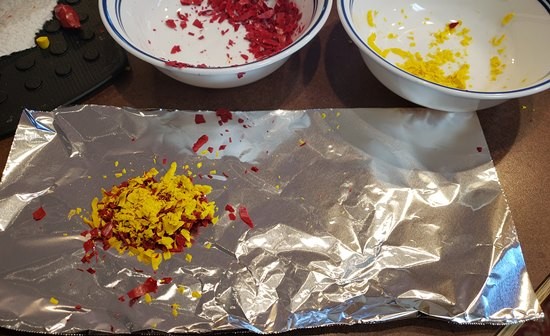
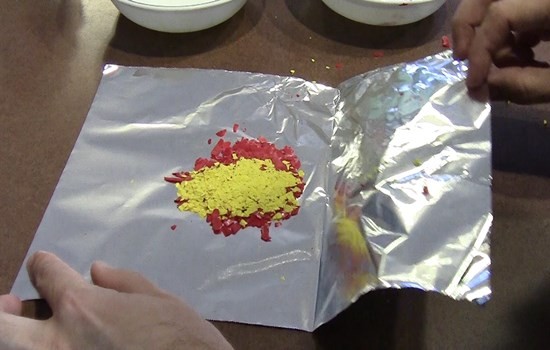
- Pile the shavings into layers on a sheet of aluminum foil, one color per layer.
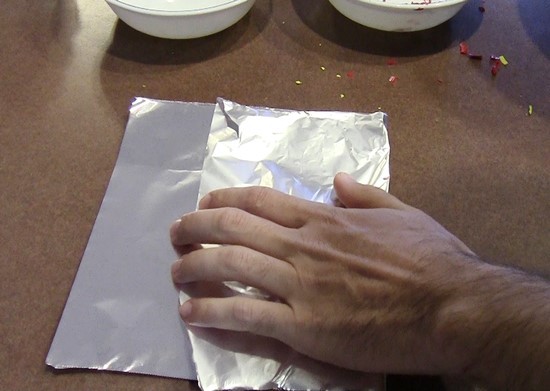
- Fold the aluminum foil over on top of the pile.
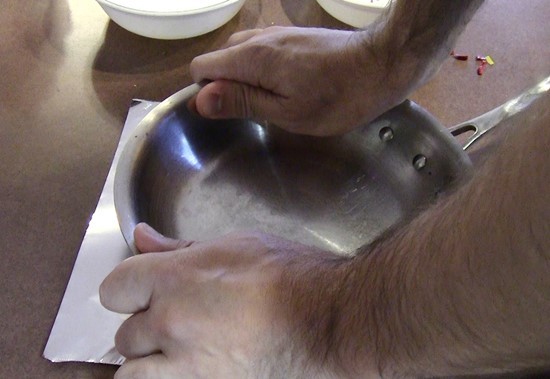
- Press down as hard as you can with the bottom of the frying pan for at least one minute. You can also put the aluminum foil on the floor and stand on it, or ask an adult for help. The harder you press, the better.
- Remove the pan and unfold the aluminum foil.
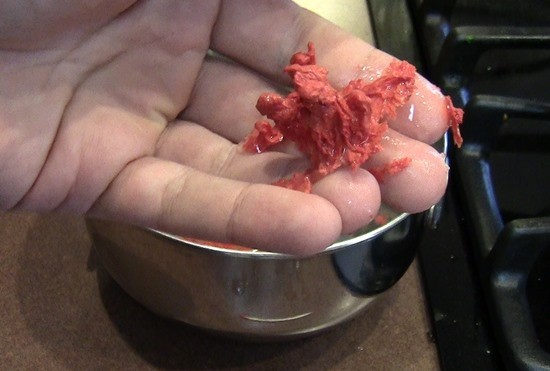
- Carefully peel the aluminum foil away from the crayon shavings and remove the pile. This is your sedimentary "rock."
 What does the rock look like? How did the individual crayon shaving pieces combine to form a single rock?

- Return your sedimentary rock to the aluminum foil. Put the aluminum foil in the frying pan, press it down flat, and heat it on the stove over medium-low heat.
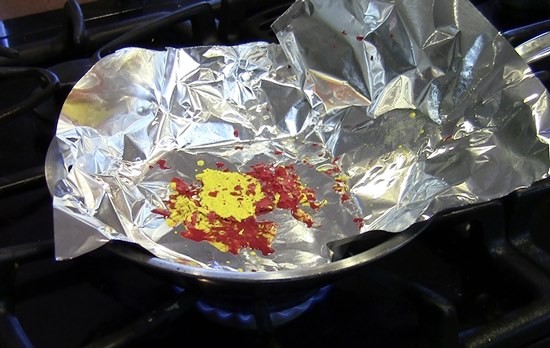
- Using oven mitts or tongs, remove the aluminum foil from the pan when the crayon rock has just melted completely. Watch as it cools, but do not touch the melted crayon.
- Carefully peel the melted crayons from the aluminum foil. This is your metamorphic rock.Examine the rock carefully. What are the differences between this rock and your sedimentary rock?
- Prepare a bowl of ice water.
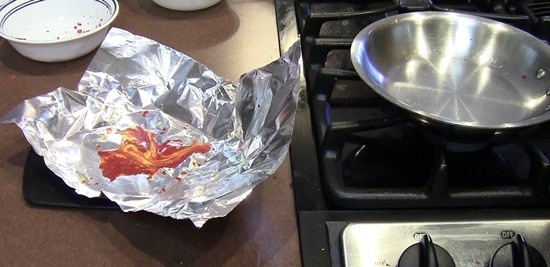
- Put the "rock" back on the aluminum foil and return it to the stove over medium-low heat. This time, when the crayons melt, stir them with a toothpick until the colors are mixed completely.

- Using tongs or oven mitts, quickly lift the aluminum foil and pour the melted crayons into the bowl of ice water.

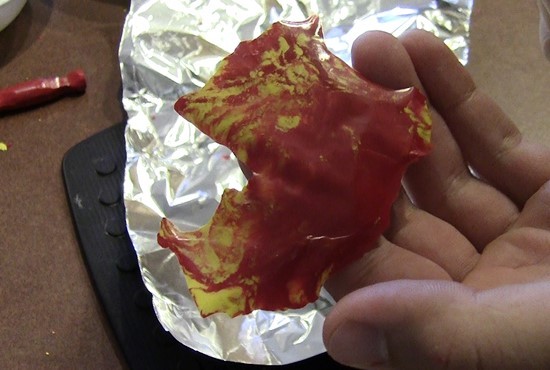
- Remove a chunk of solidified crayon from the bowl. This is your igneous rock.How is this rock different from your sedimentary and metamorphic rocks?
- If you have enough crayons, repeat steps 1–6 to make another sedimentary rock, and steps 1–9 to make another metamorphic rock. This way you will have one of each type of rock, and you can compare them side-by-side.What are the similarities and differences between your different types of rock?
/-/https/www.sciencebuddies.org/cdn/Files/15569/4/crayon-shavings.jpg)
/-/https/www.sciencebuddies.org/cdn/Files/15570/4/crayon-shaving-layers.jpg)
/-/https/www.sciencebuddies.org/cdn/Files/15571/4/aluminum-foil-fold.jpg)
/-/https/www.sciencebuddies.org/cdn/Files/15573/4/press-down-pan.jpg)
/-/https/www.sciencebuddies.org/cdn/Files/15574/4/crayon-sedimentary-rock.jpg)
/-/https/www.sciencebuddies.org/cdn/Files/15575/4/crayon-sedimentary-rock-2.jpg)
/-/https/www.sciencebuddies.org/cdn/Files/15576/4/melting-crayons-stove.jpg)
/-/https/www.sciencebuddies.org/cdn/Files/15578/4/melted-crayons-cooling.jpg)
/-/https/www.sciencebuddies.org/cdn/Files/15579/4/crayon-metamorphic-rock.jpg)
/-/https/www.sciencebuddies.org/cdn/Files/15580/4/crayon-stir-toothpick.jpg)
/-/https/www.sciencebuddies.org/cdn/Files/15581/4/pouring-molten-crayons.jpg)
/-/https/www.sciencebuddies.org/cdn/Files/15582/4/crayon-igneous-rock.jpg)
Cleanup
What Happened?
When you pressed down on the pile of crayon shavings, you exerted a lot of pressure that smashed them together into one solid piece with multiple layers. This "sedimentary rock" might have been crumbly and fragile, especially around the edges. When you melted the sedimentary rock on the stove, the different colors started to swirl together, but different colors were still visible. When it cooled, the "metamorphic rock" was much stronger and less crumbly than the sedimentary rock. Finally, when you melted the metamorphic rock again and stirred it with a toothpick, the colors mixed completely (for example, in the photos above, red and yellow combine to make orange). When you poured the melted crayon into a bowl of ice water, it cooled rapidly and solidified, forming an "igneous rock." The resulting shape may have air bubbles or pockets in it because of the way it cooled. Read the Digging Deeper section to learn more about the rock cycle and different types of rocks.
Digging Deeper
In this activity, you used crayons to model how different types of rocks are formed on the Earth's surface and inside the Earth. Over thousands or millions of years, sand, dust, and dirt will form different layers on the ground. Eventually these layers get pressed together and compacted to form sedimentary rocks. As these rocks get moved even deeper underground due to the motion of the Earth's crust (plate tectonics, see link in Additional Resources section), they are exposed to even higher amounts of heat and pressure, turning them into metamorphic rocks. Eventually it gets so hot that the rocks melt completely. This melted rock is called magma. When magma cools and solidifies (for example, when it erupts from a volcano and is exposed to air or water), it forms igneous rocks. The links in the Additional Resources section have more information and diagrams illustrating the rock cycle.
Ask an Expert
For Further Exploration
- Can you figure out how to turn an igneous or metamorphic rock back into a sedimentary rock? What natural processes do you think could make this happen with real rocks?
Related Resources
Activities
/-/https/www.sciencebuddies.org/cdn/Files/13952/9/sweet-earthquake-shake-thumbnail.jpg)
/-/https/www.sciencebuddies.org/cdn/Files/15232/5/river-water-flow-thumbnail.jpg)
/-/https/www.sciencebuddies.org/cdn/Files/12371/6/beach-wind-activity-incense.jpg)
Links
- University Corporation for Atmospheric Research: Rock Cycle
- Minerology4Kids: The Rock Cycle
- Geography4Kids: Plate Tectonics
/-/https/careerdiscovery.sciencebuddies.org/cdn/Files/1359/18/VNIIOarctic.jpg)
/-/https/img.youtube.com/vi/0KjnJYoIqPA/0.jpg)
/-/https/img.youtube.com/vi/rzEYT7V-yUk/0.jpg)
/-/https/img.youtube.com/vi/yUsjx5MVhaQ/0.jpg)