Dye Eggs Using Silk Ties for Egg-cellent Colors
Summary
/-/https/www.sciencebuddies.org/cdn/Files/4556/6/silk-tie-dye-eggs_img.jpg)
Introduction
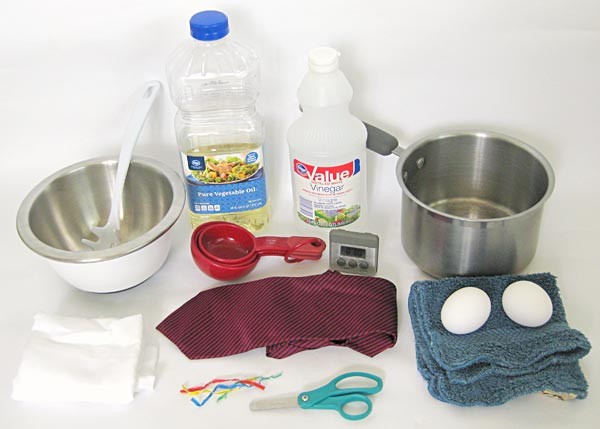
Have you ever dyed eggs? Turning eggshells from white into different, dazzling colors can be a lot of fun! People often do this using dye tablets to make different colors in a liquid bath. They then dip the egg into the liquid and wait till it turns the desired color. Eggs can be dyed in many other ways, and one neat method uses silk ties. Sounds strange to use clothing to dye eggs, right? But it actually works really well! In this activity, you will dye eggs with silk ties and investigate whether heat is needed for the process to work well. Are you just dye-ing to try this out?Materials
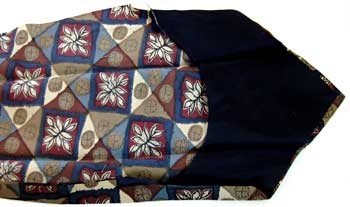
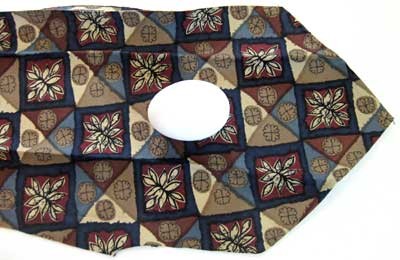
- 100% silk tie. Look at the tags on the back of the tie to make sure it is 100%. Darker blues, purples, and reds transfer dye the best. These ties can usually be purchased at a secondhand shop or thrift store. Be sure to ask permission before using someone else' silk tie for this activity! The ties will be destroyed in this activity.
- Light-colored tablecloth, pillow case, or other lightweight, light-colored fabric scrap. Use fabric that you will not mind having cut up
- Old dishtowels or rags
- Scissors
- Twist ties (4)
- Raw white eggs (2)
- Water
- White vinegar
- Optional: Vegetable oil
- Cooking pot
- Large bowl or another cooking pot, similar in size to the first cooking pot
- Measuring cups
- Well-ventilated stove area, such as provided by an overhead ventilation system or a nearby window that could be opened, or dust masks.
- Timer or clock
- Tongs or slotted spoon
/-/https/www.sciencebuddies.org/cdn/Files/6023/6/silk-tie-dye-egg-materials.jpg)
Prep Work
- Adult supervision is required when using the stove. Dust masks or a well-ventilated stove area is needed to avoid breathing in vinegar and dye fumes. Some acid dyes are toxic while others are non-toxic. Without knowing exactly which acid dyes are in the ties you will be using, it is best to practice caution and avoid breathing in potentially dangerous dye fumes when heating the ties in hot water.
- Do not eat the eggs that are used in this activity.
Instructions
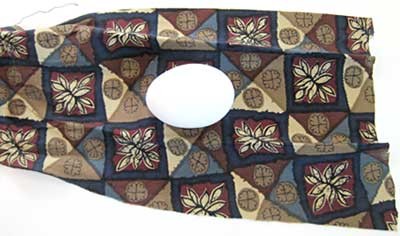
- Take the silk tie and turn it over so that you are looking at its back. Using scissors, have an adult help you carefully cut through the stitches going up the middle back of the tie.
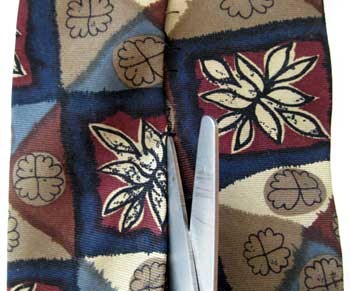
- Open the tie up as you go. Remove any labels. Continue until you have cut through all of the stitches along the seam.
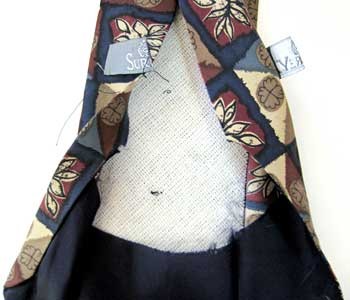
- Remove any (usually white) liners running along the inside of the tie.
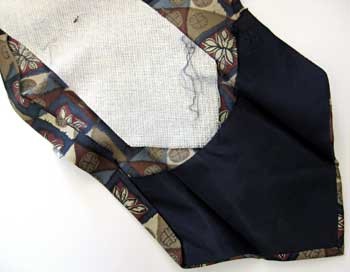
- If there is a liner sewed to the bottom of the tie, carefully cut along the seams to remove this liner. Try to only cut the liner part of the tie.
- Flip the tie over so that its front is facing up. What colors are on the tie and does it have any patterns/designs? How do you think this will dye the eggs? Place an egg a few inches away from the tip of the tie.
- Fold the tie's tip over the egg so that it completely covers the egg. Adjust the position of the egg in the tie so that you can gather up enough tie material on one end to bind the material together.
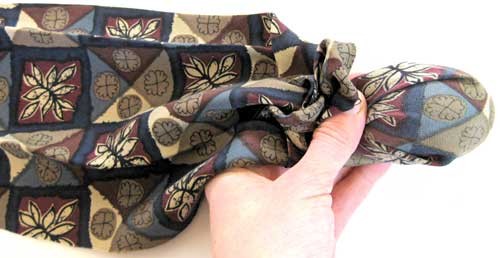
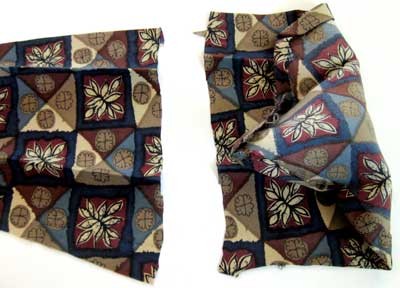
- Once you are satisfied with the egg's position, cut off the piece of tie that the egg is wrapped in. Cut straight across the width of the tie.
- Pinch the tie material around the egg so that it is tight, but be careful not to break the egg! Twist a twist tie around the fabric at the end of the egg. To smooth all of the wrinkles, carefully pull the fabric through the twist tie to tighten it around the egg.
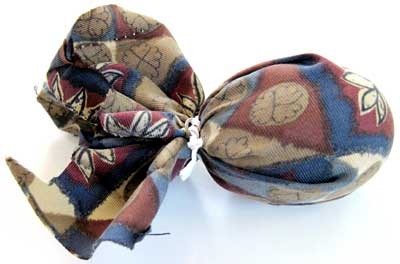
- Take a new egg and place it on the tie several inches above where you just cut the tie. Wrap this egg in a higher-up piece of the tie material as you did with the first egg.
- Wrap each egg in a second layer of lightweight, light-colored fabric scrap to help hold the piece of tie next to the egg. Why do you think it is important that the fabric be light-colored? For each egg cut the fabric so that you have enough to cover the egg, wrap the new fabric around the egg, twist a twist tie around the end of the egg (on top of the other twist tie), and tighten the light-colored fabric as you did with the tie material.
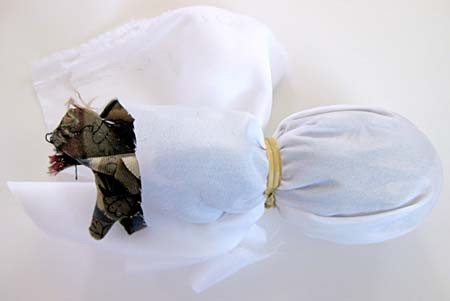
- Place one of the wrapped eggs in a cooking pot. This egg will be boiled. Place the other wrapped egg, which will not be boiled, in a similarly-sized large bowl or pot.
 How well do you think the boiled egg will be dyed compared to the non-boiled egg?
 - Use a measuring cup to add water to the pot until there is at least about one inch of water above the egg. Add the same amount of water to the egg in the bowl.
- Add ¼ cup of white vinegar to each egg.Why is adding vinegar important?
- Place the pot with the egg to be boiled onto the stove. Have an adult turn the burner on to medium/high and cover the pot with a lid. To avoid breathing in the vinegar and potentially dangerous dye fumes, leave the lid on the pot while on the stove, turn on an overhead stove fan and/or open a nearby window, or put on a dust mask (and have anyone in the kitchen area put on a dust mask as well). It is also recommended to stay out of the kitchen area for the most part during the boiling process.
- Leave the other wrapped egg remaining in its bowl on a counter.
- With an adult's help, check on the pot on the stove every few minutes to see if the water's boiling. When it boils, have an adult remove the lid and reduce heat to medium so that the water is simmering. Let the egg simmer for 20 minutes.
- After simmering, have an adult use tongs or a slotted spoon to carefully remove the egg from the water and place it on some old dishtowels or rags on the counter. Also remove the egg that was not boiled and set it on the old dishtowels.
- Let the eggs sit on the dishtowels until they are both cool enough to unwrap. This should take about 10 minutes.
- Carefully unwrap the eggs (undoing the twist ties and removing the fabric layers).
- Compare the eggs.How does the egg that was boiled look compared to the egg that was not? Which egg looks like it dyed better, or darker? How do you think heating the egg affected the chemical reaction taking place between the acid dyes (in the tie material) and the eggshell? Do you think heating the egg helped the chemical reaction to work better?
- If you like, rub the eggs with a little vegetable oil to make them shiny.
/-/https/www.sciencebuddies.org/cdn/Files/4558/6/silk-egg-dyeing-step-2_img.jpg)
/-/https/www.sciencebuddies.org/cdn/Files/4559/6/silk-egg-dyeing-step-2c_img.jpg)
/-/https/www.sciencebuddies.org/cdn/Files/4560/6/silk-egg-dyeing-step-3_img.jpg)
/-/https/www.sciencebuddies.org/cdn/Files/4561/6/silk-egg-dyeing-step-4_img.jpg)
/-/https/www.sciencebuddies.org/cdn/Files/4562/6/silk-egg-dyeing-step-5_img.jpg)
/-/https/www.sciencebuddies.org/cdn/Files/4564/6/silk-egg-dyeing-step-5d_img.jpg)
/-/https/www.sciencebuddies.org/cdn/Files/4565/6/silk-egg-dyeing-step-5e_img.jpg)
/-/https/www.sciencebuddies.org/cdn/Files/4567/6/silk-egg-dyeing-step-5g_img.jpg)
/-/https/www.sciencebuddies.org/cdn/Files/4569/6/silk-egg-dyeing-step-5j_img.jpg)
/-/https/www.sciencebuddies.org/cdn/Files/4570/6/silk-egg-dyeing-step-6_img.jpg)
Cleanup
What Happened?
Did the boiled egg dye much better, or more darkly, than the non-boiled egg?
Silk is generally dyed using a specific group of dyes known as acid dyes. Acid dyes color objects by chemically reacting with certain proteins in them (such as the silk fibers in the ties and proteins in the eggshell). For the chemical reaction to work well, the different parts involved in the reaction — the dye, the proteins they are coloring, and the acid they are in (which is the vinegar used in this activity) — need to be heated up. This is why you should have seen that the boiled egg was dyed much better (or more darkly) than the non-boiled egg. If you used a light-colored tie, the boiled egg may have been visibly dyed while the non-boiled egg remained white. If you used a dark-colored tie, the boiled egg should have been darkly dyed and the non-boiled egg may have had some very light, faded coloring as well.
Digging Deeper
People have been dyeing eggs long before the common store-bought tablets existed, and dyeing eggs is so much fun that people have explored many other ways to do it over the years, such as by using dyes from plants and spices, or by using completely different methods. One way you can dye eggs is using 100% silk ties. To dye an egg using silk ties, the egg is wrapped in the tie and they are placed in water with vinegar. When the process is done, some of the dye that was on the tie transfers to the eggshell. Ideally, it dyes the eggshell so that it looks similar to the tie, with some detailed designs being clearly visible on the eggshell.
Silk is generally dyed using a specific group of dyes known as acid dyes, and these dyes need to be around acid, such as vinegar, for the chemical reaction to work well (i.e., change an object's color). This is why the eggs are soaked with vinegar (an acid) during the dyeing process — this helps the acid dyes transfer their color from the silk ties to the eggshells. (Acid specifically makes chemical groups on the proteins become positively charged so they can react with the negatively charged dye molecules.)
Ask an Expert
For Further Exploration
- It is possible to use the same tie to dye eggs multiple times. Try doing this to see how well it works. How many times can you dye an egg using the same piece of tie so that the colors from the silk tie still transfer to the eggshell with the same darkness and details? Do some colors last longer than others?
- In this activity you put the eggs in a certain amount of water with ¼ cup of white vinegar. Try repeating this activity keeping all of the conditions the same but changing the ratio of water to vinegar. For example, if you used 5 cups of water and ¼ cup of vinegar, you could also try 5 ¼ cups water and no vinegar and 4 ¾ cups water and ½ cup vinegar. Do the eggs dye better using more or less vinegar? Do they dye at all when you add no vinegar?
- Vinegar is a mild acid that you used in this activity because acid dyes are commonly used to dye silk. Do you think other acids, or even bases, could be used to dye the eggshells using silk ties? Using the Science Buddies resource Acids, Bases, and the pH Scale, you could learn more about this topic, make a hypothesis about how well you think different acids and/or bases will dye the eggs, and then repeat this activity to test your hypothesis. Be sure always to find out and follow the necessary safety precautions for using different chemicals and ask for adult supervision when using them.
/-/https/www.sciencebuddies.org/cdn/Files/4570/6/silk-egg-dyeing-step-6_img.jpg)
/-/https/www.sciencebuddies.org/cdn/blog/graphics/2014-blog-tie-dye-eggs-success.png)
/-/https/www.sciencebuddies.org/cdn/blog/graphics/2013_blog-egg-dyeing-natural-science-mom-easter.png)
/-/https/careerdiscovery.sciencebuddies.org/cdn/Files/947/17/pexels-photo-3825412.jpg)
/-/https/careerdiscovery.sciencebuddies.org/cdn/Files/940/18/pexels-photo-1267347.jpg)
/-/https/careerdiscovery.sciencebuddies.org/cdn/Files/1107/19/pexels-photo-3938023.jpg)
/-/https/careerdiscovery.sciencebuddies.org/cdn/Files/20209/5/chemical-engineer-citgo.jpg)
/-/https/img.youtube.com/vi/CiVX05fsEMk/0.jpg)
/-/https/img.youtube.com/vi/ONoWZ1rzYJA/0.jpg)
/-/https/img.youtube.com/vi/r0UDLuV6058/0.jpg)