Build an Ion Wind Rotor
Summary
/-/https/i.ytimg.com/vi/SYJP36RJKPA/maxresdefault.jpg)
/-/https/www.sciencebuddies.org/cdn/Files/18309/5/ion-wind-rotor-thumbnail.jpg)
Introduction
Can you use electrically charged "wind" to make something move? Find out in this fun project as you build your own ion wind rotor.
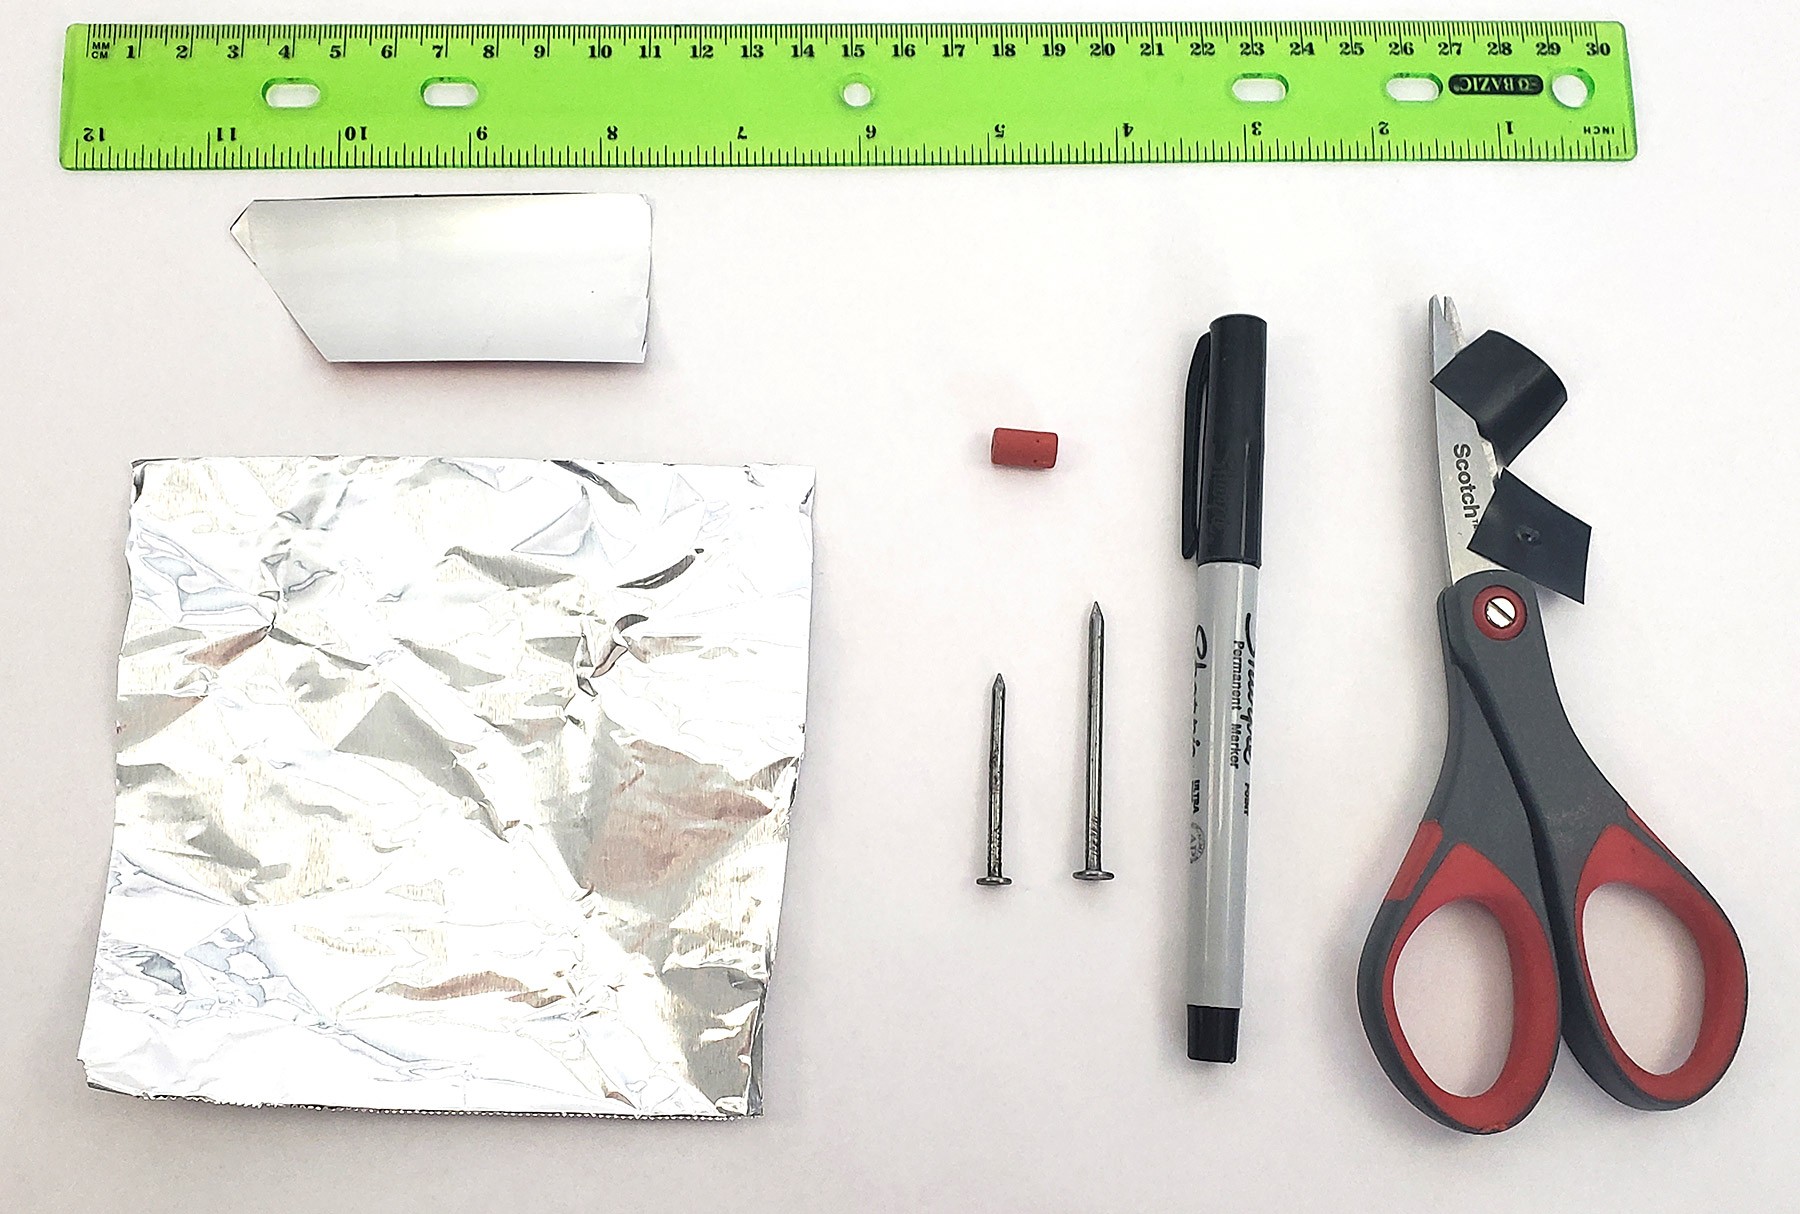
Materials
- Aluminum foil or piece of aluminum cut from a beverage can
- Two nails of slightly different diameter
- Pencil eraser
- Fine-point marker
- Scissors
- Ruler
- Electrical tape
- Access to a Van de Graaff generator
/-/https/www.sciencebuddies.org/cdn/Files/18307/5/ion-wind-rotor-materials.jpg)
Disclaimer: Science Buddies participates in affiliate programs with Home Science Tools®, Amazon.com, Carolina Biological, and Jameco Electronics. Proceeds from the affiliate programs help support Science Buddies, a 501(c)(3) public charity, and keep our resources free for everyone. Our top priority is student learning. If you have any comments (positive or negative) related to purchases you've made for science projects from recommendations on our site, please let us know. Write to us at [email protected].
Prep Work
- Make sure you read the instructions for the Van de Graaff generator and follow all safety measures when operating it.
- If you are using an aluminum beverage can, have an adult help you cut a flat piece from the side. Be careful because this can result in sharp edges.
Instructions
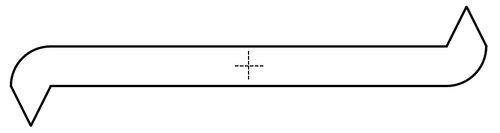
- Use the ruler and marker to draw an outline for your rotor on the piece of aluminum. The exact size and shape of the rotor does not matter as long as it is symmetric. It should be long and skinny with two triangular tips pointing in opposite directions at each end. Make sure the back edges of the rotor blades (opposite the tips) are rounded, not pointed. Carefully mark the exact center of the rotor.
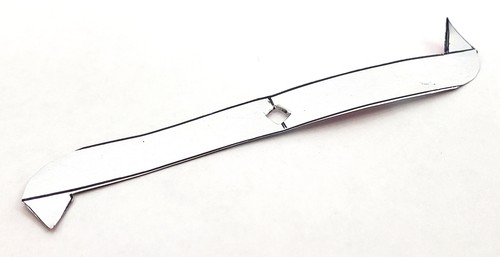
- Use scissors to carefully cut out the rotor.
- Use the larger nail to punch a hole exactly in the center of the rotor. If you find this to be difficult, place a piece of scrap cardboard behind the rotor as you punch the nail through.
- Flip the rotor over, and use the head of the nail to flatten any sharp edges that may be poking out around the hole.
- Cut two small pieces of electrical tape.
- Punch the small nail through the center of one piece of tape with the sticky side facing toward the head of the nail. Slide the piece of tape all the way down to the head of the nail.
- Wrap the other piece of tape several times around the base of the nail.
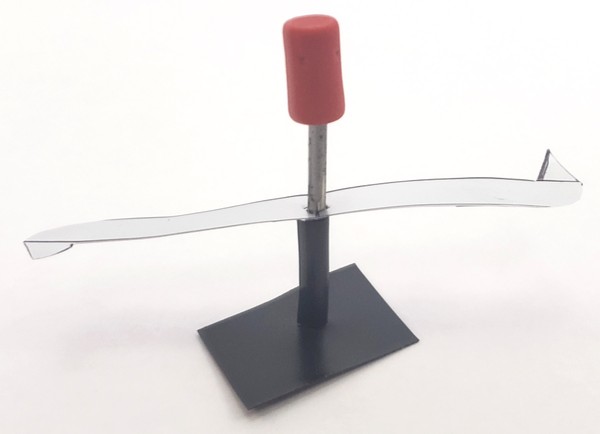
- Slide the rotor onto the nail.
- Press the pencil eraser onto the top of the nail. This will keep the rotor from flying off.
- Make sure the rotor can spin freely without getting stuck. If it gets stuck, remove the rotor and use the larger nail to widen the hole and flatten any rough edges. Repeat this process until the rotor can spin freely on the smaller nail.
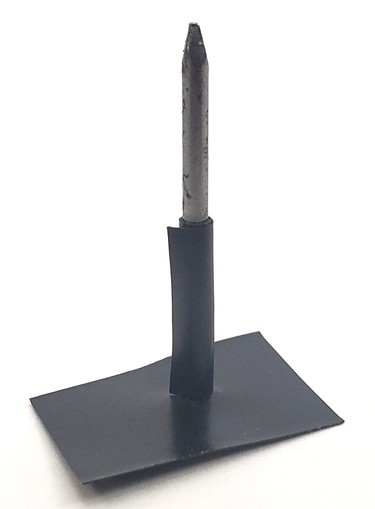
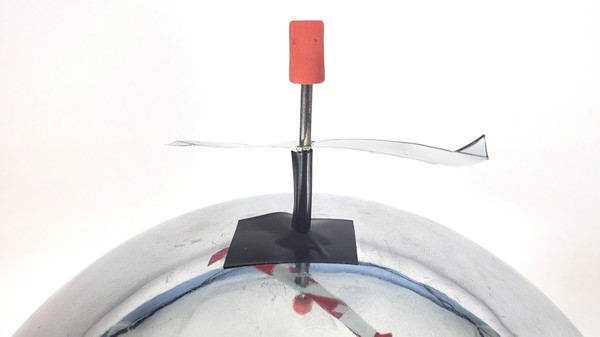
- Tape the nail vertically to the top of the Van de Graaff generator. Make sure to press down firmly, so the nail is in electrical contact with the dome.
 What do you think will happen when you turn the Van de Graaff generator on?
 - Turn the Van de Graaff generator on and watch your rotor closely. Was your prediction correct?
/-/https/www.sciencebuddies.org/cdn/Files/18310/5/ion-rotor-outline.png)
/-/https/www.sciencebuddies.org/cdn/Files/18312/5/ion-wind-rotor-cut-out.jpg)
/-/https/www.sciencebuddies.org/cdn/Files/18315/5/nail-electrical-tape.jpg)
/-/https/www.sciencebuddies.org/cdn/Files/18311/5/ion-wind-rotor-assembled.jpg)
/-/https/www.sciencebuddies.org/cdn/Files/18314/5/ion-wind-rotor-on-van-de-graaff.jpg)
Cleanup
- Follow the instructions to safely turn off your Van de Graaff generator.
What Happened?
When you turn your Van de Graaf generator on, your ion wind rotor should spin like a propeller! If it gets stuck and does not spin, there might be too much friction between the rotor and the nail. Remove the rotor and try widening the hole. If your rotor is not symmetric, it may tilt at an angle and get stuck on the nail. If you cannot repair the rotor (for example, by trimming excess material from one side), try making a new one and make sure you measure carefully. Read the Digging Deeper section to learn how your ion wind rotor works.
Digging Deeper
A Van de Graaff generator builds up static electrical charge. It accumulates excess positive charges on the dome, which can result in a shock when you touch it! Since your rotor is connected to the dome via an electrically conductive nail, it also accumulates positive charge. However, these charges are not evenly distributed. They cluster near sharp corners, like the pointed tips of the rotor blades. This concentration of positive charge causes electrons to be stripped from nearby air molecules, turning them into positively-charged ions. The now positively-charged ions are then repelled from the positively-charged rotor tip, pushing them away. According to Newton's third law of motion, for every reaction there is an equal and opposite reaction, so the air molecules also push back on the rotor. This causes the rotor to spin.
/-/https/www.sciencebuddies.org/cdn/Files/18313/8/ion-wind-rotor-explanation.png)
Ion thrusters, also called ion drives or ion engines, are used in real spacecraft to propel them through space. These thrusters do not spin like your rotor, because they all point in the same direction. They propel ions in a straight line out the back of the spacecraft, pushing the spacecraft forward.
Ask an Expert
For Further Exploration
- What happens if you try this experiment with a rectangular rotor that does not have pointed tips?
/-/https/www.sciencebuddies.org/cdn/Files/14675/5/electroscope-thumbnail.jpg)
/-/https/careerdiscovery.sciencebuddies.org/cdn/Files/1640/26/Fyysikot_tyossaan.jpg)
/-/https/careerdiscovery.sciencebuddies.org/cdn/Files/835/18/msfc-202000343.jpg)
/-/https/img.youtube.com/vi/fJ-FJDCCjUw/0.jpg)
/-/https/img.youtube.com/vi/w_3RIXnotEk/0.jpg)
/-/https/img.youtube.com/vi/DOilqjKEhqo/0.jpg)