Making Everyday Objects Out of Mushrooms: Environmentally Friendly Design
Summary
/-/https/www.sciencebuddies.org/cdn/Files/17281/8/mushroom-material-planter-and-fruit-bowl.jpg)
/-/https/i.ytimg.com/vi/B937Ox9JNEQ/maxresdefault.jpg)
Introduction
Maybe you have grown vegetables or flowers, but have you ever grown the flowerpot? Yes, you read that right! In this activity, you will use mushroom roots to grow a biodegradable material that can be molded into a product of your liking, like a flowerpot! Growing a set of bowls, a lampshade, or a pot is easier than you might think. Once you try it out, you just might feel inspired to replace some of your plastic objects with ecological counterparts that you created from mushroom roots!
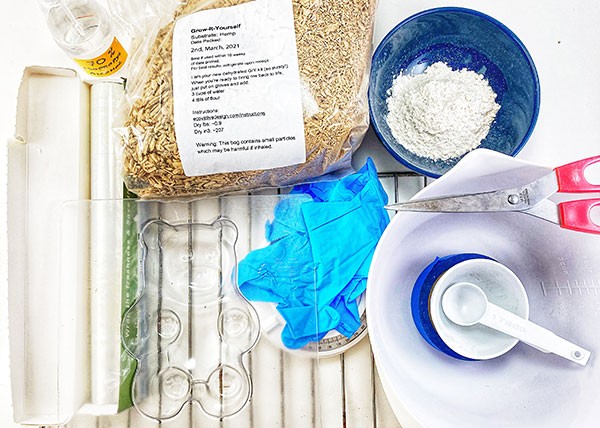
Materials
- Mycelium growing material, like the Grow-It-Yourself Mushroom® material sold by Grow.bio
- Spray bottle of 70% isopropyl alcohol
- Disposable gloves, at least three pairs
- Flour, people with gluten allergies can use maltodextrin as a substitute
- Water
- Measuring spoon
- Measuring cup
- Large bowl
- Scissors
- Clips or tape
- Growing containers. More details on how to select or make growing containers can be found in the Procedure.
- Plastic wrap
- Scale
- Wire rack
- Optional: Oven or fan
/-/https/www.sciencebuddies.org/cdn/Files/17282/8/Mycelium-growth-materials.jpg)
Prep Work
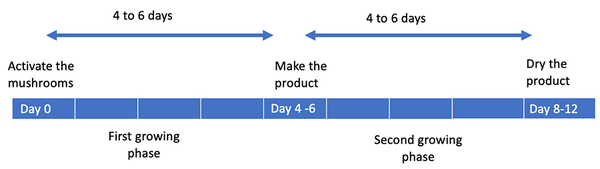
- Plan your project. Growing products out of mushroom roots takes about two weeks. It consists of three major steps, each separated by 4–6 days of growing. Check your calendar to make sure that if you start today, will you have time in 4–6 days to work on your mushroom project, and again 4–6 days after that.
- If you need to postpone work on your mushroom product, place the growing mushroom roots in a plastic bag, add air holes, and store it in the refrigerator. Your mushroom roots will stay alive at refrigerator temperatures, but their growth will slow down drastically.
- Always work in a clean space. The following guidelines will prevent other microorganisms from entering the growth environment:
- Wash your hands, tools, and workspace with soap and water before and after you handle your mushroom project.
- Wear disposable gloves while handling your mushroom project.
- When you are about to start working on your project at each stage, disinfect the tools that will be in contact with the mushroom roots (including the disposable gloves you are wearing) by spraying them with 70% isopropyl alcohol. Let the tools and gloves air-dry before using them.
- Do not touch your mushroom project with bare hands while it is still growing, and do not breathe on it.
/-/https/www.sciencebuddies.org/cdn/Files/17283/11/Mycelium-growing-timeline.png)
Instructions
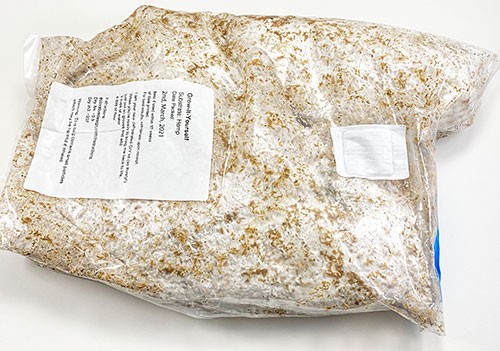
- Follow the instructions that came with your mycelium growing kit to activate the mushroom roots. It will list the following steps:
- Disinfect your workspace, your gloves, and all the tools you will use. Let them air-dry before use.
- To activate the material in the bag, you will need to add a specific amount of water and flour to it. The exact amounts will be listed in the instructions that came with your kit. Mix these ingredients well.
- Carefully cut the top of the bag open.
- Pour the water-flour mixture in the bag with the mushroom material.
- Close the bag with tape or clips.
- Shake the bag well until all of the material in the bag is wet. This will take at least 1 minute of shaking.
- Your bag will probably have a filter patch that allows air exchange with the environment. If you covered the filter patch when you re-closed the bag to shake it up, open the bag and reclose it so nothing is covering the filter patch. If there is no filter patch, make a few small holes in the plastic bag to allow air exchange with the environment.
- Place the bag with the activated material in a spot away from direct sunlight, where it can stay undisturbed for 4–6 days. Room temperature works well; colder temperatures might result in slower mushroom growth.
 What do you think will happen inside the bag? What do you expect to observe that could indicate a change is happening?
- For the next 4–6 days, observe your bag daily.What changes do you observe? Why would these happen?
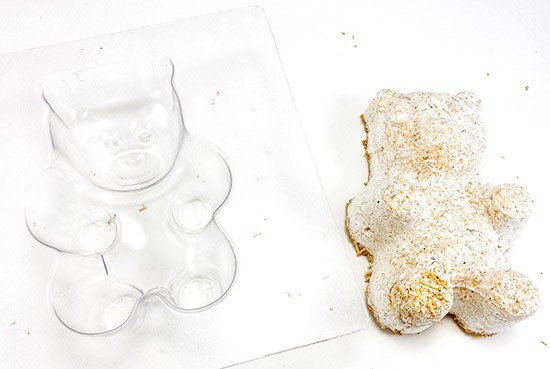
- While you are waiting for your mushroom roots to grow, think of some products you would like to make. Objects with few details, like a fruit bowl, a flowerpot, a lamp shade, or a bird bath, etc. are great for a first product. You can also make a set of bricks, or packaging material, and investigate how well mushroom root material could work for those.
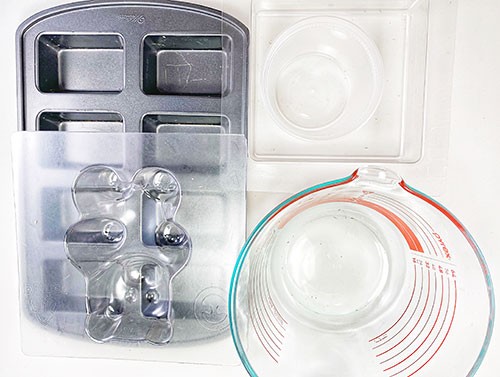
- Select growing containers that will serve as molds for your product, or create your own. A good growing container has the following qualities:
- It is made from non-porous material, like plastic or metal or glass, or covered with a non-porous material like tape or plastic wrap.
- It can hold moisture inside. It is okay to cover a side with plastic wrap to hold moisture inside.
- It has holes to allow air exchange. It is okay to have the holes only on one side; for example, in the plastic wrap that covers the top.
- It allows easy removal of the product once it is ready and grown into one piece. It could consist of two or more parts sticking together, or have a side covered with plastic wrap, or a lid that allows you to remove the product in one piece.
- To make removal easier, we suggest that you create a product with sides that slant outward by 2 degrees or more.
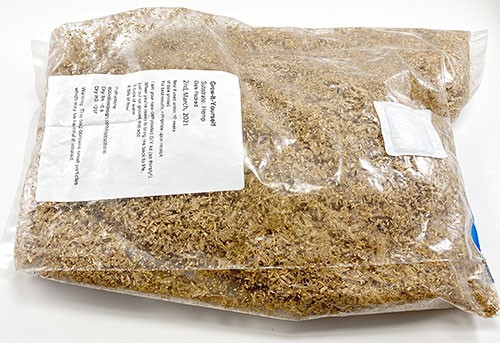
- After four to six days, the contents of your bag should look white, covered with mushroom roots. It is normal to see condensation (water droplets) build up inside the bag.Where do you think the water droplets you see in the bag come from?
- When all of the particles in the bag look white, you are ready to mold it into a product. Follow the instructions that come with your kit to transform your mushroom root material into the product of your choosing. The following steps will be listed:
- Disinfect your workspace, your gloves, and all the tools you will use, including your growing containers. Let them air-dry before use.
- Open your bag of mushroom root material and break it apart, collecting all pieces in a large bowl. The white will disappear as you break the white material apart; that is fine. Keep breaking it up into small pieces.
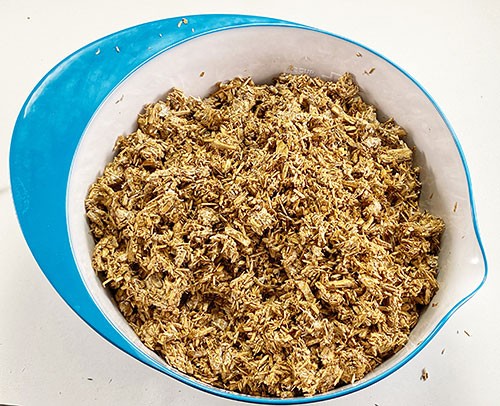
What do you think is holding the initial loose material together?- The instructions for your kit will indicate what to add to your mushroom material at this stage. Usually, it is a specific amount of flour. Mix this thoroughly into the bowl of pieces.
Why do you think you need to add flour?- Pour the mixture into your growing containers and pack it down.
- Cover with plastic wrap or a lid so moisture is kept inside, or place your container in a plastic bag. In our experiments, we noticed that the growing bags with air filters were best at keeping the moisture inside, and thus, allowed for better mushroom root growth.
- Make sure there are air holes. If you need to create air holes, it is okay to have them only on one side, such as in the lid of your growing container. Space them about 1 inch apart.
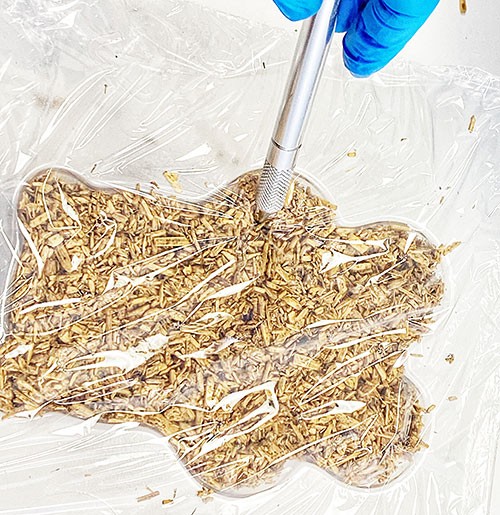
Do you think it is important to keep moisture inside and allow air exchange? Why do you think so?- Place the filled growing containers in a spot away from direct sunlight where they can stay undisturbed for 4–6 days. Room temperature works well; colder temperatures might result in slower mushroom growth.
What do you think will happen inside the growing containers now? - Observe the changes in your growing containers daily.What do you think is happening in the growing containers?
- After 4–6 days, the contents in your growing containers should look white, covered with mushroom roots. You are ready to finish the product!How do you think you can stop the mushroom root growth?
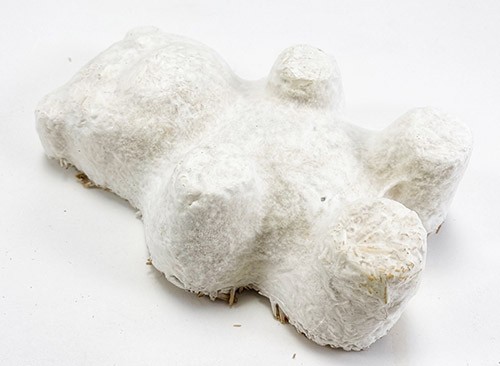
- Carefully remove the product from the growing container.
- Follow the steps below to stop the mushroom root growth:
- Weigh your products and write down the initial mass of each of your creations.
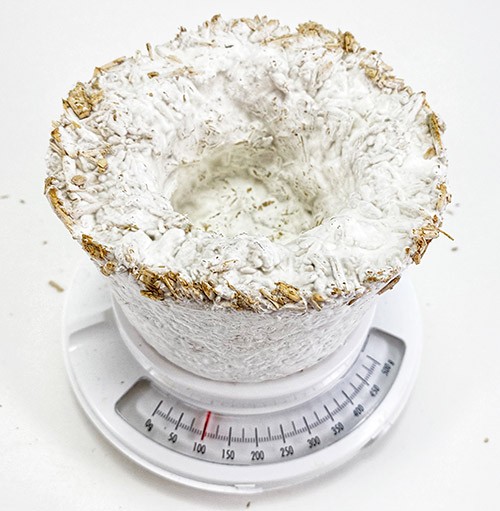
- Place your products on a wire rack in a well-ventilated area. If you do not have a wire rack, remember to turn them on a different side every few hours so all sides can dry.
- Leave your products out for 1–2 days. Increasing the air circulation by opening up windows, adding a fan, etc. can speed up the process.
What do you think is happening during this time?- Optional: Finish the drying process by placing your products in an oven preheated to 200° F (93° C ) for 30 min.
Why would you still want to bake your products? Would air-dried products be different from baked ones?- Let your products cool, preferably on a wire rack.
- Weigh your products again. Each dried product's mass should be about 1/3 of its mass before drying.
Why do you think the mass of each product decreased so much?
- Weigh your products and write down the initial mass of each of your creations.
- Test the material properties of your eco-friendly mushroom products!Are your products waterproof? Do they sink or float in water? Are they soft and spongy, or firm? Would they be good shock absorbers? What other qualities could you test?
- Optional: Paint or decorate your products.

/-/https/www.sciencebuddies.org/cdn/Files/17284/11/Mycelium-kit-activated.jpg)
/-/https/www.sciencebuddies.org/cdn/Files/17285/8/Mycelium-growing-containers.jpg)
/-/https/www.sciencebuddies.org/cdn/Files/17286/11/Mycelium-after-first-growth.jpg)
/-/https/www.sciencebuddies.org/cdn/Files/17287/8/Mycelium-pieces-after-growth-1.jpg)
/-/https/www.sciencebuddies.org/cdn/Files/17288/8/add-airholed-for-mycelium-growth.jpg)
/-/https/www.sciencebuddies.org/cdn/Files/17289/8/bear-product-and-mold.jpg)
/-/https/www.sciencebuddies.org/cdn/Files/17290/9/Mycelium-pot-on-scale-before-drying.jpg)
/-/https/www.sciencebuddies.org/cdn/Files/17291/8/weighing-pot-after-drying.jpg)
/-/https/www.sciencebuddies.org/cdn/Files/17292/8/mushroom-material-planter-and-fruit-bowl.jpg)
Cleanup
What Happened?
The mycelium growing kit contains a bag with organic material and dormant (meaning temporarily inactive) mushroom roots. Adding flour and water activates the mushroom roots. Water creates the moist environment they need to grow, they consume flour as food, and the room temperature allows for quick growth.
Living mushroom roots breathe. They inhale oxygen and exhale carbon dioxide and water. That is why it is important to allow air exchange with the environment, and why you see water droplets accumulate on the inside of the bag. The organic material turns white as it becomes covered with mushroom roots.
/-/https/www.sciencebuddies.org/cdn/Files/17293/8/Mycelium-detail.jpg)
When you open your bag after the initial growth, you can feel how the mushroom roots hold these particles together; they act like glue. When you break these initial mushroom root bonds, you damage and stress the mushroom roots. After adding flour as additional food, and molding the material into a growing container, the mushroom roots recover and create stronger bonds; they act like a stronger glue.
/-/https/www.sciencebuddies.org/cdn/Files/17294/8/mycelium-bear.jpg)
Finally, once the mushroom roots have regrown and filled the gaps between the organic material, you let the mushroom product dry out. This stopped the growth. You can keep this as a final product, or bake it at 200° F to kill the mushroom roots inside the product.
These products are ideal as eco-friendly alternatives for plastic and polystyrene foam. They are sturdy, lightweight, and give a little when pressed, and the baked products are also waterproof. They are created from organic waste like wood chips, mushroom roots, and a little bit of flour; thus, they can decompose without leaving any toxic material behind.
Digging Deeper
Mushrooms are part of the kingdom of fungi. They differ from plants and animals in the way they obtain energy and nutrients. Plants, in general, use the Sun's energy to create food through photosynthesis. Animals eat and digest food inside their bodies to extract the nutrients and energy. Fungi do neither; their roots (called mycelium) grow around food, secrete chemicals to break down the food, and then absorb the nutrients. Mushrooms are the fruit of these fungi.
Mushrooms contain the spores that allow the fungus to reproduce. The larger part of the fungus is the root system, the mycelium. It is a network of strong bonds, that, when grown in molds around biological waste like wood chips, can create strong, lightweight, eco-friendly products.
Products made from mushroom roots are all eco-friendly. To start, the resources used to create the product are non-toxic and easy to obtain. In this project, you probably used wood chips inoculated with mycelium, some water, and some flour. In addition, the process does not create wasteful byproducts, nor does it use an excessive amount of energy. Finally, the product is biodegradable; it can decompose and the nutrients stored in the product can enter the cycle of life again. An interesting characteristic of air-dried mushroom products it that they can regrow when placed in the right conditions. When done right, they could restore themselves!
Because the mushroom material can be grown so it has similar characteristics as polystyrene foam—a foam that is taxing on the environment—the hope of some producers is to replace all polystyrene foam with mushroom products. Other uses are being explored as well; textiles and building material are two examples.
/-/https/www.sciencebuddies.org/cdn/Files/17295/9/mushroom-material-as-packaging-material.jpg)
Ask an Expert
For Further Exploration
- In this activity, you let the product completely develop in the growing container. You could also take the product out of its growing container on day 4 of the second growing period, mold it further by hand or with tools, and let the mushroom roots grow for another 3 days in a plastic bag before moving to the drying stage. This last growth can also be used to add a smooth white out layer.
- Make a product by growing together two partially finished products. Before drying the products out, place them together and let the mushroom roots 'glue' them together. Explore how strong these two products are bonded together by mushroom roots.
- Explore what is needed to re-initiate growth in an air-dried mushroom product.
/-/https/www.sciencebuddies.org/cdn/Files/17296/8/finished-mushroom-bear.jpg)
/-/https/careerdiscovery.sciencebuddies.org/cdn/Files/1429/17/unsplash-4pM4nhHyo9M.jpg)
/-/https/careerdiscovery.sciencebuddies.org/cdn/Files/20218/6/EnvEng_KeyPhoto.jpg)
/-/https/img.youtube.com/vi/ZWJfIdZOpP4/0.jpg)
/-/https/img.youtube.com/vi/NF_nanpcQ9c/0.jpg)
/-/https/img.youtube.com/vi/_uruQS6EJyI/0.jpg)