Summary
/-/https/www.sciencebuddies.org/cdn/Files/12883/5/sunprint-feather-detail.jpg)
/-/https/www.sciencebuddies.org/cdn/Files/12884/5/sunprint-one-feather.jpg)
Introduction
Have you ever wondered how artists are able to replicate intricate details in nature on paper or canvas? In this activity, you will depict these details in a different way! Using Sunprint® paper and sunlight, you too can make breathtaking representations of objects found in nature.
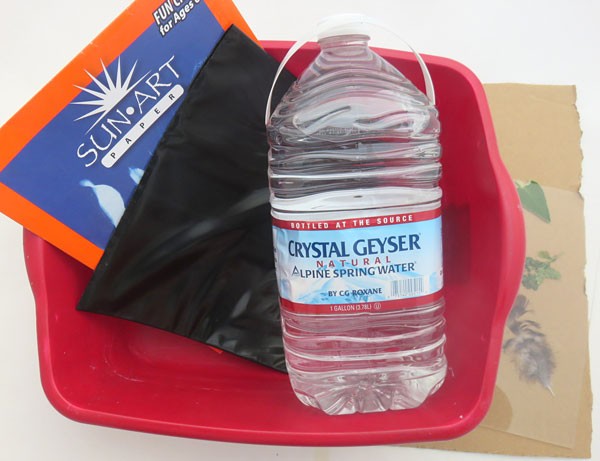
Materials
- Sunprint paper
- Cardboard, clipboard, or other hard surface
- Objects from nature
- Plastic cover sheet
- Bucket or large container
- Water
/-/https/www.sciencebuddies.org/cdn/Files/12885/6/sunprint-materials.jpg)
Prep Work
- Note: Leave the Sunprint paper in its protective bag until you have collected all your materials and are ready to make a print. Exposure to light will interfere with the paper's ability to make a print.
- Collect objects from nature that you would like to make a print with. Keep the size of your Sunprint paper in mind as you select objects. Leaves, twigs, flowers, and feathers are great choices.
- Prepare a bucket of water to rinse the Sunprint paper with after it has been exposed to the sun.
Instructions
- Look for a shaded area to prepare your print. Take the Sunprint paper out of its protective bag and place it blue-side up on the cardboard or other hard surface. Place the objects you selected onto the Sunprint paper, and finish by adding the plastic cover sheet on top. The plastic sheet is not necessary, but helps keep your objects in place.
- Move the stack (cardboard, Sunprint paper, and plastic sheet) so it is fully exposed to the sun. Watch what happens!
 Do you see the paper change in any way?
 - Wait until the paper turns very light blue. On a sunny day, this will take a couple of minutes. On a cloudy day, this can take up to several hours.
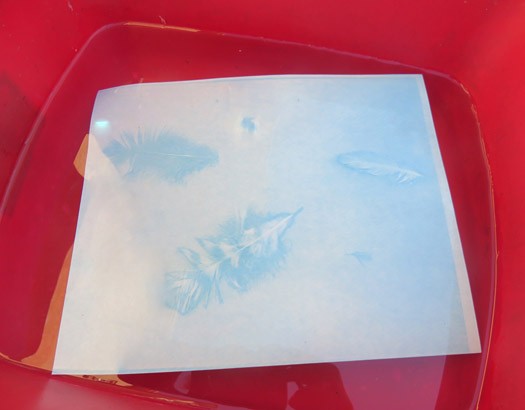
- Once the Sunprint paper has changed color, remove the plastic sheet and objects from it and have a quick look.Do you see a print of the objects on the paper? What color are the areas that did not receive sunlight? Why would this be?
- Rinse the Sunprint paper in water for about one minute.Do you see the color of the paper change? Why would that happen?
- Lay the Sunprint paper flat on a hard surface to dry. This takes a little while. Observe every 15 minutes until the paper is dry.How does the paper change while it dries? Do the prints become more distinct and details more noticeable? Why would this happen?
- Repeat the procedure, choosing different objects. Choose a flat object so you can use the plastic protective sheet for this print. Leave your cardboard, Sunprint paper, and plastic sheet stack in the shade for a while and observe what happens.Do you see the color of the Sunprint paper change? Does it change as rapidly it did in your first print? Why would this be the case?
- Move your cardboard, Sunprint paper, plastic sheet sandwich to a sunny spot if needed.Does the color change speed up once the Sunprint paper is exposed to direct sunlight?
- After your Sunprint has dried completely, you can flatten the print by placing it under a heavy book for a couple of days.
/-/https/www.sciencebuddies.org/cdn/Files/12886/5/sunprint-sandwich.jpg)
/-/https/www.sciencebuddies.org/cdn/Files/12887/5/sunprint-exposed.jpg)
/-/https/www.sciencebuddies.org/cdn/Files/12888/6/rinse-sunprint.jpg)
What Happened?
Sunprint paper contains a bluish-green, light-sensitive chemical. Exposure to light turns this chemical into a different chemical. You could see this happen as you watched the areas of the paper that were exposed to the sun turn lighter. If there was an object blocking the sunlight, the paper under the object did not change color. When you were ready to rinse the paper, you probably saw a bluish-green print of the object on a very light blue background.
/-/https/www.sciencebuddies.org/cdn/Files/12889/5/sunprint-stage-1.jpg)
Rinsing the paper in water washes all the remaining light sensitive bluish-green chemical off the paper, so the print loses its color. Because the chemical it turns into does not dissolve in water, it stays fixed on the paper. After rinsing, it gradually turns blue as a result of a chemical reaction.
Before you know it, you are left with a beautiful Sunprint!
Digging Deeper
There are two steps to making a Sunprint: exposing the paper to light, and setting the print by rinsing it in water.
Sunprint paper is soaked with a light-sensitive chemical called Berlin green. When light hits this chemical, it causes a light-activated chemical reaction, which turns the Berlin green chemical into a different chemical. Because light-activated chemical reactions require exposure to light, the reaction can only occur in areas that received light. Opaque objects (objects that do not allow light to pass through) cast a shadow on the paper, preventing the chemical reaction in these areas. At the end of the exposure step, you have a pale blue piece of paper with blue-green images.
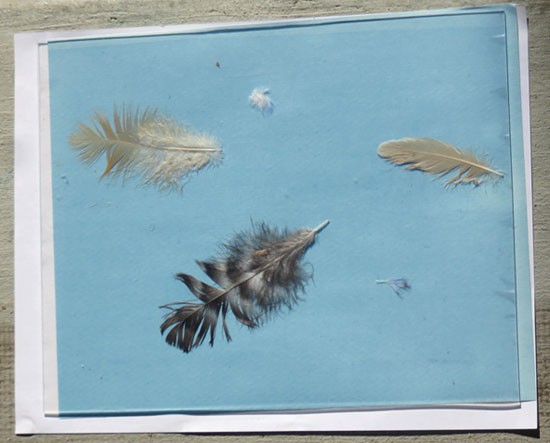
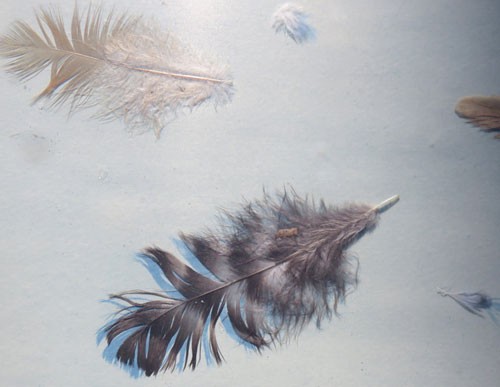
Sunprint paper needs to be rinsed in water to fix the print. This works because the light-sensitive chemical Berlin green is water-soluble (meaning it dissolves in water), so it washes away when the paper is soaked in water. The chemical it turns into is insoluble in water (meaning it does not dissolve in water), so it remains on the paper when rinsed. Somewhere along the process, a chemical called Prussian blue is created. It is responsible for the intense blue background color that starts to appear as soon as you rinse the paper. The result is a piece of artwork where the areas shaded by objects you selected from nature form light images on a blue background.
/-/https/www.sciencebuddies.org/cdn/Files/12890/5/sunprint-three-feathers.jpg)
Ask an Expert
For Further Exploration
- Try to make a Sunprint inside with artificial light.
- As shown in this activity, water can split sunlight into all the colors of a rainbow. Try to make a rainbow fall onto the Sunprint paper and observe if all color(s) of light are able to initiate the chemical reaction and from Sunprint images.
- Is ultraviolet light required for the Sunprint reaction? Use clear items that block ultraviolet light, such as most windows in cars, to test this. You can also see if sunscreen on the plastic protective sheet allows an image to form.
Related Resources
Project Ideas
/-/https/www.sciencebuddies.org/cdn/Files/3906/10/Chem_img073.jpg)
Activities
/-/https/www.sciencebuddies.org/cdn/Files/6150/8/fireworks-colors.jpg)
/-/https/www.sciencebuddies.org/cdn/Files/12719/6/fresco-example-thumbnail.jpg)
Links
- Blog Post: Finger Paint Fractals
/-/https/careerdiscovery.sciencebuddies.org/cdn/Files/1107/19/pexels-photo-3938023.jpg)
/-/https/careerdiscovery.sciencebuddies.org/cdn/Files/1429/17/unsplash-4pM4nhHyo9M.jpg)
/-/https/careerdiscovery.sciencebuddies.org/cdn/Files/1100/18/unsplash-NP6JLl_2C-c.jpg)
/-/https/img.youtube.com/vi/lgMg3W0jG2o/0.jpg)
/-/https/img.youtube.com/vi/tSsKYdh9_7w/0.jpg)
/-/https/img.youtube.com/vi/gCBo4t8inAQ/0.jpg)