Build a Water Sprinkler Toy
Summary
/-/https/www.sciencebuddies.org/cdn/Files/15296/6/water-sprinkler-chicken-thumbnail.jpg)
/-/https/i.ytimg.com/vi/dZhmcai85Y0/maxresdefault.jpg)
Introduction
Do you enjoy playing with water? Have you ever considered building a water sprinkler toy? It is easier than it looks!
Get some PVC pipes, a few connectors, and a backyard water hose, then drill a few holes and start connecting! What will be your most creative and most fun design?
Materials
- 1/2" PVC pipe, 25 ft or more
- PVC pipe connectors. Since you will make your own design, we cannot give you exact numbers. Make sure to get "slip" or "socket" connectors (the kind where you just push in the pipe) instead of threaded. Start with a few of each of the following:
- Garden hose
- 1/2" PVC hose adapter. A 1/2" Slip PVC x 3/4" Female Thread Garden Hose to Pipe Fitting works for most garden hoses.
- Permanent marker
- Drill with 1/8" drill bit
- Pen and pencil
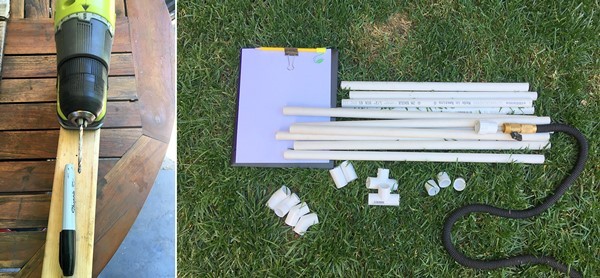
/-/https/www.sciencebuddies.org/cdn/Files/15297/6/materials-tools-waterpark-activity.jpg)
Disclaimer: Science Buddies participates in affiliate programs with Home Science Tools®, Amazon.com, Carolina Biological, and Jameco Electronics. Proceeds from the affiliate programs help support Science Buddies, a 501(c)(3) public charity, and keep our resources free for everyone. Our top priority is student learning. If you have any comments (positive or negative) related to purchases you've made for science projects from recommendations on our site, please let us know. Write to us at [email protected].
Instructions
- Brainstorm and sketch a design for your water sprinkler toy. Think about how it will stay upright, how tall it should be, and where you want the water to spray out.
- If you have already purchased your materials, make sure your design does not require more materials than you have (for example, do not draw something that requires 10 elbow connectors if you only have 5).
- If you did not purchase materials yet, make a list of how many of each part you will need in order to build your design.
 Once you are done drawing, look at your design and evaluate it. Will the structure stay upright? Will it be possible to build it with sections of straight PVC pipe and the connectors that you (will) have?
 - Your design might include curves. It is difficult to bend sections of PVC pipe unless they are very long, so it is better to use short sections of straight pipe and angle pieces instead of trying to bend the pipes.
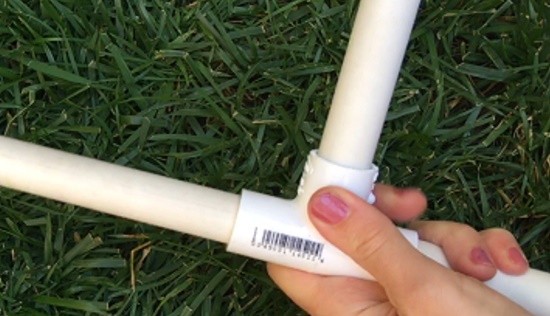
- Start building your structure. You can connect PVC pipe sections by firmly pressing them into the connectors. You can make changes to your design when you need or want to. Pipe sections can easily be pulled out of the connectors. If you have trouble removing a pipe, try twisting it back and forth as you pull.Can you make something that can stand up on its own?

- Keep changing until you find a design that can stand upright on its own.
- Test if it still stays upright when you push it gently (think about what could happen if you have it outside on a windy day, when water starts flowing through it, or when someone bumps into it). If it falls, think about how you can make it more stable.
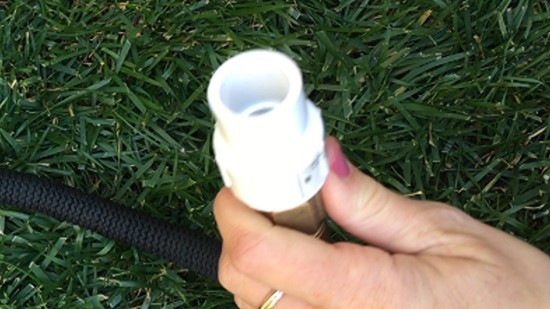
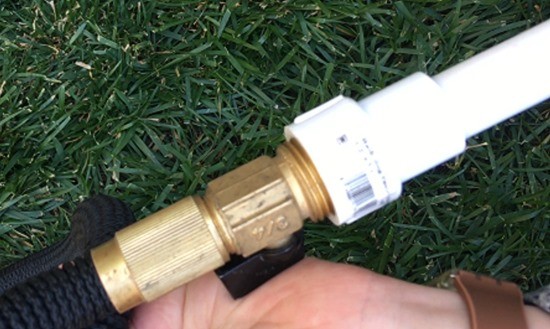
- To connect your structure to the hose, first screw the 1/2" hose adapter onto the hose. Then, press the other end of the adapter onto a pipe.
- Place caps on all the open ends of your structure.Why would it be important to close all the open ends of the pipes?
- Use a permanent marker to indicate where you want the water to squirt out of the pipe.How far apart do you want the water to emerge from the pipe? Do you want the water to squirt up, down, or to the sides?
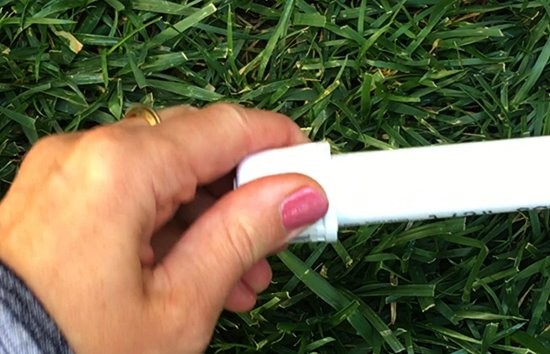
- One at a time, remove a pipe that needs holes.
- For the next step, ask an adult to help or supervise you while you operate the drill.
- Drill holes in the pipe. Start with a few holes. It is always easy to add more holes, but difficult to remove holes. It is okay if you accidentally drill through both sides of the pipe, and you might even like that effect.

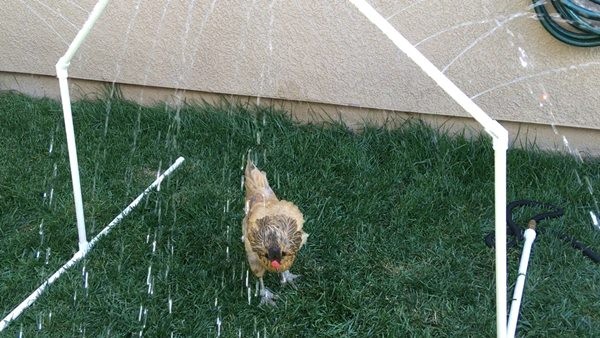
- Place the pipe back in the structure, turn on the water, and see what happens!What happens? Does water squirt out of the holes you drilled?
- If little or no water reaches the holes you drilled, first disconnect your hose and make sure that the spigot is working. Next, reconnect the hose and look for leaks. Check the connections between the spigot and the garden hose, the garden hose and the PVC pipe structure, and also between the pipes and connectors in the structure itself (including the end caps or missing end caps). If you find a leak, turn off the water and fix the connection to make it tighter, then try again. Repeat this process until water only flows out through the drilled holes. Ask an adult if you need help fixing leaky connections.Why is it important that water does not leak out in places other than the intended holes?
- Look at the water spraying out of the holes. Partially close the spigot, then open it fully.How does this change the streams of water spraying out?
- Make a mental note of how far the streams of water shoot out when you turn the spigot fully open.
- Turn the water off, turn the PVC pipe so the holes face a different direction, and turn it on again.How does this alter the water spraying out?
- Repeat steps 8–12 as often as you need to.Feel how hard the streams shoot out with the spigot fully open. What happens to the streams of water as you add more and more holes? Why do you think this happens?
/-/https/www.sciencebuddies.org/cdn/Files/15298/7/pipes-connected-with-Tee.jpg)
/-/https/www.sciencebuddies.org/cdn/Files/15299/6/pipes-connected-with-elbow.jpg)
/-/https/www.sciencebuddies.org/cdn/Files/15300/7/hose-with-adapter.jpg)
/-/https/www.sciencebuddies.org/cdn/Files/15301/6/hose-adapter-pipe.jpg)
/-/https/www.sciencebuddies.org/cdn/Files/15302/5/add-cap-PVC-pipe.jpg)
/-/https/www.sciencebuddies.org/cdn/Files/15303/5/drill-holes-for-sprinkler-toy.jpg)
/-/https/www.sciencebuddies.org/cdn/Files/15295/6/sprinkler-with-chicken.jpg)
What Happened?
Did you notice that the streams of water became stronger when you let more water in, and weaker as more holes were added to the pipes? This is expected.
When you turn on the water, it flows into the hose and pipes and the drilled holes are the only way out. Initially, water enters the system faster than it leaves it, so water builds up within the pipes until they are full. It pushes in all directions so that the water near the hole is pushed out. When you turn the water on more fully, you add water with more pressure to the system of pipes, and as a result, the water is pushed out of the hole with more pressure. You see this as streams of water that reach farther and feel stronger. On the other hand, when more holes are added to the system, water can drain from the pipes faster. This releases the pressure faster and the streams become less intense.
Digging Deeper
Water in the plumbing system is kept under pressure, usually from a private well or a public water system. This means that it presses against all the water around it, the inner walls of the pipes, and everything it encounters. Whenever there is an area of less pressure, like an open faucet or a hole, this pressure will push the water out. The farther you turn your faucet open, the higher the pressure of the water stream. Put your hand in the stream and you will feel the water pressure.
For the sprinkler toy, you connect the hose to a system of pipes. When there is no way for the water to escape, the water will eventually fill up the pipes and the water pressure will be equal throughout the pipes. If there are holes in the pipes (like in your sprinkler toy), the water will be pushed out through these holes, and the higher the pressure in the pipes, the more pressurized these streams will be. If there is only a single, small hole, it is harder for the water to escape, so the pressure inside the pipes stays high. This results in a single, intense stream of water. As you add more holes (or make bigger holes), it becomes easier for the water to escape. The pressure inside the pipes drops, and you have more streams of water but they are softer. This means there is a trade-off in your sprinkler design. If you add too many holes or make them too large, the water may only trickle out instead of coming out in streams.
Ask an Expert
For Further Exploration
- Take your structure apart and build a different one. How many different structures can you build with the pieces you have?
- Test what happens when you drill smaller or larger holes in the pipes.
/-/https/www.sciencebuddies.org/cdn/Files/15722/4/rocket-blastoff-thumbnail.jpg)
/-/https/www.sciencebuddies.org/cdn/Files/14315/7/colorful-bottles-with-holes.jpg)
/-/https/www.sciencebuddies.org/cdn/Files/13014/5/block-tower-thumbnail-img.jpg)
/-/https/www.sciencebuddies.org/cdn/Files/12741/5/geodesic-dome-gumdrops-thumbnail.jpg)
/-/https/careerdiscovery.sciencebuddies.org/cdn/Files/1450/21/iStock-1227179796.jpg)
/-/https/careerdiscovery.sciencebuddies.org/cdn/Files/1876/20/iStock-1188858196.jpg)
/-/https/careerdiscovery.sciencebuddies.org/cdn/Files/1457/17/pexels-photo-3861938.jpg)
/-/https/careerdiscovery.sciencebuddies.org/cdn/Files/17365/4/manufacturing-technician-main-Stock-1140837585.jpg)
/-/https/img.youtube.com/vi/u3LdI00902o/0.jpg)
/-/https/img.youtube.com/vi/G7gvJEKh_p8/0.jpg)
/-/https/img.youtube.com/vi/bH5WaKM3A8A/0.jpg)