Abstract
Robotic arms have many uses, ranging from assembling things in factories to collecting soil samples on Mars to acting as prosthetics (artificial limbs) for humans. If you have ever wanted to build your own robotic arm, this project will guide you through the basics of designing and building a simple one. You can use this design as a starting point to design your own robotic arm and add your own features.
Summary
Previous experience with Arduino is recommended. You can follow the tutorials on our How to Use an Arduino page before trying this project.
A kit is available from our partner Home Science Tools®. See the Materials section for details.
No issues
/-/https/i.ytimg.com/vi/2MOFAHGUGps/maxresdefault.jpg)
Objective
Design and build your own working robotic arm.
Introduction
While we sometimes take them for granted, human arms and hands are pretty amazing. We can use them for tasks that require a lot of speed and strength, like swinging a baseball bat, and for tasks that require careful precision, like sewing with a needle. Building a robotic arm with all the dexterity and versatility of the human arm is a pretty difficult task! However, sometimes robots can be better at certain tasks than humans—like repeating the exact same motion over and over again. Robots do not get tired! This is why robotic arms like the one in Figure 1 are frequently used in factory assembly lines to perform repetitive tasks with high precision.
/-/https/www.sciencebuddies.org/cdn/Files/19583/10/robotic-arm.jpg)
Robotic arms are also useful in places humans cannot easily or safely go, like space. The Canadarm (Figure 2) was mounted on the outside of the Space Shuttle to assist with various tasks like deploying satellites. Mars rovers like Perseverance use robotic arms for scientific tasks like analyzing Martian soil (Figure 3). Robotic arms can also be used as prosthetics, or artificial limbs for people (Figure 4).
/-/https/www.sciencebuddies.org/cdn/Files/19584/10/canadarm.jpg)
/-/https/www.sciencebuddies.org/cdn/Files/19585/10/optimism-soil-sensor.jpg)
Figure 3. A replica of the Perseverance rover (named Optimism) using its robotic arm to collect soil samples on Earth.
/-/https/www.sciencebuddies.org/cdn/Files/19586/10/prosthetic-arm-side.jpg)
Figure 4. An amputee wearing a prosthetic forearm.
As you can see, there are many different types of robotic arms with different purposes. Robotic arms can have different numbers of degrees of freedom, or independent motions. The procedure of this project will show you how to build a basic robotic arm using an Arduino and servo motors (Figure 5). You can learn more about servo motors using the resources in the Bibliography.
As demonstrated in the video, this arm has three degrees of freedom: one to rotate the arm horizontally, one to rotate the arm vertically, and one to control the gripper. This gives the arm a somewhat limited range of motion. It can only move in an arc, and the gripper cannot rotate because it has no "wrist" joint. This would be like if you wore braces on your arm that prevented you from rotating your elbow or wrist.
/-/https/www.sciencebuddies.org/cdn/Files/19587/10/popsicle-stick-robot-arm.jpg)
Figure 5. A robotic arm made with an Arduino, servo motors, and popsicle sticks.
If you plan to enter a science fair, you should not simply copy our basic design. You should follow the engineering design process to design and build your own robotic arm, using the information we have provided as a guide. Before you continue, you should do more background research on different types of robotic arms and their uses (there are many more than we have shown in this introduction!), and think about what type of robotic arm you want to build.
Terms and Concepts
- Robotic arm
- Prosthetics
- Degree of freedom
- Arduino
- Servo motor
- Engineering design process
Questions
- What are some different types of robotic arms?
- What are some different uses for robotic arms?
- What type of robotic arm do you want to build, and what will you use it for?
Bibliography
- Science Buddies staff (n.d.). How to Use an Arduino. Retrieved March 31, 2023.
- Science Buddies staff (n.d.). Introduction to Servo Motors. Retrieved March 31, 2023.
- Science Buddies staff (n.d.). The Engineering Design Process. Retrieved March 31, 2023.
Materials and Equipment 
Recommended Project Supplies
/-/https/www.sciencebuddies.org/cdn/Files/19915/12/SB_ARDNSTR_web__01473.jpg)
Note: this is an engineering design project. The list of materials below shows what you need to build the example robotic arm in this procedure. However, if you plan to enter a science fair, you should add features or design your own arm, not just copy our design. This will require additional materials, so you should come up with a design and parts list for your arm before you start buying materials. See the beginning of the Procedure to get started.
- Electronics:
-
Electronics Kit for Arduino, available from our partner Home Science Tools®.
- Note: This project will work with the Arduino UNO R3, UNO R4 Minima, UNO R4 WiFi, and compatible third-party boards.
- Servo motors (not included in the kit). How many you need will depend on the design for your arm.
- The Science Buddies kit contains two buttons, two switches, and one potentiometer. You may need additional inputs to control your arm, such as:
-
Electronics Kit for Arduino, available from our partner Home Science Tools®.
- Windows or Mac computer. See this page if you have a Chromebook. Your computer will need:
- Access to the Arduino IDE, either installed local version or web-based editor (note that Chromebooks can only use the web version). Watch this video for a comparison of the two options.
- USB port. The Science Buddies kit comes with a USB-A to B cable. The "B" end plugs into the Arduino and the "A" end plugs into your computer. You will need an adapter or different cable if your computer only has USB-C ports. Watch this video to learn about the different types of cables and adapters.
- Materials to build the structure of your arm, such as:
- Cardboard
- Popsicle sticks
- Double-sided foam tape
- Hot glue
- Zip ties or twist ties
- Lab notebook
Disclaimer: Science Buddies participates in affiliate programs with Home Science Tools®, Amazon.com, Carolina Biological, and Jameco Electronics. Proceeds from the affiliate programs help support Science Buddies, a 501(c)(3) public charity, and keep our resources free for everyone. Our top priority is student learning. If you have any comments (positive or negative) related to purchases you've made for science projects from recommendations on our site, please let us know. Write to us at [email protected].
Experimental Procedure
- Before you start building anything, you should come up with a design for your robotic arm. Try to answer the following questions (this is not an exhaustive list):
- What do you want to use your arm for?
- What objects will the arm need to pick up?
- How big will you want your arm to be? Will you need to order larger motors than the ones linked in the materials section?
- How can you design a gripper to pick up those objects?
- What will the arm do with the objects once it has picked them up?
- How many degrees of freedom does your arm need in order to accomplish this task? In other words, how many motors do you need for the required motions?
- How will you control the arm (buttons, potentiometers, etc)? Will you use the same type of control for each motor?
- Draw a sketch of your arm. You do not necessarily have to stick with this design. You might need to change it later, and that is OK. The engineering design process is iterative, meaning you might go through multiple designs before you arrive at your final product. Figure 6 shows an example sketch of the arm in this project. You should also think about what materials you will use to build the arm. The example arm in this procedure uses popsicle sticks and double-sided foam tape. This works for a simple arm, but is not very sturdy and cannot lift heavy objects. You will need sturdier materials and connection methods if you want to build a more heavy-duty arm.

Figure 6. A hand-drawn sketch of the robotic arm design. Each motor's axis of rotation is shown with a dashed line. - Make a complete materials list for all the parts you will need to build your arm. It can take at least a few days for parts that you order online to arrive, so it will delay your project if you have to order more parts later. Carefully go over the materials list and make sure you are not missing any parts before you place your order.
- Once you have your parts, you can start to build and test your circuit before you build the physical structure of your arm. Your exact circuit will depend on how many servo motors your arm has and what inputs you use to control them. Figure 7 shows a circuit which three motors, each of which is controlled by two buttons (one to rotate the motor in each direction, so six total). When wiring your breadboard, keep in mind that you will need physical access to the controls, so you do not want to obscure the buttons under other wires.
Here is a list of connections in this circuit. Note that servo motors from different manufacturers may have different conventions for their color-coding.
- Servo 1
- Orange wire to Arduino pin 10
- Red wire to 5V
- Brown wire to ground
- Servo 2
- Orange wire to Arduino pin 7
- Red wire to 5V
- Brown wire to ground
- Servo 3
- Orange wire to Arduino pin 4
- Red wire to 5V
- Brown wire to ground
- Button 1A
- One contact to Arduino pin 9
- Other contact to ground
- Button 1B
- One contact to Arduino pin 8
- Other contact to ground
- Button 2A
- One contact to Arduino pin 6
- Other contact to ground
- Button 2B
- One contact to Arduino pin 5
- Other contact to ground
- Button 3A
- One contact to Arduino pin 3
- Other contact to ground
- Button 3B
- One contact to Arduino pin 2
- Other contact to ground

Figure 7. Breadboard diagram to control three servo motors with two buttons each. Click here for a larger version of the diagram. Image generated with Tinkercad. - Servo 1
- This example code will control the servos with the buttons if you build the circuit shown in Figure 7. You can also see a Tinkercad simulation of the circuit here. You may wish to add more features to your code, like limiting the range of certain motors (which defaults to 0–180°). For example, the gripper in Figure 6 does not need to rotate a full 180°. If you use other inputs (like potentiometers or joysticks) or additional motors, you will need to modify the code accordingly. See our How to Use an Arduino for tutorials about potentiometers and joysticks.
- Test that your code, inputs, and motors are all working before you start building the physical structure for your arm. It will be easier to solve these problems now and re-wire things if necessary than after you have started building the arm.
- Build the physical structure for your arm. There are several things to consider when building:
- How will you attach the motors to each other, the base, and other parts (like popsicle sticks)? Double-sided foam tape works for this purpose (Figure 8), but is not very sturdy. It might not be strong enough to support the weight of the entire arm, especially if you plan to add more motors. Note that the servo motors have holes on the sides that you can use to attach them to something (like a piece of wood or 3D-printed mounting bracket) using screws or bolts.
- How will you manage all the wires? You do not want the arm to get tangled in the wires as it tries to move around, and you do not want the wires to be too tight and limit the arm's range of motion. Zip ties or twist ties are useful for organizing the wires (Figure 9).
- Think about your gripper design. The gripper in this project is just made from two flat popsicle sticks (Figure 10). Can you design a gripper with more friction or a better shape for picking up your target objects?
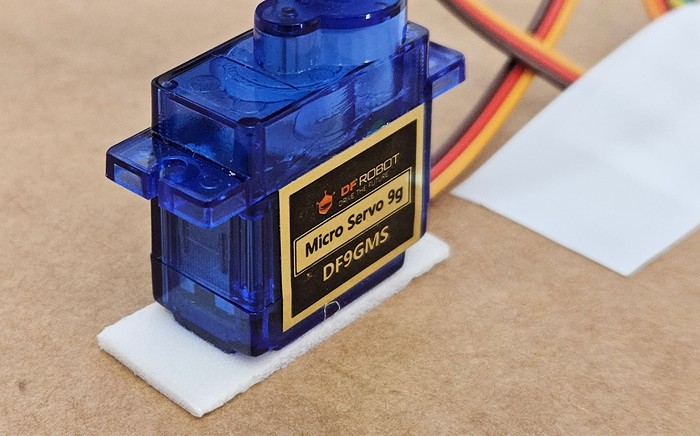
Figure 8. Motor taped to a cardboard base with double-sided foam tape.
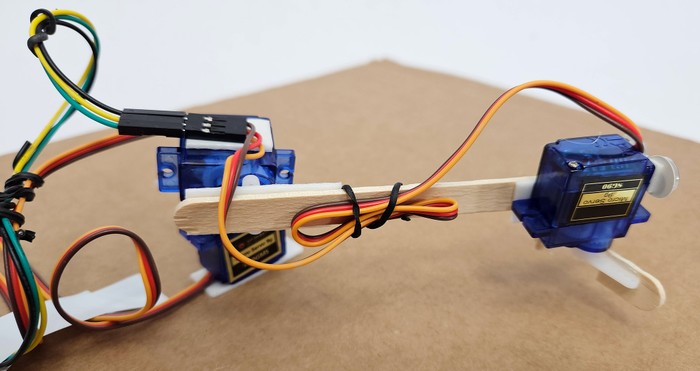
Figure 9. Servo motor wires held in place with a twist tie.

Figure 10. Close-up picture of the gripper made from two popsicle stick ends. - After you have finished building, test your arm's range of motion before you try lifting and manipulating objects. Can all the motors move through their full range without getting stuck or anything on the arm breaking? Do you need to repair anything or change something about your design?
- After you have tested your arm's range of motion, try lifting and manipulating objects. What exactly you do here will depend on your original goal for your arm (for example, picking something up and placing it in a cup). Experiment with using the arm. Does the gripper do a good job grabbing the objects? Is the arm easy to control using the controls you have designed? Is it too fast? Too slow? What could you change about your code or your arm design to make it easier to use or improve its performance?
- Continue iterating and improving your robotic arm until you are satisfied with its performance. See the Variations section for even more ideas about what you can do with your robotic arm.
/-/https/www.sciencebuddies.org/cdn/Files/19588/8/robotic-arm-sketch.png)
/-/https/www.sciencebuddies.org/cdn/Files/19589/8/three-servo-breadboard-diagram-labeled.png)
/-/https/www.sciencebuddies.org/cdn/Files/19590/10/servo-foam-tape.jpg)
/-/https/www.sciencebuddies.org/cdn/Files/19591/10/servo-cables-twist-ties.jpg)
/-/https/www.sciencebuddies.org/cdn/Files/19592/10/robot-arm-gripper.jpg)
Ask an Expert
Global Goals
The United Nations Sustainable Development Goals (UNSDGs) are a blueprint to achieve a better and more sustainable future for all.
/-/https/www.sciencebuddies.org/cdn/Files/19746/5/E-WEB-Goal-03.png)
/-/https/www.sciencebuddies.org/cdn/Files/19752/5/E-WEB-Goal-09.png)
Variations
- The robotic arm you built in this project is controlled manually using inputs like buttons, potentiometers, or joysticks. Can you build a robotic arm that operates automatically (either partially or fully)? This could range from an arm that uses a single sensor to automatically close the gripper when it detects an object, to an arm that uses a camera and a computer vision system to recognize and grasp objects.
- Mounting a motor at each joint of a robotic arm can make it very heavy. Can you design a cable-driven robotic arm instead? This means that the motors are mounted at the base of the arm, and they pull on cables or strings that make the different parts of the arm move. See the Science Buddies projects Make a Robot Hand Using Drinking Straws and Motorizing a Robotic Hand for some ideas to help you get started.
- The attachment at the end of a robotic arm is called the "end effector." Robotic arms can have many different attachments, ranging from traditional grippers, to "soft" grippers designed to grab a variety of different objects, to other tools like drills. Can you design different end effectors for your robotic arm? Can you make them easily interchangeable?
Careers
If you like this project, you might enjoy exploring these related careers:
/-/https/careerdiscovery.sciencebuddies.org/cdn/Files/1725/18/4161_Michelle_Easter_and_Curiousity_Clone.jpg)
/-/https/careerdiscovery.sciencebuddies.org/cdn/Files/1223/17/iStock-971549326.jpg)
/-/https/careerdiscovery.sciencebuddies.org/cdn/Files/1450/21/iStock-1227179796.jpg)
/-/https/careerdiscovery.sciencebuddies.org/cdn/Files/20167/5/IndustrialProdManager_KeyPhoto.jpg)
Contact Us
Our kits are developed in partnership with Home Science Tools®. If you have purchased a kit for this project, Home Science Tools® is pleased to answer any questions.In your email, please follow these instructions:
- Include your Home Science Tools® order number.
- Please describe how you need help as thoroughly as possible:
Examples
Good Question I'm trying to do Experimental Procedure step #5, "Scrape the insulation from the wire. . ." How do I know when I've scraped enough?
Good Question I'm at Experimental Procedure step #7, "Move the magnet back and forth . . ." and the LED is not lighting up.
Bad Question I don't understand the instructions. Help!
Good Question I am purchasing my materials. Can I substitute a 1N34 diode for the 1N25 diode called for in the material list?
Bad Question Can I use a different part?
Contact Support

/-/https/img.youtube.com/vi/POt4gDIKTkc/0.jpg)
/-/https/img.youtube.com/vi/zJyByg2kEnU/0.jpg)
/-/https/img.youtube.com/vi/PJGSEttUzx8/0.jpg)