Summary
/-/https/www.sciencebuddies.org/cdn/Files/11818/6/LED-stickies.jpg)
Introduction
Add some light to your refrigerator magnets and learn about circuits in this fun craft project!Materials
- Magnetic surface (refrigerator, filing cabinet, etc.)
Disclaimer: Science Buddies participates in affiliate programs with Home Science Tools®, Amazon.com, Carolina Biological, and Jameco Electronics. Proceeds from the affiliate programs help support Science Buddies, a 501(c)(3) public charity, and keep our resources free for everyone. Our top priority is student learning. If you have any comments (positive or negative) related to purchases you've made for science projects from recommendations on our site, please let us know. Write to us at [email protected].
Instructions
- Without reading ahead, try to connect an LED (light-emitting diode) to a battery to get it to light up. What happens if you touch one or both of the LED's metal legs to the same side of the battery? What happens if you touch the legs to different sides of the battery?
- Look closely at an LED's two metal legs. One of them is slightly longer than the other.
- Now look closely at one of your batteries. It should have a "+" mark printed on one side.
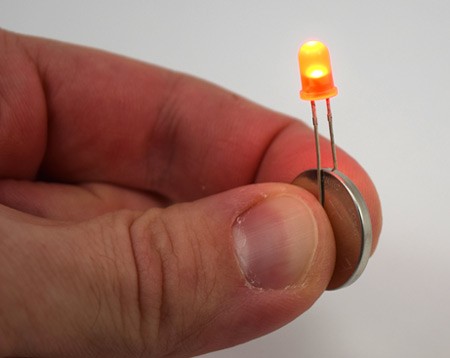
- Pinch the legs of the LED around the battery so that one leg touches each side. Make sure the LED's long leg touches the "+" side of the battery. The LED should light up! If your LED does not light up:
- Try flipping the LED around. You might have gotten the LED's long and short legs reversed.
- Make sure the LED's short leg does not touch the rim of the battery, which is connected to the "+" side. It should only touch the back side of the battery.
- Make sure both legs are firmly in contact with the battery. It will not work if only one leg is touching.
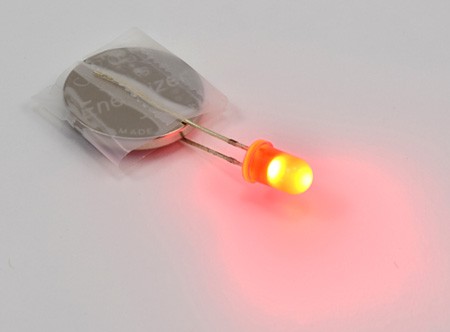
- Hold the LED's legs in place by wrapping the battery in a piece of clear tape. Make sure it is tight enough that when you let go, the LED stays lit.
- Cut a square piece of magnetic tape roughly the size of the battery. Place it on one side of the battery (it can go on either side), then wrap it in another piece of clear tape.
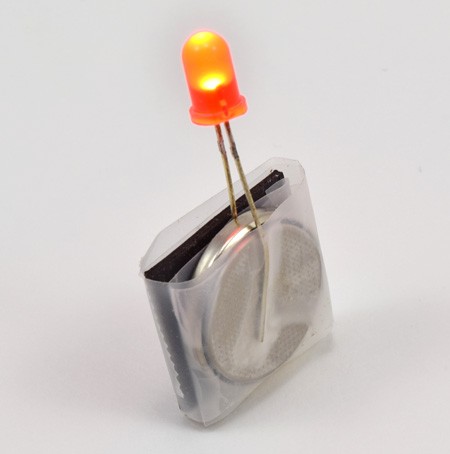
- You have made your first LED sticky! Place it on a magnetic surface like your refrigerator. Turn off the lights or wait until night to see how it looks in the dark.
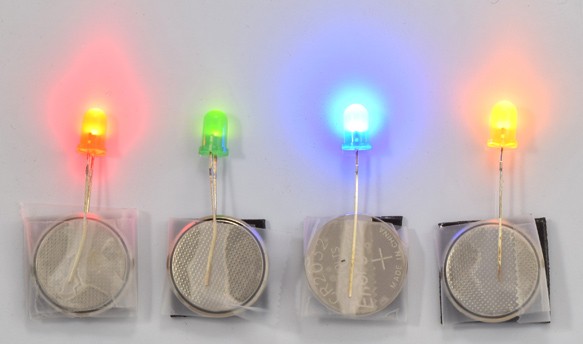
- Make more LED stickies with different colors. See the Explore More section for more ideas.
/-/https/www.sciencebuddies.org/cdn/Files/11819/7/LED-pinch.jpg)
/-/https/www.sciencebuddies.org/cdn/Files/11820/6/LED-tape.jpg)
/-/https/www.sciencebuddies.org/cdn/Files/11821/7/LED-sticky.jpg)
/-/https/www.sciencebuddies.org/cdn/Files/11822/6/LED-stickies-magnets.jpg)
What Happened?
When you connected the LED's legs to the two sides of the battery, you formed a simple circuit. Electricity flows through the LED, causing it to light up. Circuits power the lights we use every day like lamps, ceiling lights, and flashlights. You might have noticed that you had to follow specific instructions to get your circuit to work. See the Digging Deeper section to learn why.Digging Deeper
In order to get your LED to light up, you had to make sure both legs of the LED were touching opposite sides of the battery. This forms a closed circuit and allows electricity to flow through the LED, lighting it up. If only one of the LED's legs touches the battery, there is an open circuit and no electricity can flow. If both legs touch the same side of the battery, this creates a short circuit and prevents the LED from lighting up.
You also had to make sure the LED's positive side (long leg) touched the battery's positive side ("+" side). LEDs act like one-way valves that only let electricity flow in one direction (they have polarity). So if you connect the LED backwards, it will not light up, even though both legs are touching the battery.
If you have done other projects with LEDs before, you might wonder why this project does not require a resistor. Typically, circuits with LEDs need an electronic part called a resistor that "resists" the flow of electrical current. This prevents too much electricity from flowing through the LED and burning it out. However, the coin cell battery used in this project cannot supply very much current, so it is safe to connect directly to the LED. You would not want to try this with a AA battery without using a resistor, because the LED would burn out.
Ask an Expert
For Further Exploration
- Try connecting multiple LEDs of the same color to a single battery. This is called a parallel circuit.
- Try mixing colors with a single battery. Which colors work together? Can you figure out why? (Hint: you will need to do some research about the voltage required by different color LEDs.)
- How long do the batteries last? Are the results different for different colors?
- Did you enjoy combining circuits and art? Check out some of the other projects available from Science Buddies listed in the Additional Resources section below.
/-/https/www.sciencebuddies.org/cdn/Files/8305/13/vibrobots-thumbnail.jpg)
/-/https/www.sciencebuddies.org/cdn/Files/5152/8/led-dance-glove-all_img.jpg)
/-/https/www.sciencebuddies.org/cdn/Files/5721/7/squishy-circuit-butterfly.jpg)
/-/https/www.sciencebuddies.org/cdn/Files/6868/6/paper-circuit-flowers.jpg)
/-/https/www.sciencebuddies.org/cdn/Files/7450/11/paper-speaker.jpg)
/-/https/www.sciencebuddies.org/cdn/blog/graphics/thumb/2015-paper-circuits-all-lit-thumb.png)
/-/https/www.sciencebuddies.org/cdn/blog/graphics/thumb/2015-holiday-STEM-greetingcard-thumb.png)
/-/https/www.sciencebuddies.org/cdn/blog/graphics/thumb/2015-blog-LED-patch-kitty-thumb.png)
/-/https/careerdiscovery.sciencebuddies.org/cdn/Files/1223/17/iStock-971549326.jpg)
/-/https/careerdiscovery.sciencebuddies.org/cdn/Files/1233/17/unsplash-b28ac533a45f.jpg)
/-/https/careerdiscovery.sciencebuddies.org/cdn/Files/17365/4/manufacturing-technician-main-Stock-1140837585.jpg)
/-/https/img.youtube.com/vi/ULkUK0Ro4Aw/0.jpg)
/-/https/img.youtube.com/vi/JSEhXB07024/0.jpg)
/-/https/img.youtube.com/vi/wRco4tGXrzw/0.jpg)