Summary
/-/https/www.sciencebuddies.org/cdn/Files/17747/4/rainbow-candy-thumbnail.jpg)
/-/https/i.ytimg.com/vi/-xMj-Q1S7_g/maxresdefault.jpg)
Introduction
Make your own rainbow candy in this fun STEM activity! You will do it without using any food coloring. Instead, you will use a light-bending phenomenon called diffraction.
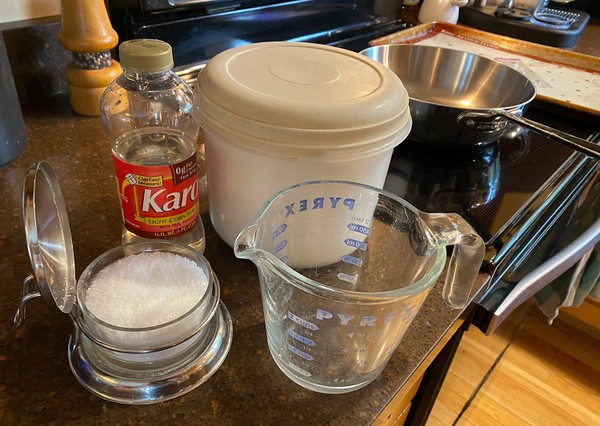
Materials
- Saucepan
- Cooking thermometer that registers up to at least 300°F
- Large piece of foil or a cookie sheet
- Masking tape
- Pen or permanent marker
- Heat-resistant spoon
- Sugar (1/2 cup)
- Corn syrup (2 Tbsp.)
- Water (1 Tbsp.)
- Optional:
- Flavor extract
- Pinch of salt
- Lollipop stick or chopstick
/-/https/www.sciencebuddies.org/cdn/Files/17666/5/rainbow-candy-materials.jpg)
Disclaimer: Science Buddies participates in affiliate programs with Home Science Tools®, Amazon.com, Carolina Biological, and Jameco Electronics. Proceeds from the affiliate programs help support Science Buddies, a 501(c)(3) public charity, and keep our resources free for everyone. Our top priority is student learning. If you have any comments (positive or negative) related to purchases you've made for science projects from recommendations on our site, please let us know. Write to us at [email protected].
Prep Work
Instructions
- Set up your diffraction grating. If you know which side has the lines, skip to step 3.
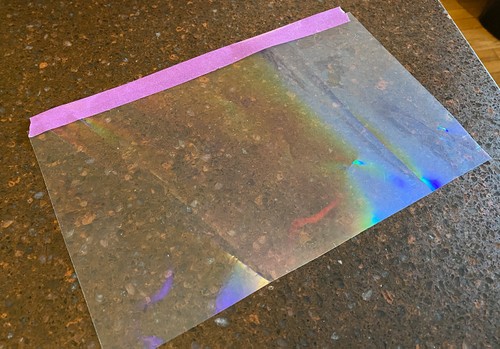
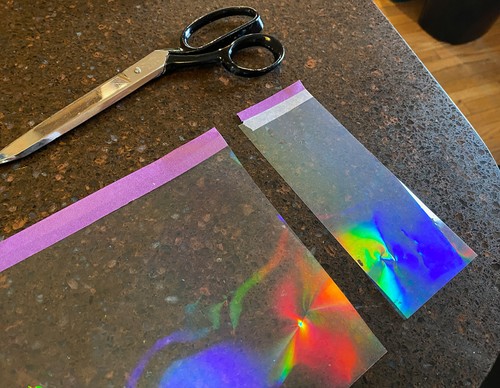
- If you do not know which side of the grating has the lines, put a piece of masking tape on your grating and write "A" on it. Cut off two 2"×2" pieces of grating, keeping track of which side is up. Put a piece of tape on one that has the same side as "A" facing up, and label it "A" as well. Flip the other 2"×2" square over, and put a piece of tape, labeled "B," on that side.
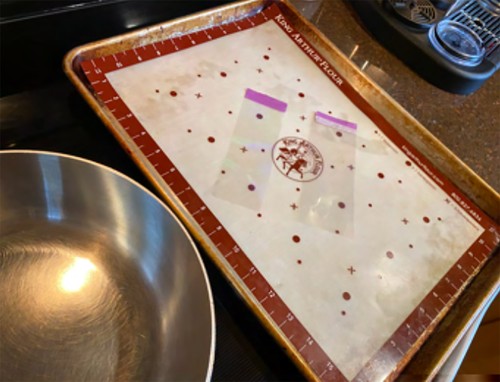
- Take your diffraction grating and put it on your piece of foil or cookie sheet. If you know which side is lined, make sure that side is facing up. If you are still figuring out which side is lined, put both your A-up and B-up pieces of diffraction grating on your piece of foil or cookie sheet. If you are using a lollipop stick or chopstick, position it on the diffraction grating, where you want the lollipop.
- Put the sugar, corn syrup, salt (optional to enhance flavor), and water into your saucepan. Give it a brief stir just to get everything mixed.
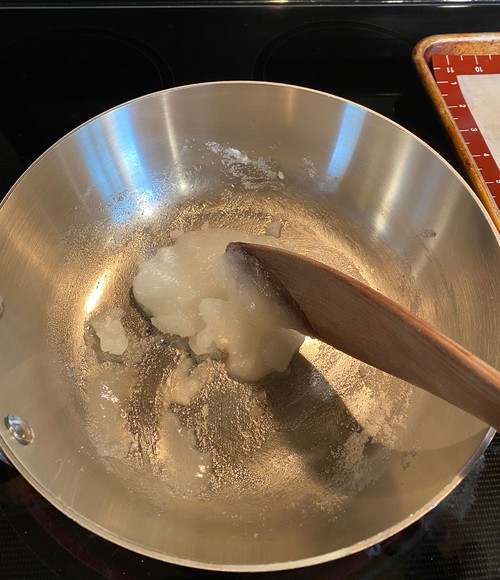
- You might need an adult to help with this step. Put the saucepan on medium-high heat. Be careful! You do not want to spill this on yourself.
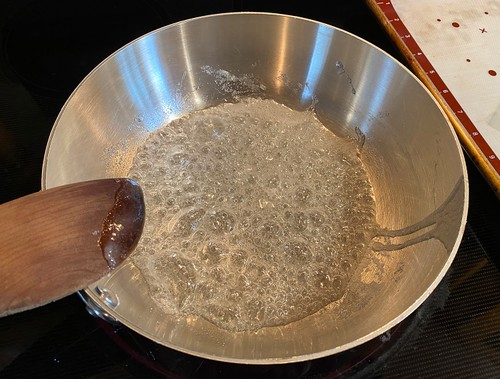
- Start checking the temperature frequently once the liquid begins to boil. You want to remove the mixture from the heat when the temperature of the candy reaches 300°F. It is important to keep the tip of the thermometer off the bottom of the pan so you are only measuring the temperature of the liquid.
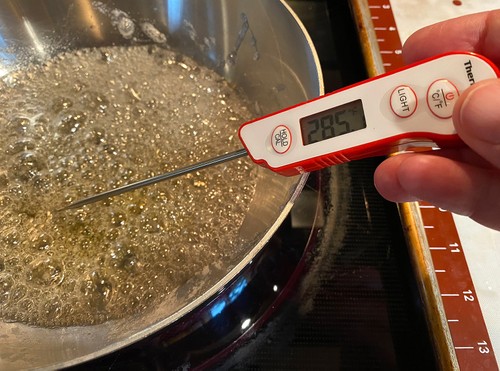
- The candy's temperature can continue to rise for a few degrees when you remove it from the heat, so if you take it off the heat at 300°F, it should end up around 305–310°F. You can tell when it is at the right temperature because the candy will be slightly golden moving toward brown rather than purely clear.
- Off the heat, add 1/2 tsp. of flavoring with a quick stir.
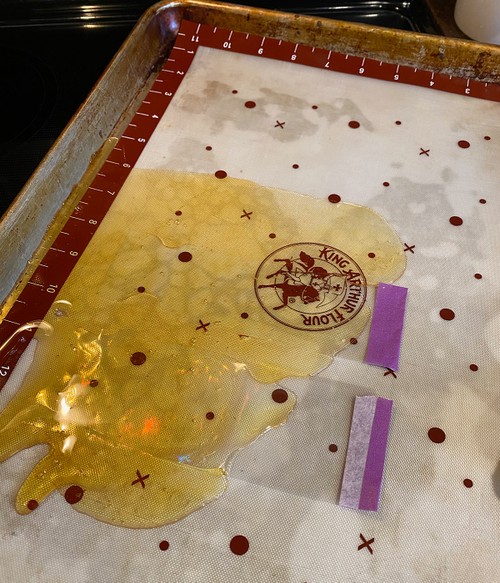
- Wait a few seconds for the candy to cool slightly; the goal is about 270°F. You want it to be liquid, but no longer so hot that it might melt the plastic. Once it is below 270°F, rapidly but carefully, use the spoon to drop lollipop-sized circles of candy onto the diffraction grating, covering one end of the lollipop stick if you are using one. You can also just make a sheet of candy if you prefer.
- Now that you have emptied the saucepan of candy, fill it with water. This will make it easier to clean. Let it sit until the end of the experiment, and the stuck-on sugar should dissolve.
- Allow your candy to cool completely. The cooling can take a while, but if you want to take a picture of the results, have a camera ready. You will want to capture the effect before it fades!
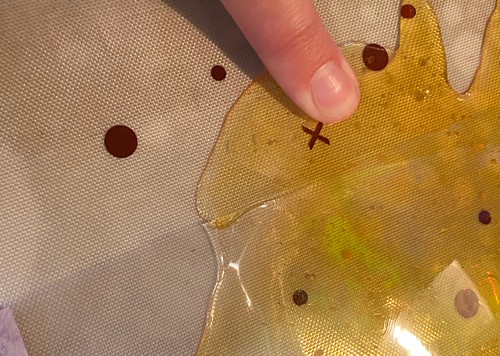
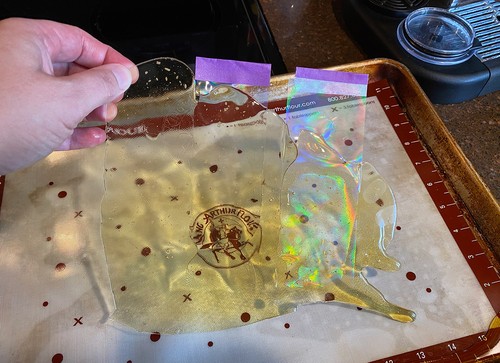
- Carefully peel the candy away from the diffraction grating. Appreciate the rainbow. Note: if you tested both sides, A and B, only one will show a rainbow. Note down which side so you know which side is up on your diffraction grating for next time!
- Enjoy the fun look of your candy before the colors fade and take a picture if you would like. Humidity from the air will generally erase your rainbow in a few minutes to an hour, depending on the time of year and where you are performing the experiment. The rainbow will look best in direct white light, so go out into sunshine or use a flashlight for the best appearance.
/-/https/www.sciencebuddies.org/cdn/Files/17655/5/diffraction-grating.jpg)
/-/https/www.sciencebuddies.org/cdn/Files/17656/5/cut-grating.jpg)
/-/https/www.sciencebuddies.org/cdn/Files/17657/5/diffraction-grating-cookie-sheet.jpg)
/-/https/www.sciencebuddies.org/cdn/Files/17692/4/stir-ingredients.jpg)
/-/https/www.sciencebuddies.org/cdn/Files/17658/5/melting-ingredients.jpg)
/-/https/www.sciencebuddies.org/cdn/Files/17659/5/checking-candy-temperature.jpg)
/-/https/www.sciencebuddies.org/cdn/Files/17661/6/candy-sheet.jpg)
/-/https/www.sciencebuddies.org/cdn/Files/17662/5/touching-candy.jpg)
/-/https/www.sciencebuddies.org/cdn/Files/17663/5/rainbow-candy-peel.jpg)
/-/https/www.sciencebuddies.org/cdn/Files/17664/5/rainbow-candy.jpg)
Cleanup
What Happened?
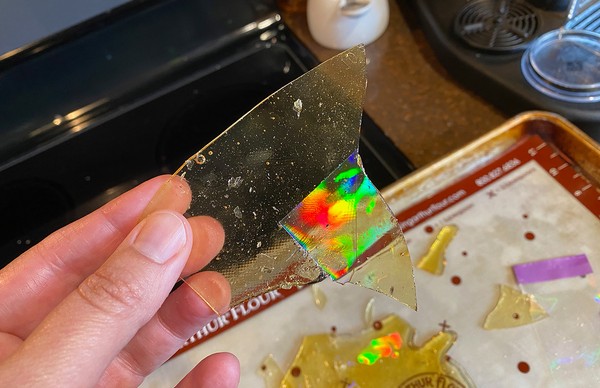
The diffraction grating has a lot of tiny lines, or ridges, on its surface that bend light, resulting in a rainbow of color. When you use the diffraction grating to make candy, these lines are transferred to the surface of the candy, so the candy also has a rainbow appearance.
Over time the rainbow effect disappears. How quickly this happens depends on the local humidity. Humidity is moisture in the air. This moisture is re-absorbed by the candy. The added water makes the candy a bit softer and makes the tiny lines and ridges on the surface of the candy melt into each other. Without those ridges, the candy no longer looks rainbow colored.
Digging Deeper
Have you ever appreciated the rainbow that appears on the top of some oil-slicked puddles or that is made by a CD/DVD? If so, you have appreciated structural color, which is color that comes from the way light waves bounce from a surface and interact with each other, rather than from the reflection of a pigmented surface. CDs and DVDs create rainbows because their surfaces are etched with many tiny lines that are just the right size to create a rainbow appearance when a beam of white light bounces off of them. The waves from adjacent lines interfere constructively (add up) and destructively (cancel out) with each other to create the rainbow. If we copy those lines onto any other shiny surface, that surface can create rainbows as well. In this activity, you demonstrated with candy!
Ask an Expert
For Further Exploration
- If you add food coloring to your candy, how does it affect the appearance of the rainbow?
/-/https/www.sciencebuddies.org/cdn/Files/14659/7/remove-rock-candy-thumbnail.jpg)
/-/https/www.sciencebuddies.org/cdn/Files/17616/5/activity-rainbow-cast-on-paper.png)
/-/https/www.sciencebuddies.org/cdn/Files/16555/4/milky-water-bottle-with-light.jpg)
/-/https/img.youtube.com/vi/wY5hJMfVA7o/0.jpg)
/-/https/img.youtube.com/vi/tXWv9JbmnKs/0.jpg)
/-/https/img.youtube.com/vi/C0IAQzxgQa8/0.jpg)