Abstract
Have you ever had a refreshing bath using a bath bomb? A bath bomb is several ingredients mixed and molded into a shape, which becomes fizzy when it touches the water. It can be quite a relaxing experience, especially if your bath bomb has a nice fragrance or includes some bath salts. The fizz is the result of a chemical reaction taking place between different ingredients within the bath bomb. In this science project, you will get to make your own homemade bath bombs and explore how changing the amounts of the different ingredients affects the fizziness of the bath bombs when you toss them in the bath. You can use your perfected recipe to create some super impressive bath bombs, and maybe even give them away as gifts!
Summary
None
A kit is available from our partner Home Science Tools®. See the Materials section for details.
Adult assistance is required for using the oven.
Edited by Svenja Lohner, PhD, Science Buddies
/-/https/i.ytimg.com/vi/Ar78O1hl7TE/maxresdefault.jpg)
Objective
Investigate how changing the amounts of different ingredients in homemade bath bombs affects their fizziness.
Introduction
/-/https/www.sciencebuddies.org/cdn/Files/12530/19/bath-bomb-activity-thumbnail.jpg)
Bath bombs—like the ones shown in Figure 1, below—can come in all types of shapes, sizes, and festive colors, depending on the molds and dyes used.
/-/https/www.sciencebuddies.org/cdn/Files/5964/12/homemade-bath-bombs.jpg)
Figure 1. Multicolored, homemade bath bombs made using a seashell mold.
They can also have a wide range of ingredients, including bath salts, various fragrances, and other components. That said, there are a few key ingredients that most simple bath bomb recipes have: baking soda, citric acid, and cornstarch. When baking soda and citric acid are mixed together with some water, they undergo a chemical reaction. Specifically, this reaction involves acid-base chemistry, since the baking soda—also known as sodium bicarbonate (NaHCO3)—is a weak base, and citric acid (C6H8O7) is a weak acid. This reaction is shown in Equation 1, below. As you can see from Equation 1, the acid-base reaction produces carbon dioxide (CO2) gas. This gas is what makes the fizzy bubbles when you toss a bath bomb into a tub full of water.
Equation 1:
How acidic or basic something is can be measured by a scale called pH, which ranges from 0 to 14. For example, an acidic pH is below 7, such as lemon juice or vinegar. A basic pH is above 8, such as baking soda or bleach. A neutral pH is about 7, which is typically the pH of water. For more on these topics, see the Science Buddies webpage on Acids, Bases, & the pH Scale.
Now back to the role of the cornstarch in homemade bath bombs. This ingredient can act as a dry "filler" that gets mixed in with the reactive baking soda and citric acid components in the bombs. In this science project, you will explore how changing the amount of cornstarch filler affects the reaction rate of the bath bomb reaction, or, in other words, how the amount of cornstarch affects the fizziness of the bath bombs. The reaction rate for a chemical reaction is a measurement of how quickly the reaction happens, or how quickly the reactants (the baking soda and citric acid for the bath bombs) create the reaction's products (which includes the CO2 bubbles for the bath bombs). The faster a bath bomb dissolves, the more CO2 it is making, the fizzier it is, and the faster the reaction is taking place. Because of this, you will be measuring the reaction rate by timing how long it takes the bath bombs to dissolve in water.
How do you think having more or less filler will affect how fizzy the bath bombs will be and how quickly they can dissolve in the tub? Note that you will be testing one normal bath bomb recipe, and a second recipe that has extra cornstarch added to it (and includes less citric acid and baking soda to keep the totals similar). Which do you think will make the most impressive bath bombs? Get ready to find out!
Terms and Concepts
- Chemical reaction
- Acid-base chemistry
- Sodium bicarbonate
- Citric acid
- Acid-base chemical reaction
- pH
- Acidic
- Basic
- Reaction rate
- Reactant
- Product
Questions
- What are the fizzy bubbles made out of that show up when you toss a bath bomb into a water-filled bathtub?
- What are examples of acids or bases that you might find around your home?
- What is the purpose of the cornstarch in homemade bath bombs?
- Now that you know what most homemade bath bombs are made of and how the bubbles are created, what would you expect to have an influence on the fizziness of the bath bomb?
Bibliography
To find out more about acids and bases, you can check out these resources:
- Science Buddies. (n.d.). Acids, Bases, & the pH Scale. Retrieved June 20, 2014.
- Rader, A. (n.d.). Acids and Bases Are Everywhere. Rader's Chem4Kids.com. Retrieved July 15, 2014.
To find out more about the chemistry that takes place in the bath bomb reaction (between the citric acid and sodium bicarbonate), you can explore these resources:
- The Chemistry Store.com. (n.d.). Making Your Bath Bombs Foam. Galileo's Workshop. Retrieved July 15, 2014.
- American Chemical Society (ACS). (2009). What's New, CO2? Education Division Staff. Retrieved July 15, 2014.
Materials and Equipment 
Recommended Project Supplies
/-/https/www.sciencebuddies.org/cdn/Files/12670/4/SB-BATHBOMB-Kit.jpg)
- Bath Bomb Science Kit, available from our partner Home Science Tools®. You will need these items from the kit:
- Spherical bath bomb molds (6 spheres)
- Cornstarch (1 lb)
- Baking soda (1 lb)
- Epsom salt (1 lb)
- Citric acid (8 ounces)
- Food colors (red, blue, green, yellow)
- Fragrance (1/2 oz. raspberry, 1/2 oz. vanilla)
- Waterproof thermometer
- You will also need to gather these items, not included in the kit:
- Large bowls (4)
- Masking tape or painter's tape
- Pen or permanent marker
- Metric measuring cup
- Water
- Vegetable oil
- Medicine dropper
- Measuring spoons
- Forks and spoons for mixing
- Stopwatch or timer
- Optional: Helper to help you time the reaction times.
- Optional, but recommended: Oven
- Note: If you live in a very humid environment, use the oven to dry the bath bombs after making them to get satisfying results. Note that you can use the plastic molds in the oven at 170°F.
- Lab notebook
Disclaimer: Science Buddies participates in affiliate programs with Home Science Tools®, Amazon.com, Carolina Biological, and Jameco Electronics. Proceeds from the affiliate programs help support Science Buddies, a 501(c)(3) public charity, and keep our resources free for everyone. Our top priority is student learning. If you have any comments (positive or negative) related to purchases you've made for science projects from recommendations on our site, please let us know. Write to us at [email protected].
Experimental Procedure
Bath Bomb Recipes
- Look at the list of ingredients in Table 1, below, for the two different bath bomb recipes. The total amount for each recipe is approximately 16 tbsp. This should make enough bath bomb mixture to fill three halves of the spherical bath bomb molds for each bath bomb recipe. Be sure to write the recipes down in your lab notebook.
| Bath Bomb Recipes | |||||||||
|---|---|---|---|---|---|---|---|---|---|
| Recipe Name | Citric Acid | Baking Soda | Cornstarch | Epsom Salt | Food Coloring | Water | Vegetable Oil | Fragrance | Approximate Total |
| Normal Recipe | 3 tbsp. | 6 tbsp. | 4.5 tbsp. | 1.5 tbsp. | 5 drops | 2.25 tsp. | 2.25 tsp. | 30 drops | 16.5 tbsp. |
| Extra Cornstarch Recipe | 2 tbsp. | 4 tbsp. | 7.5 tbsp. | 1.5 tbsp. | 5 drops | 5.5 tsp. | 2.25 tsp. | 30 drops | 17.5 tbsp. |
Table 1. Each bath bomb recipe here will make enough mixture to fill three halves of the spherical bath bomb molds. Amounts are given in tablespoons (tbsp.) and teaspoons (tsp.).
Making the Bath Bombs
- Using masking tape or painter's tape and a pen or permanent marker, label two bowls "Normal" and the other two bowls "Extra Cornstarch."
- In the first "Normal" bowl, mix together the citric acid, baking soda, cornstarch, and Epsom salts by following the normal recipe from Table 1, above. Your bowl may look similar to the one in Figure 2, below.
/-/https/www.sciencebuddies.org/cdn/Files/5966/11/cornstarch-citric-acid-baking-soda.jpg)
Figure 2. When you mix the dry ingredients together (citric acid, baking soda, cornstarch, and Epsom salts), your bowl should look similar to the one shown here.
- In one of the "Extra Cornstarch" bowls, mix together the citric acid, baking soda, cornstarch, and Epsom salts by following the extra cornstarch recipe from Table 1.
- You will be making all three normal bath bombs one color, and all three of the extra cornstarch bath bombs another color. This way it will be easy to tell them apart later. Decide which color you want each recipe to be and make a note of your decisions in your lab notebook. The Bath Bomb Science Kit comes with four colors to choose from: red, green, blue, and yellow. You can also choose between two different fragrances: raspberry and vanilla.
- In the second "Normal" bowl, mix together the food coloring, water, vegetable oil, and the fragrance of your choice by following the normal recipe from Table 1. Add the color you decided on using for the normal recipe. Use a medicine dropper to measure the drops for the food coloring and fragrance. When mixed together, this bowl may look similar to the one in Figure 3, below.
- Rinse out and clean the medicine dropper and measuring spoons in between measuring the different ingredients.
- Note that these four ingredients will not mix well together because two are water-based (the food coloring and water) and two are oil-based (the vegetable oil and fragrance), but do your best to use a fork and mix them together a bit.
/-/https/www.sciencebuddies.org/cdn/Files/5967/11/water-food-coloring-mixed.jpg)
Figure 3. When you mix the water, vegetable oil, fragrance, and food coloring together in the third bowl, it should look similar to this one (depending on what color food coloring you are using).
- Next you will mix together the wet mixture you made in step 5 with the normal recipe's dry ingredients you prepared in step 2. (Only proceed with this when you are ready, because you will need to do steps 6–8 in one sitting.) This can be tricky to do, so read the following instructions carefully before you start:
- Have a clean spoon ready nearby.
- Then, using a clean medicine dropper, add a few drops of the wet mixture to the normal recipe's dry ingredients. What happens when you add a drop of the wet mixture? You should see it fizz; this is the bath bomb reaction taking place! Because you do not want the bath bombs to react yet, quickly press down on the fizzy spot with the back of the clean spoon. This should stop the fizzing (and just leave a damp spot).
- After you stopped the reaction with the spoon, mix the damp spot in with the rest of the ingredients in the bowl. You want to evenly distribute the moisture as much as you can.
- Repeat steps 6.b.–6.c. until your bath bomb mixture has the right consistency. You may not have to use all of the wet mixture. Important: Part of the challenge of making bath bombs is adding the right amount of wet ingredients. If you live in a humid environment, you may not need to add all of the wet ingredients. Making bath bombs can be significantly affected by surrounding humidity levels.
- If the bath bomb mixture ever appears to continue to puff up and fizz even after you have thoroughly mixed in some wet ingredients, then the mixture may be too wet and the bath bombs will not form properly. Instead of trying to "rescue" the mixture, it is best to start over by repeating steps 2, 5, and 6, but this time reduce the amounts of liquid in your recipe. (You can set aside the bowl of "Extra Cornstarch" dry ingredients for later by storing it in a sealable plastic bag.)
- For example, instead of using 2.25 tsp. of water, you could try using 1 tsp. or 0.5 tsp.
- You do not need to adjust the amount of food coloring, vegetable oil, or fragrance.
- If you find that the normal recipe works better using less water, you will want to adjust the extra cornstarch recipe similarly. For example, if you ended up using 1 tsp. (instead of 2.25 tsp.) of water in the normal recipe, then use 1.25 tsp. of water less in the extra cornstarch recipe (such as 4.25 tsp. instead of 5.5 tsp.).
- It is also possible to make the bath bombs too dry. If the bath bombs are very crumbly, the recipes and bath bomb mixtures may not have enough water in them. The mixture should be damp enough so that it holds shape when you press together small pieces with your fingers. If the bath bombs are too dry, they will fall apart after they have dried. To fix this, you will need to repeat steps 2, 5, and 6, but adjust the recipes so that they use more water. Getting the amount of water right in bath bombs recipes is a big challenge for making bath bombs, and can depend a lot on surrounding humidity levels.
- For example, if the normal recipe you used included 2.25 tsp. of water, you may want to try repeating it with 3 tsp. of water.
- Again, you do not need to adjust the amount of food coloring, vegetable oil, or fragrance.
- If you find that the normal recipe works better using less water, you will want to adjust the extra cornstarch recipe similarly.
- If the bath bomb mixture ever appears to continue to puff up and fizz even after you have thoroughly mixed in some wet ingredients, then the mixture may be too wet and the bath bombs will not form properly. Instead of trying to "rescue" the mixture, it is best to start over by repeating steps 2, 5, and 6, but this time reduce the amounts of liquid in your recipe. (You can set aside the bowl of "Extra Cornstarch" dry ingredients for later by storing it in a sealable plastic bag.)
- When you have mixed the wet and dry ingredients together, your bowl may look similar to the one in Figure 4, below. Quickly go on to the next step so that your mixture does not begin to harden in the bowl.
/-/https/www.sciencebuddies.org/cdn/Files/5968/12/bath-bombs-mixture.jpg)
Figure 4. After mixing the recipe's wet and dry ingredients together, your bowl may look similar to this one.
- Use a clean medicine dropper to drop one drop of vegetable oil into six halves of the spherical bath bomb molds. Then use a finger to spread the oil all around the surface. Doing this will make it easier for you to remove your bath bombs once they have dried.
- Take the normal bath bomb mixture you prepared in step 6 and put it in three of the molds. Add a spoonful at a time and use the back of the spoon and/or the palm of your hand to press the mixture down into the hole. It is important to carefully and continually press down hard on the mixture as it is added to the holes so that the bath bombs turn out hard and solid. Evenly divide up the mixture between the three molds, filling them as similarly as you can, as shown in Figure 5, below. Note: Do not fill them above the rim, otherwise it will be difficult to remove the bath bombs after they have dried. Also, do not worry if you end up with some extra bath bomb mixture. It is much better to have too much than too little!
/-/https/www.sciencebuddies.org/cdn/Files/5969/26/bath-bombs-in-molds-scaled.png)
Figure 5. Fill up three bath bomb molds using the bath bomb mixture, continually pressing down on the mixture while you fill the mold.
- Once you have finished your normal recipe batch bombs, continue with the extra cornstarch ones. In the second "Extra Cornstarch" bowl, repeat step 5, but this time mix together the wet ingredients for the extra cornstarch recipe. Use the color and fragrance you decided on using for the extra cornstarch recipe. Be sure to rinse out and clean the medicine dropper and measuring spoon in between measuring the different ingredients.
- Repeat steps 6–8 using the extra cornstarch recipe ingredients.
- Since you already prepared the normal recipe and adjusted the water amounts in the recipes if needed in step 6.d., you should not need to adjust the water amounts again.
- Try to fill the bath bomb molds as similarly as possible to how you filled them for the normal recipe bath bombs in step 8.
- Do not worry if you end up with some extra bath bomb mixture.
- Put all bath bomb molds on a plate and let the bath bombs dry.
- You can either let the bath bombs sit at room temperature to dry them over night or use the oven. If you use the oven, after it has been preheated to 170° F, turn the oven off and put the plate with the bath bombs in. Let them dry in the (turned-off) oven for one hour. Tip: If you live in a very humid environment, it is recommended to use the oven to dry the bath bombs after making them to help them dry well.
- Once the bath bombs have dried, carefully remove them from their molds. They should look similar to the ones shown in Figure 6. You can immediately move on to the next section in the Procedure, Testing the Bath Bombs, or you can store the bath bombs in sealed plastic bags until you are ready to test them.
- If the bath bombs turned out too crumbly, then the bath bomb mixture might have been to dry. You will need to start again by mixing the dry and wet ingredients, but adjust the recipes so that they use more water (see step 6.d.).
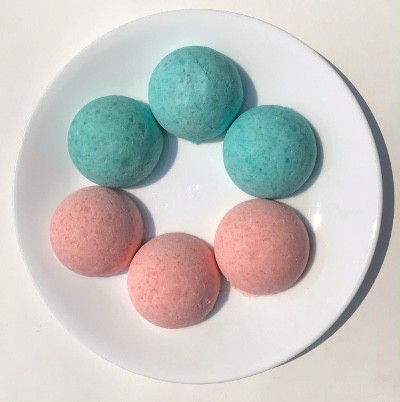
Figure 6. After drying the bath bombs and removing them from the mold, they should look similar to these.
/-/https/www.sciencebuddies.org/cdn/Files/12470/21/dried-bath-bombs-scaled.jpg)
Testing the Bath Bombs
- In your lab notebook, make a data table like Table 2, below. You will be recording your data and observations in this data table.
| Trial | Temperature (in °C) |
Time to Dissolve (in sec) |
Observations | |
|---|---|---|---|---|
| Normal Recipe | 1 | |||
| 2 | ||||
| 3 | ||||
| Extra Cornstarch Recipe | 1 | |||
| 2 | ||||
| 3 |
Table 2. In your lab notebook, make a data table like this one in which to record your results.
- Fill a bowl with hot tap water (at least as deep as the height of the bath bombs). Use a metric measuring cup so that you can record exactly how much water you added to the bowl in your lab notebook. Add the same amount each time you fill the bowl.
- Using a thermometer, measure the temperature of the water. To simulate a bath, you will want the water to be hot, somewhere between 32°Celsius (C) and 43°C (or 90°F and 110°F). Record the exact temperature of the water in the data table in your lab notebook.
- If the temperature of the water is too cold to be within the temperature range, empty the bowl and repeat steps 2–3 with hotter water.
- Tip: To get the water at the temperature you want it to be, try filling the bowl with really hot tap water and then measure the temperature as it cools down until it is within the range you want it to be for your test.
- Get a stopwatch or timer ready, and if you have a helper, have him or her get ready to time the reaction (i.e., how long it takes a bath bomb to dissolve in the hot water).
- Drop one of the normal bath bombs into the bowl of water and start the stopwatch right when the bath bomb touches the water. How does the bath bomb react with the water? Observe how the bath bomb dissolves in the water. Record the time (in seconds [sec]) until it has completely dissolved in the data table in your lab notebook as trial 1 using the normal recipe.
- It can be tricky to tell exactly when the bath bomb has completely dissolved because the water may become cloudy, and the bath bomb may sink. When the bath bomb stops bubbling, check with your fingers, if you can still feel undissolved parts of the bath bomb under the water. Once you do not feel any solid bath bomb pieces anymore, stop the stopwatch.
- Record any other observations you make in the data table in your lab notebook.
- Repeat steps 2–5 using the other two normal bath bombs, one at a time. Use the same amount of water in the bowl each time and make sure the water is within about 0.5°C (or 1°F) (plus or minus) of the original temperature you used. Be sure to record your results in the data table in your lab notebook.
- Repeat steps 2–6 using the bath bombs made using the extra cornstarch recipe, testing one bath bomb at a time. How does the reaction between these bath bombs and the water compare to the reaction you saw with the normal bath bombs and the water?
- Again, make sure the temperature of the water is within about 0.5°C (or 1°F) (plus or minus) of your previous trials.
- Be sure to record all of your results in your lab notebook.
Analyzing Your Results
- Calculate the average time to dissolve (in seconds) for each recipe. Record your results in your lab notebook.
- For example, if the bath bombs in the three trials using your normal recipe dissolved after 95 sec, 80 sec, and 100 sec, the average time to dissolve would be 92 sec for the normal recipe (since 95 sec + 80 sec + 100 sec = 275 sec, and 275 sec ÷ 3 = 92 sec).
- Make a bar graph of your results. Put the average time to dissolve (in seconds) on the y-axis (the vertical axis) and the two different recipes on the x-axis (the horizontal axis), making a bar for each recipe.
- Based on your graph and observations, try to answer the following questions:
- Which bath bombs dissolved faster?
- What does this have to do with their reaction rate? Hint: Reread the Introduction in the Background tab if you need a refresher on what a reaction rate is.
- Which recipe made the most impressive bath bombs?
- How does having more or less filler (i.e., cornstarch) affect the fizziness of the bath bombs?
- Why do you think you got the results that you did?
- Which bath bombs dissolved faster?
Ask an Expert
Variations
- Try making a two-colored bath bomb by combining bath mixtures made following different recipes. Can you make a bath bomb where part of it dissolves faster than the other part? Can you make it move or spin around in a certain way by doing this?
- In this science project, you tested your bath bombs in hot water, but they might dissolve differently in colder water. You could repeat this science project, but this time use cold water instead of hot water. Do the bath bombs take a different amount of time to dissolve depending on the temperature of the water?
- Instead of citric acid, you could experiment with making bath bombs using citric acid substitutes, such as cream of tartar or lemon juice. How do bath bombs made using citric acid substitute compare to bath bombs made using citric acid?
- In this science project, you tried varying the amount of cornstarch, but you could try making bath bombs without any cornstarch. If bath bombs are made that do not have cornstarch, how do they compare to bath bombs made with cornstarch? Are they different?
- Do some research on other recipes used for making bath bombs. How are the chemical reactions used in those recipes similar or different from the one used in this project?
Careers
If you like this project, you might enjoy exploring these related careers:
/-/https/careerdiscovery.sciencebuddies.org/cdn/Files/20209/5/chemical-engineer-citgo.jpg)
/-/https/careerdiscovery.sciencebuddies.org/cdn/Files/1429/17/unsplash-4pM4nhHyo9M.jpg)
Contact Us
Our kits are developed in partnership with Home Science Tools®. If you have purchased a kit for this project, Home Science Tools® is pleased to answer any questions.In your email, please follow these instructions:
- Include your Home Science Tools® order number.
- Please describe how you need help as thoroughly as possible:
Examples
Good Question I'm trying to do Experimental Procedure step #5, "Scrape the insulation from the wire. . ." How do I know when I've scraped enough?
Good Question I'm at Experimental Procedure step #7, "Move the magnet back and forth . . ." and the LED is not lighting up.
Bad Question I don't understand the instructions. Help!
Good Question I am purchasing my materials. Can I substitute a 1N34 diode for the 1N25 diode called for in the material list?
Bad Question Can I use a different part?
Contact Support

/-/https/img.youtube.com/vi/iIdDMVw4PFU/0.jpg)
/-/https/img.youtube.com/vi/PszGCm1PqSo/0.jpg)
/-/https/img.youtube.com/vi/Q7FXhuBYmxM/0.jpg)