Abstract
What covers less than 10% of the Earth's surface, yet is a vital natural resource for terrestrial life? What filters ground water and supports most of our food production, not to mention the production of building materials and paper? The answer, often overlooked, is: soil. With this project you can get all the dirt on soil formation, soil horizons, and the composition of different soils.Summary
Andrew Olson, Ph.D., Science Buddies
Sources
- Global Learning and Observations to Benefit the Environment (GLOBE). (2005a). Soil Characterization Protocol. Retrieved October 29, 2013.
- GLOBE. (2005b). Protocols. Retrieved October 29, 2013.
/-/https/www.sciencebuddies.org/cdn/Files/6778/9/CB-soil-sieve.jpg)
Objective
This project has two goals:
- to observe and measure core samples of soil to see how soil properties changes with depth, and
- to compare soil core profiles collected from multiple sites.
Introduction
/-/https/www.sciencebuddies.org/cdn/Files/12227/4/soil-layers-thumbnail.jpg)
"Soils are one of Earth's essential natural resources, yet they are often taken for granted. Most people do not realize that soils are a living, breathing world supporting nearly all terrestrial life." (GLOBE, 2005b)
We depend on soil for food production from crops, but our dependence on the soil goes much deeper than that. Soil is such a vital part of every ecosystem on Earth that it is often called "the great integrator" (GLOBE, 2005b). Here are some examples that help to explain the nickname: "Soils hold nutrients and water for plants and animals. They filter and clean water that passes through them. They can change the chemistry of water and the amount that recharges the groundwater or returns to the atmosphere to form rain. The foods we eat and most of the materials we use for paper, buildings, and clothing are dependent on soils. Soils play an important role in the amount and types of gases in the atmosphere. They store and transfer heat, affect the temperature of the atmosphere, and control the activities of plants and other organisms living in the soil." (GLOBE, 2005b)
Yet arable soil covers only a small fraction of the Earth's surface—about 10% (GLOBE, 2005a). This thin layer of soil is called the pedosphere. Soil formation is a grindingly slow process. To produce one inch of soil can take 500 years.
The study of soil is called pedology. Learn more about the world beneath our feet! In this science project, you will become an amateur pedologist and learn how to make the following soil characterization measurements:
- Site description
- Horizon depths
- Soil structure
- Soil color
- Soil consistence
- Soil texture
- Roots
- Rocks
- Carbonates
Terms and Concepts
- Soil formation
- Soil types
- Humus
- Silt
- Sand
- Clay
- Soil horizon
- Pedosphere
- Ped
Questions
- What is a soil horizon?
- What are the five factors that contribute to soil formation?
Bibliography
- Natural Resources Conservation Service Soils. Examination and Description of Soil Profiles. United States Department of Agriculture. Retrieved July 18.
- The GLOBE Program. (n.d.). Pedosphere (Soil). Retrieved July 5, 2018.
- Global Learning and Observations to Benefit the Environment (GLOBE). (2005a). Soil Characterization Protocol. Retrieved October 29, 2013.
Materials and Equipment
These items can be purchased from Carolina Biological Supply Company, a Science Buddies Approved Supplier:
- Spray bottle. It should be filled with water.
- Soil color chart or book. You may also be able to find one, such as a Munsell soil color chart, at a local library.
- Magnifying glass
- Watering pipet. Alternatively, a medicine dropper or eyedropper may be used.
- #10 soil sieve. It should have 2 mm mesh openings. Alternatively you may be able to find this at a gardening store.
- Disposable gloves. Alternatively, these can be purchased at a local drug store or pharmacy. If you are allergic to latex, use vinyl or polyethylene gloves.
- A printout or other mobile copy of this science project's Procedure to help you characterize the soil
- Homemade soil auger, consists of:
- Length of 1" PVC pipe
- 1-inch wood dowel. This is for pushing soil core from PVC pipe.
- Sturdy wood block. This is to cover end of pipe when driving it in with hammer.
- Hammer or mallet
- Golf tees, nails or other horizon markers
- Trowel or shovel
- Paper towels
- Meter stick or tape measure
- Camera
- Vinegar
- Sheets of paper or paper plates
- Soil characterization data sheet
- Helper
- Pencils
- Optional: Sealable bags or containers
- Optional: Marking pen
- Lab notebook
Disclaimer: Science Buddies participates in affiliate programs with Home Science Tools®, Amazon.com, Carolina Biological, and Jameco Electronics. Proceeds from the affiliate programs help support Science Buddies, a 501(c)(3) public charity, and keep our resources free for everyone. Our top priority is student learning. If you have any comments (positive or negative) related to purchases you've made for science projects from recommendations on our site, please let us know. Write to us at [email protected].
Experimental Procedure
- Select your sites.
-
Describe each site in your lab notebook. Include in your description:
- slope,
- landscape position (e.g., hillside, summit, large flat area),
- cover type (e.g., trees, grass),
- land use (e.g., forest, lawn, beach),
- parent material (underlying bedrock, if you know it—a county soil survey may be available and would be helpful here).
-
Take soil core samples at each site.
- Have your helper hold the PVC pipe vertically, with one end firmly on the ground where you want to sample the soil.
- Hold the wood block in place on top of the PVC pipe, to distribute the force of the blows from the hammer or mallet. (Keep your fingers out of the way!)
- Pound the PVC pipe into the soil, until there is about 6 in remaining above the surface. (Alternatively, you can take the soil cores out in smaller chunks, carefully assembling them in order.)
- Holding the pipe straight up and down, rotate it back and forth to loosen the pipe in the hole.
- Pull up the pipe with your soil core sample inside.
- Use the 1 in dowel to carefully push the soil core sample out of the pipe. Use paper plates or sheets of plain paper as a background for examining the soil core samples.
-
Identify soil horizons. Use all of the information at your disposal:
- soil color and texture,
- root depth,
- evidence of worms and other soil organisms, etc.
- This is a good time to use your magnifying glass!
- Using golf tees or nails (or markers on the background paper), mark the soil horizon depths.
- Measure the horizon depths (top and bottom of each horizon) and record them in your data table (see example).
-
For each soil horizon, use the table to identify the soil structure and record it in your data table (GLOBE, 2005a).
- Use a trowel or other digging device to remove a sample of soil from the horizon being studied.
- Hold the sample gently in your hand and look closely at the soil to examine its structure. This is a good time to use your magnifying glass!
Swipe left to see more
Step 7. Identifying Soil StructureGranular: Resembles cookie crumbs and is usually less than 0.5 cm in diameter. Commonly found in surface horizons where roots have been growing. 
Blocky: Irregular blocks that are usually 1.5–5.0 cm in diameter. 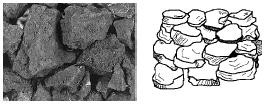
Prismatic: Vertical columns of soil that might be a number of cm long. Usually found in lower horizons. 
Columnar: Vertical columns of soil that have a white, rounded salt "cap" at the top. Found in soils of arid climates. 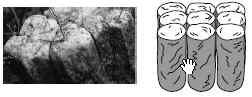
Platy: Thin, flat plates of soil that lie horizontally. Usually found in compacted soil. 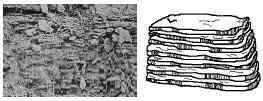
In certain cases, soil samples may have no structure. These would be classified as either "Single-Grained" or "Massive." Single-Grained: Soil is broken into individual particles that do not stick together. Always accompanies a loose consistence. Commonly found in sandy soils. 
Massive: Soil has no visible structure, is hard to break apart and appears in very large clods. 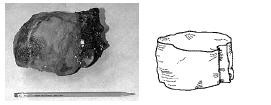
-
For each soil horizon, identify the soil color by matching to the swatches in a soil color book (optional, but preferable), or by using descriptive color terms. Photographs would also be useful here for your display board.
- Take a ped (a ped is a small, naturally-occuring aggregate of soil—in other words, a small "lump" of soil) from the horizon being studied and note whether it is moist, dry or wet. If it is dry, moisten it slightly with water from your spray bottle.
- Break the ped and hold it next to the color chart.
- Stand with the sun over your shoulder so that sunlight shines on the color chart and the soil sample you are examining.
- Find the color on the color chart that most closely matches the color of the inside surface of the ped.
- Record the color of the ped in your data table, in the row for the appropriate soil horizon. Sometimes, a soil sample may have more than one color. Record a maximum of two colors if necessary, and indicate (1) the dominant (main) color, and (2) the sub-dominant (secondary) color.
-
For each soil horizon, use the table, Step 9, to identify the soil consistence (GLOBE, 2005a).
- Take a ped from the soil horizon being studied. If the soil is very dry, moisten the face of the core sample by squirting water on it, and then remove a ped for determining consistence.
- Holding the ped between your thumb and forefinger, gently squeeze it until it pops or falls apart.
- Record your findings for each soil horizon in your data table.
Swipe left to see more
Step 9. Identifying Soil ConsistenceLoose: You have trouble picking out a single ped and the structure falls apart before you handle it. Note: Soils with Single-Grained structure always have Loose consistence. 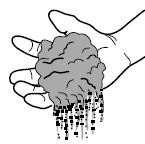
Friable: The ped breaks with a small amount of pressure. 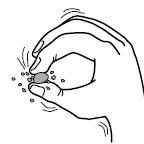
Firm: The ped breaks when you apply a larger amount of pressure and the ped dents your fingers before it breaks. 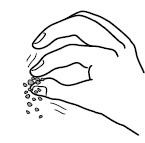
Extremely Firm: The ped can't be crushed with your fingers (you need a hammer!) 
-
For each soil horizon, identify the soil texture using the instructions and the soil textural triangle, (GLOBE, 2005a).
Soil Texture, Step 1- Place some soil from a horizon (about the size of a small egg) in your hand and use the spray bottle to moisten the soil. Let the water soak into the soil and then work it between your fingers until it is thoroughly moist. Once the soil is moist, try to form a ball.
- If the soil forms a ball, go on to Soil Texture, Step 2.
- If the soil does not form a ball, call it a sand. Soil texture is complete. Record the texture for this horizon in your data table.
- Place the ball of soil between your thumb and forefinger and gently push and squeeze it into a ribbon.
- If you can make a ribbon that is longer than 2.5 cm, go to Soil Texture, Step 3.
- If the ribbon breaks apart before it reaches 2.5 cm, call it a loamy sand. Soil texture is complete. Record the texture for this horizon in your data table.
-
If the soil:
- is very sticky,
- is hard to squeeze,
- stains your hands,
- has a shine when rubbed,
- forms a long ribbon (> 5 cm) without breaking,
-
Otherwise, if the soil:
- is somewhat sticky,
- is somewhat hard to squeeze,
- is at most slightly sticky,
- forms a medium ribbon (between 2 and 5 cm) before breaking,
-
Otherwise, if the soil:
- is smooth,
- is easy to squeeze,
- is at most slightly sticky,
- forms a short ribbon (< 2 cm) before breaking,
-
Wet a small pinch of the soil in your palm and rub it with a forefinger. If the soil:
- Feels very gritty every time you squeeze the soil, go to b.
- Feels very smooth, with no gritty feeling, go to c.
-
Feels only a little gritty, go to d.
-
Add the word sandy to the initial classification.
-
If you've reached this point, the soil texture should be one of the following:
- sandy clay,
- sandy clay loam, or
- sandy loam.
-
Soil texture is complete. Record the texture for this horizon in your data table.
-
If you've reached this point, the soil texture should be one of the following:
-
Add the word silt or silty to the initial classification.
-
If you've reached this point, the soil texture should be one of the following:
- silty clay,
- silty clay loam, or
- silt loam.
-
Soil texture is complete. Record the texture for this horizon in your data table.
-
If you've reached this point, the soil texture should be one of the following:
-
Leave the original classification.
-
If you've reached this point, the soil texture should be one of the following:
- clay,
- clay loam, or
- loam.
-
Soil texture is complete. Record the texture for this horizon in your data table.
-
If you've reached this point, the soil texture should be one of the following:

A triangle is labeled on three sides: percent clay, percent silt, and percent sand. Each edge is numbered from 0 to 100 and describes the make-up of soil based on how it feels. The inside of the triangle is broken into 12 sections of different sizes that describe a texture. By feeling soil and matching the texture to the descriptions you can get an idea of how much sand, silt and clay is in the soil.
Figure 1. Soil Textural Triangle. This diagram shows the approximate percentages of sand, silt, and clay in the soil, according to how the soil feels in your hands. See instructions for step 10, above.
- For each horizon, observe and record if there are none, few or many rocks. Use the #10 sieve to sift a soil sample from the horizon. Rocks will remain behind in the sieve.
- For each horizon, observe and record if there are none, few or many roots. Use the #10 sieve to sift a soil sample from the horizon. Roots will remain behind in the sieve.
-
For each soil horizon, measure the free carbonates.
- Set aside a portion of the soil to use for the free carbonates test. Make sure not to touch it with your bare hands.
- Use the eyedropper (or disposable squeeze pipette) to add several drops of vinegar to the soil sample.
- Look carefully for the presence of effervescence (bubbles). The more free carbonates that are present, the more effervescence you will observe.
-
From your observations, record in your data table one of the following notations:
- None: if you observe no reaction, the soil has no free carbonates present.
- Slight: if you observe a very slight bubbling action; this indicates the presence of some carbonates.
- Strong: if there is a strong reaction (many, and/or large bubbles) this indicates that many carbonates are present.
-
Take a photograph or make a drawing of your soil profile. Here are some tips for getting a good photograph.
- Use a marker and a blank sheet of paper to make a sign that identifies the site. Take a photograph of the sign (get close enough so you can read it) so that you'll know where the following pictures came from.
- Place a tape measure or meter stick starting from the top of the soil profile next to where the horizons have been marked.
- With the sun at your back, photograph the soil profile so that the horizon markers and their depths (on the tape measure or meter stick) can be seen clearly.
- Take another photograph of the landscape around your sampling site.
- Here is a sample data table.
/-/https/www.sciencebuddies.org/cdn/Files/2381/5/EnvSci_img003.jpg)
/-/https/www.sciencebuddies.org/cdn/Files/2382/5/EnvSci_img004.jpg)
/-/https/www.sciencebuddies.org/cdn/Files/2383/5/EnvSci_img005.jpg)
/-/https/www.sciencebuddies.org/cdn/Files/2384/5/EnvSci_img006.jpg)
/-/https/www.sciencebuddies.org/cdn/Files/2385/5/EnvSci_img007.jpg)
/-/https/www.sciencebuddies.org/cdn/Files/2386/5/EnvSci_img008.jpg)
/-/https/www.sciencebuddies.org/cdn/Files/2387/5/EnvSci_img009.jpg)
/-/https/www.sciencebuddies.org/cdn/Files/2388/5/EnvSci_img010.jpg)
/-/https/www.sciencebuddies.org/cdn/Files/2389/5/EnvSci_img011.jpg)
/-/https/www.sciencebuddies.org/cdn/Files/2390/5/EnvSci_img012.jpg)
/-/https/www.sciencebuddies.org/cdn/Files/2391/5/EnvSci_img013.jpg)
/-/https/www.sciencebuddies.org/cdn/Files/2392/5/EnvSci_img014.jpg)
Landscape Position: large, flat area
Cover Type: grass
Land Use: school grounds
Parent Material: limestone bedrock
| Horizon | Top | Bottom | Structure | Color | Consistence | Texture | Rocks | Roots | Carbonates |
| 1 | 0 cm | 20 cm | Granular | 10YR3/4 | Friable | Loam | None | Many | None |
| 2 | 20 cm | 40 cm | Blocky | 7.5YR6/8 | Friable | Clay Loam | None | Many | None |
| 3 | 40 cm | 75 cm | Blocky | 5YR6/8 | Firm | Clay Loam | None | Many | None |
| 4 | 75 cm | 100 cm | Prismatic | 5YR6/6 | Extremely Firm | Clay | None | Few | None |
Interpreting Your Data
How do the soil profiles compare between the different sites? What do they tell you about the differences in environmental history between sites?
Note: the following suggestions are taken from the Soil Characterization Protocol (GLOBE, 2005a).
- Soil Horizons. It is unlikely that large numbers of distinct horizons will be found in very young soils (recently deposited, or close to bedrock), or very highly developed soils (such as are found in tropical regions). More horizons are found in temperate climates under forest vegetation.
- Color. Dark colored soil is usually found at the surface, unless there has been intense leaching of organic material, such as in a coniferous forest, or deposition has occurred where new parent material has been deposited on top of a soil profile that was already developed.
- Texture. In general, soil texture is similar as you go deeper into the soil, with a gradual increase in clay. If there is a very sharp difference in texture (such as a clayey soil over a very sandy soil) this may also be an indication of a different parent material due to deposition. This may occur if you are in an area near a stream where flooding is common, or where human activity has disturbed the soil and fill has been added.
- Structure. Granular structure is generally found where there are many roots. Soils with high amounts of clay typically have blocky or massive structure.
- Consistence. When soil has single-grained structure, the consistence is always loose and the texture is usually sand or other very sandy texture such as loamy sand. Testing for the bulk density of the soil can act as a check for the consistence since the denser the soil, the more firm the consistence will be.
- Roots. Bulk density should be lower when there are many roots in the soil that add pore space to the horizon.
- Carbonates. If free carbonates are present, the pH should be 7 or above since high amounts of calcium carbonate decrease the soil acidity and increase the pH.
Ask an Expert
Global Goals
The United Nations Sustainable Development Goals (UNSDGs) are a blueprint to achieve a better and more sustainable future for all.
/-/https/www.sciencebuddies.org/cdn/Files/19754/5/E-WEB-Goal-11.png)
Variations
- Instead of using core samples, dig a 1 m deep pit to examine the soil. It's a lot more work, but you'll get a better look at the soil, and you'll probably be able to get deeper samples than with your homemade auger. Make sure you have permission to dig first. You'll also need to investigate ahead of time to make sure that there are no underground utilities (e.g., water, sewer, gas, electric, or telephone lines) in the area.
- Advanced. If you want to perform further analyses of your soil samples, you should collect at least three samples from each soil horizon in sealable plastic bags. Mark each bag with the date, location, soil horizon, and depth from which it was collected. Here are some properties you can measure for your samples:
- bulk density,
- particle density,
- particle size distributions,
- pH,
- soil fertility (N, P, K).
Careers
If you like this project, you might enjoy exploring these related careers:
/-/https/careerdiscovery.sciencebuddies.org/cdn/Files/1783/17/nrcseprd423668.jpg)
/-/https/careerdiscovery.sciencebuddies.org/cdn/Files/1359/18/VNIIOarctic.jpg)

/-/https/img.youtube.com/vi/B937Ox9JNEQ/0.jpg)
/-/https/img.youtube.com/vi/Qme0DYXcF-0/0.jpg)
/-/https/img.youtube.com/vi/jhRyistosQk/0.jpg)