Abstract
Do you like drawing or painting? What if you could build a robot that creates its own art? In this project, you will create your own Art Bot, a robot with markers for "legs" that wobbles across a piece of paper, creating drawings as it moves. You can then customize your robot to change how it draws. This is a beginner-level project with no robotics experience necessary, so if you want to try building your own robot, this is a great place to start!
Summary
None
A kit is available from our partner Home Science Tools®. See the Materials section for details.
Adult supervision is required when using a hobby knife.
This project is based on the following:
- Ceceri, K. (2012). How to Build an Art Bot. Robotics: Discover the Science and Technology of the Future with 20 Projects. Nomad Press.
/-/https/i.ytimg.com/vi/daWU2Oh_xlg/maxresdefault.jpg)
Objective
Build an Art Bot and investigate how changing the robot's design affects how it draws.
Introduction
/-/https/www.sciencebuddies.org/cdn/Files/8238/8/artbot-thumbnail-triple.jpg)
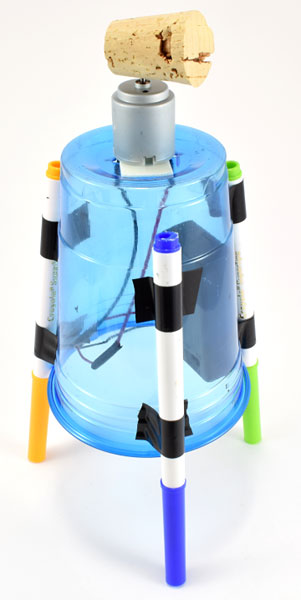
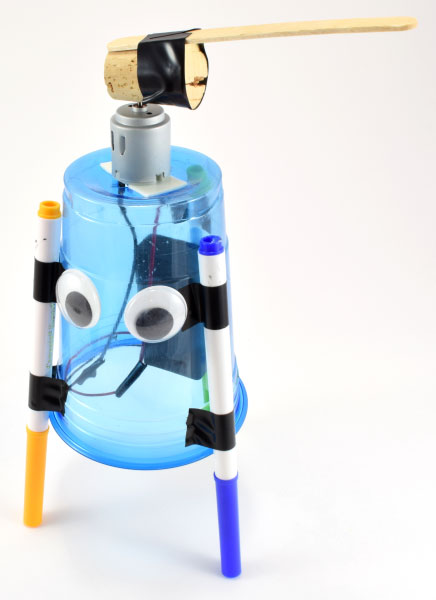
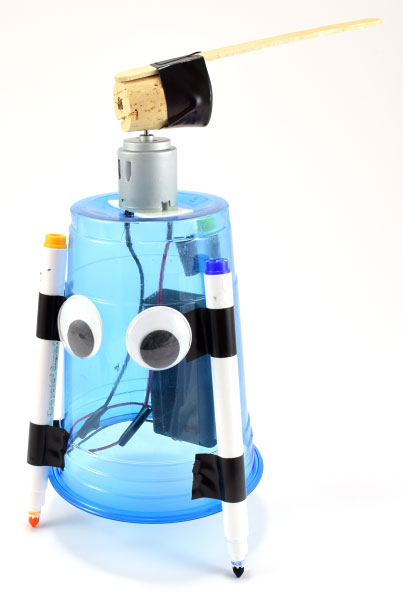
Do you like to draw pictures and make art? Do you think it would be fun to build a robot that can draw with you? In this project, you will build a robot called an Art Bot, like the one shown in Figure 1.
/-/https/www.sciencebuddies.org/cdn/Files/7960/12/artbot-robot.jpg)
Figure 1. An example of an Art Bot.
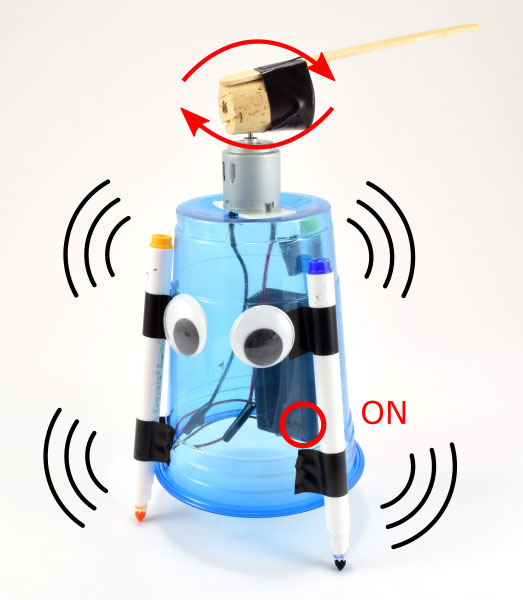
The Art Bot uses a small electric motor to move. In order to power the motor, the robot also needs a battery. When you connect the battery to the motor, you complete an electrical circuit, and this allows the motor to spin. The motor has an off-center weight attached to it (the popsicle stick in Figure 1), which causes the motor to vibrate. When the motor vibrates, it causes the robot to wobble across the paper. This is the same technology that makes video game controllers and cell phones vibrate; on the inside, they have little spinning motors with weights attached. Your Art Bot will also have markers for "legs," so it will draw on paper as it moves.
In this science project, you will find out how the weight attached to the motor affects the robot's movement. What happens if the popsicle stick is perfectly centered? What happens when it is way off-center? Move on to the Materials section to see the list of supplies you will need to build your own Art Bot, and the Procedure for instructions on how to build one and do the experiment.
Terms and Concepts
- Robot
- Motor
- Battery
- Circuit
- Vibrate
Questions
- What causes the robot's motor to vibrate?
- How does the motor make the robot move across the paper?
- What is an electrical circuit?
- What do you think will happen when the popsicle stick is perfectly centered on the motor?
- What do you think will happen when the popsicle stick is completely off-center?
Bibliography
This project is based on the Art Bot project from this book:
- Ceceri, K. (2012). How to Build an Art Bot. Robotics: Discover the Science and Technology of the Future with 20 Projects. Nomad Press.
If you want to learn more about some of the concepts in this project, like circuits and vibrational motion, check out these references:
- Henderson, T. (n.d.). Vibrational Motion. The Physics Classroom. Retrieved August 6, 2014.
- Grusin, M. (n.d.). What is a Circuit? SparkFun Electronics. Retrieved July 31, 2014.
If you want to learn about real-life robots powered by vibrational motion, read about these robots developed at Harvard University:
- Self-Organizing Systems Research Group (n.d.). Kilobots. Harvard University. Retrieved March 23, 2018.
Materials and Equipment 
Recommended Project Supplies
/-/https/www.sciencebuddies.org/cdn/Files/21616/4/hst-art-bot-kit.jpg)
- Art Bot Kit, available from our partner Home Science Tools®
- Scissors
- White posterboard pieces (3)
- Stopwatch
- Volunteer to help run your experiments
- Lab notebook
Disclaimer: Science Buddies participates in affiliate programs with Home Science Tools®, Amazon.com, Carolina Biological, and Jameco Electronics. Proceeds from the affiliate programs help support Science Buddies, a 501(c)(3) public charity, and keep our resources free for everyone. Our top priority is student learning. If you have any comments (positive or negative) related to purchases you've made for science projects from recommendations on our site, please let us know. Write to us at [email protected].
Experimental Procedure
Build Your Art Bot
- Watch this video or follow along with the slideshow to build your Art Bot:
/-/https/www.sciencebuddies.org/cdn/Files/7977/9/parts-fall-off.jpg)
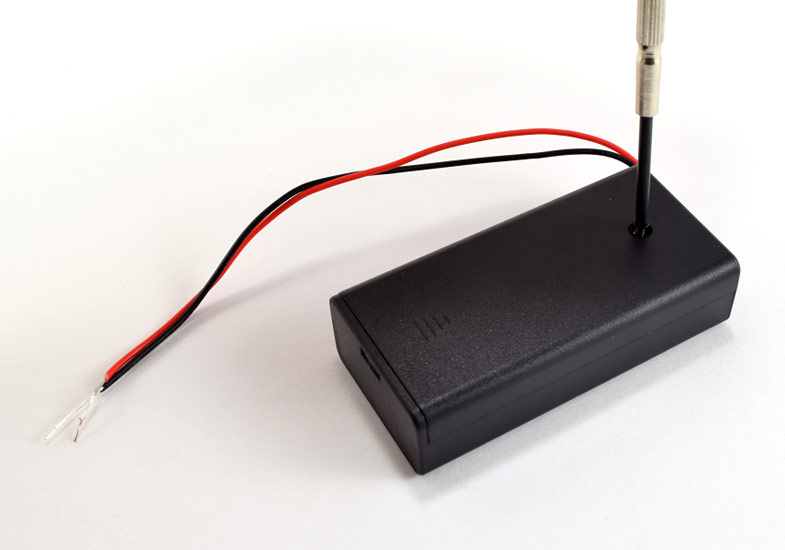
/-/https/www.sciencebuddies.org/cdn/Files/7939/14/battery-screw.jpg)
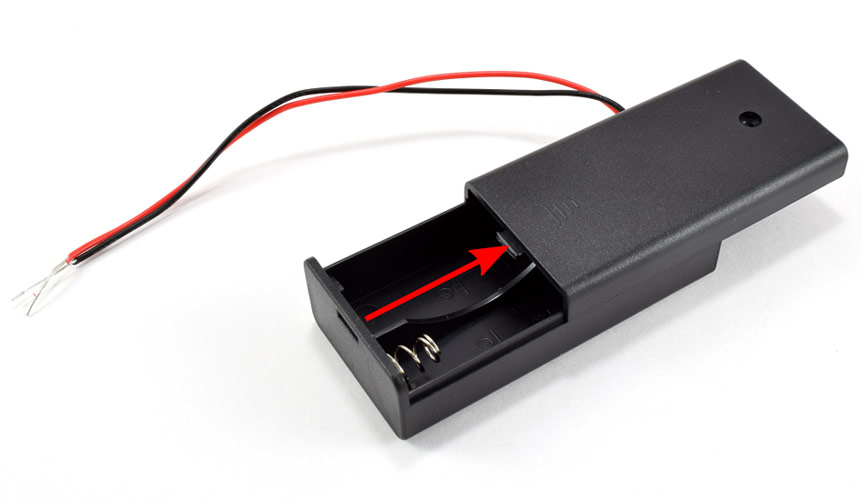
/-/https/www.sciencebuddies.org/cdn/Files/7940/15/battery-remove-cover.jpg)
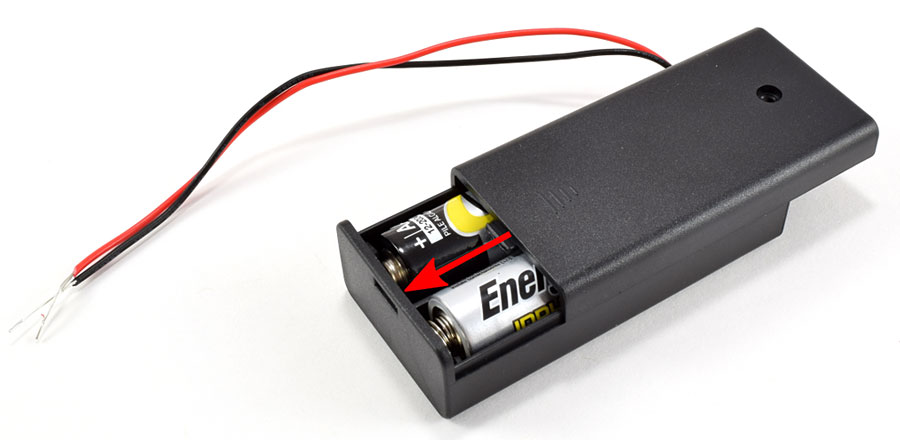
/-/https/www.sciencebuddies.org/cdn/Files/7941/15/insert-batteries.jpg)
/-/https/www.sciencebuddies.org/cdn/Files/7942/14/battery-replace-cover.jpg)
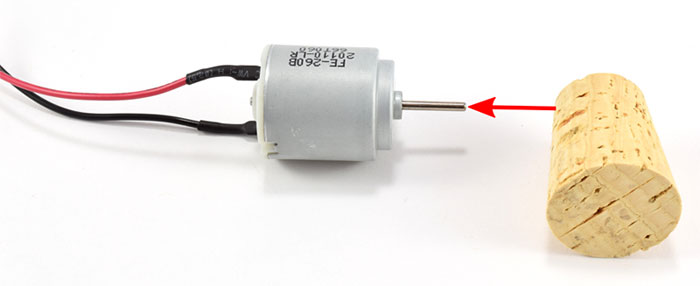
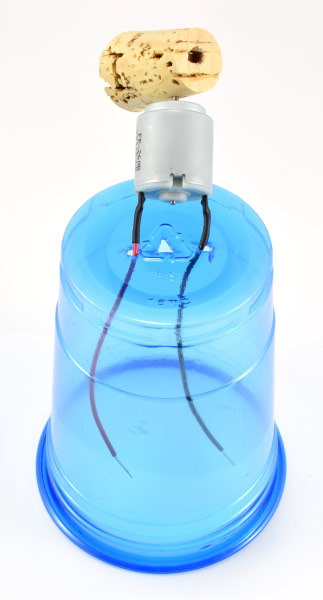
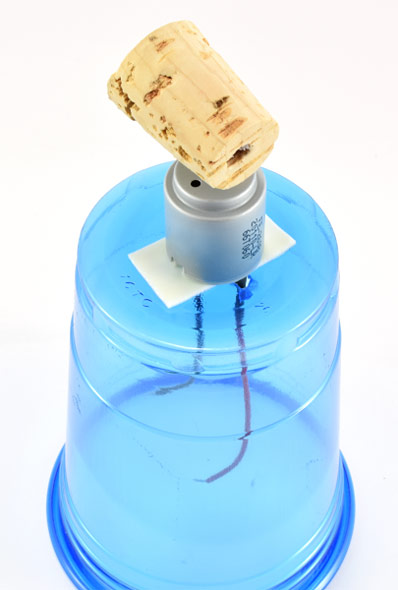
/-/https/www.sciencebuddies.org/cdn/Files/7943/15/motor-attach-cork.jpg)
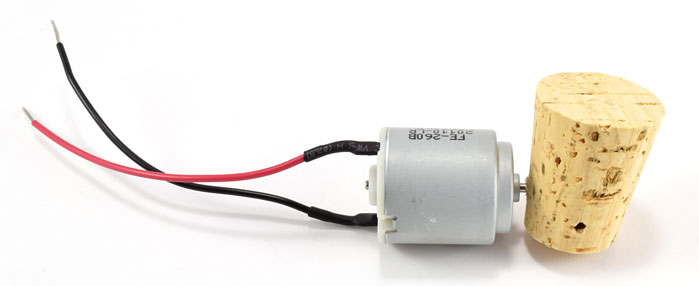
/-/https/www.sciencebuddies.org/cdn/Files/7944/14/cork-on-motor.jpg)
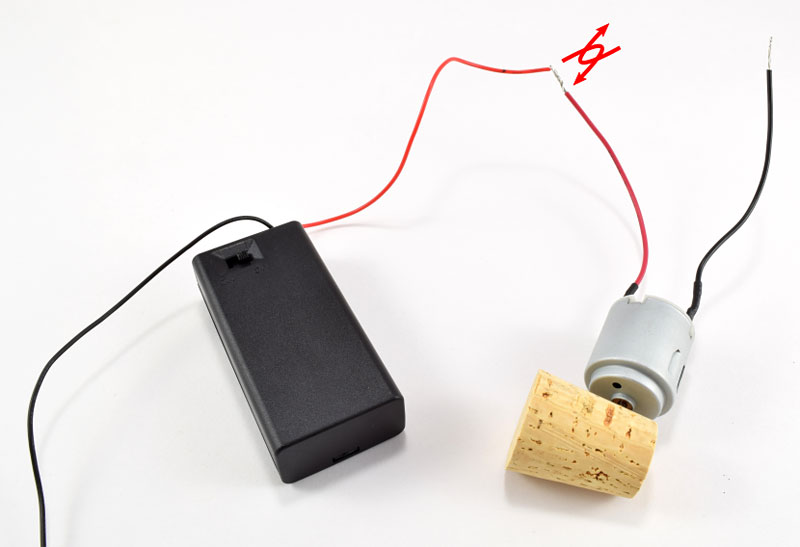
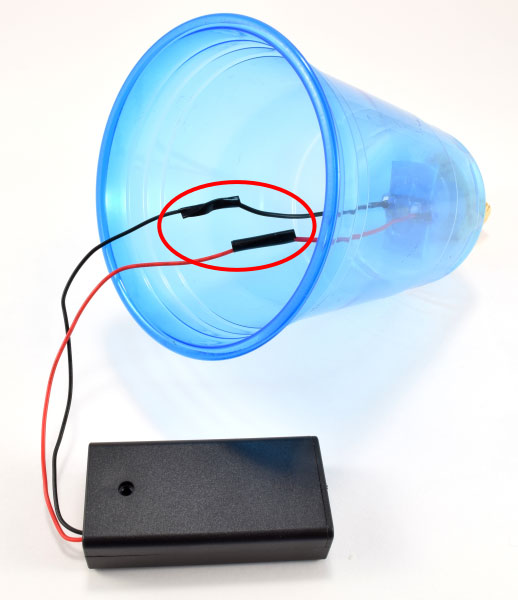
/-/https/www.sciencebuddies.org/cdn/Files/7945/14/twist-red-wires.jpg)
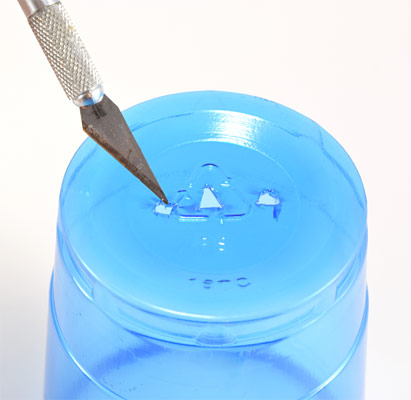
/-/https/www.sciencebuddies.org/cdn/Files/7961/10/cut-cup.jpg)
/-/https/www.sciencebuddies.org/cdn/Files/7962/10/thread-wires.jpg)
/-/https/www.sciencebuddies.org/cdn/Files/7963/9/shaft-spin.jpg)
/-/https/www.sciencebuddies.org/cdn/Files/7964/9/apply-tape.jpg)
/-/https/www.sciencebuddies.org/cdn/Files/7965/9/attach-motor.jpg)
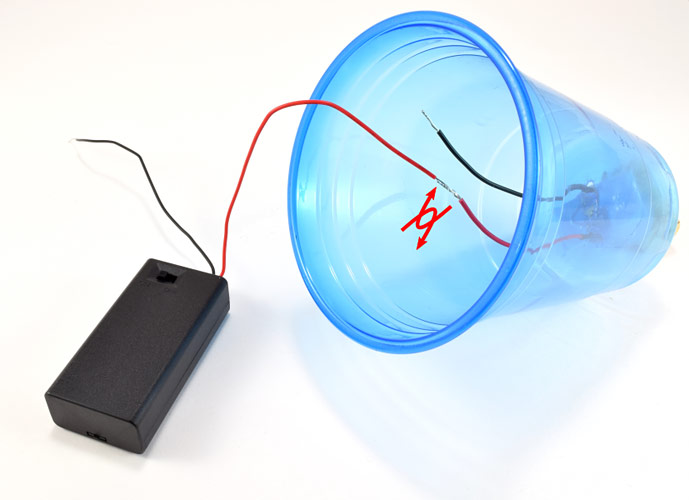
/-/https/www.sciencebuddies.org/cdn/Files/7966/9/red-wire.jpg)
/-/https/www.sciencebuddies.org/cdn/Files/7967/9/black-wire.jpg)
/-/https/www.sciencebuddies.org/cdn/Files/7968/9/electrical-tape.jpg)
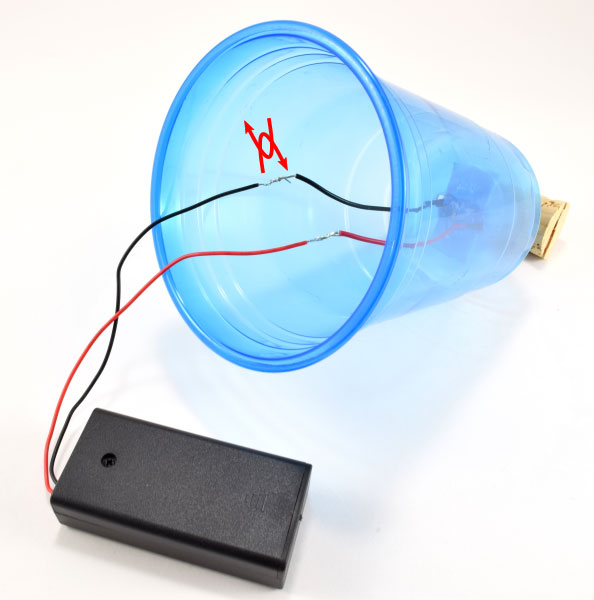
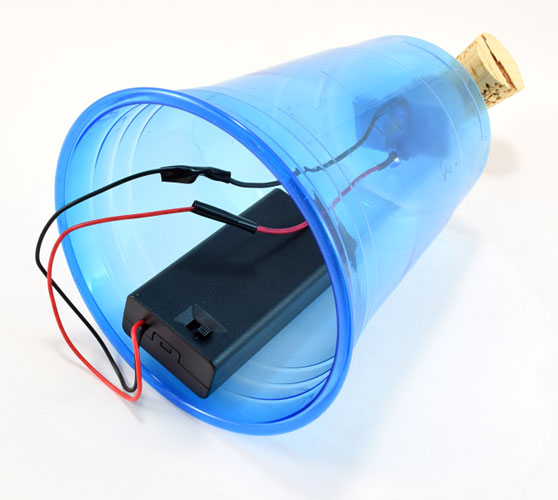
/-/https/www.sciencebuddies.org/cdn/Files/7969/9/battery-pack-tape.jpg)
/-/https/www.sciencebuddies.org/cdn/Files/7970/9/attach-battery-pack.jpg)
/-/https/www.sciencebuddies.org/cdn/Files/7971/9/tape-markers.jpg)
/-/https/www.sciencebuddies.org/cdn/Files/7972/9/tape-cork.jpg)
/-/https/www.sciencebuddies.org/cdn/Files/7973/9/googly-eyes.jpg)
/-/https/www.sciencebuddies.org/cdn/Files/7974/9/build-an-artbot.jpg)
/-/https/www.sciencebuddies.org/cdn/Files/7975/9/artbot-operation.jpg)
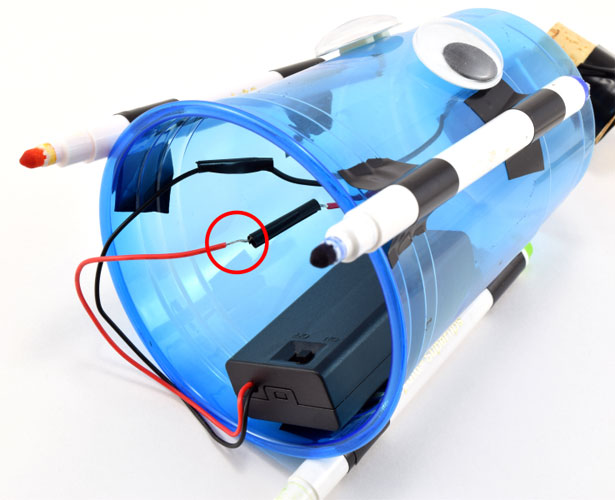
/-/https/www.sciencebuddies.org/cdn/Files/7976/9/wire-loose.jpg)
Slideshow with step-by-step instructions viewable online.
- Follow these troubleshooting tips when using your Art Bot:
- If your Art Bot stops moving suddenly, check to make sure that one set of wires did not get disconnected. If you did not twist the wires tightly enough, the vibrations may cause them to come apart. If necessary, take off the tape, tightly re-twist the wires, and then reapply tape.
- As your robot wobbles around, some pieces may fall off. If necessary, use more tape to reattach them.
- Your Art Bot might fall over frequently if it wobbles too much. To make it wobble less, move the popsicle stick so it is more centered on the cork. You may need to adjust the popsicle stick positions you test in the "Test Your Art Bot" section of this project to make sure your Art Bot does not fall over.
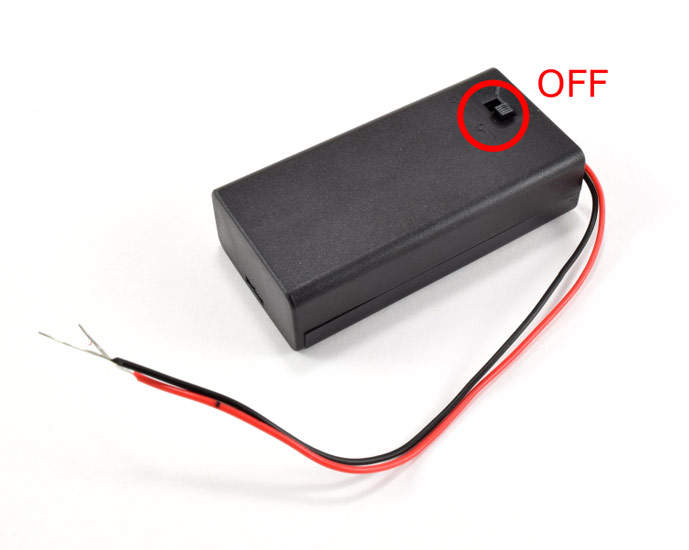
- Always turn your robot off when not in use to help conserve battery power.
Test Your Art Bot
- Label three pieces of posterboard by writing in their corners: "Popsicle stick off-center," "Popsicle stick partially off-center," and "Popsicle stick centered."
- Put the first piece of posterboard (popsicle stick off-center) down on the floor or on a tabletop. Important: Depending on the surface you are working on, you may need to be ready to catch your Art Bot before it goes off the posterboard. For example, you do not want it to fall off a table, or to get marker on surrounding carpet.
- Take the marker caps off your Art Bot, and place it in the center of the first piece of posterboard.
- Have your volunteer get the stopwatch ready.
- Lift the Art Bot up and turn the battery holder's switch to ON. Be carefully that the spinning popsicle stick does not hit your hand!
- Place the Art Bot down in the center of the posterboard. As soon as you put it down, your volunteer should start the stopwatch.
- The volunteer should say "Stop!" as soon as the stopwatch reaches 10 seconds. As soon as they say "stop," pick the Art Bot up and turn it off.
- If the Art Bot goes off the posterboard before 10 seconds is up, pick it up and turn it off.
- If any part of your robot breaks during testing (for example, if a marker falls off), stop testing, fix your robot, and then redo that trial.
- Can you make any observations about the Art Bot's motion? For example, does it seem very jerky and wobbly, or does it move smoothly? Does it move fast or slow? Record any observations you make in your lab notebook.
- Repeat step 4 two more times, on the same piece of posterboard, for a total of three trials.
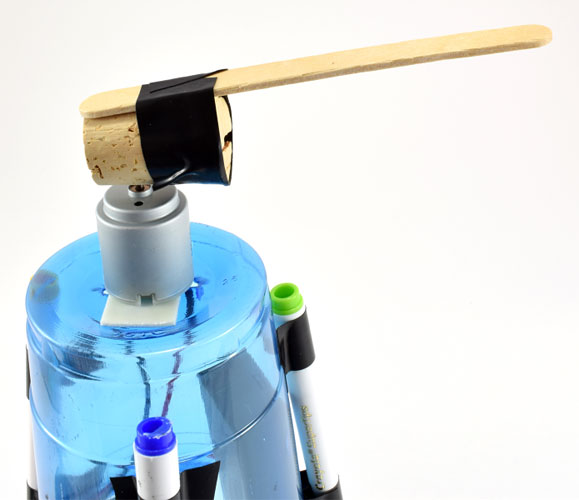
- Now, re-tape the popsicle stick to the cork so it is only partially off-center, as shown in Figure 2.
/-/https/www.sciencebuddies.org/cdn/Files/6354/21/popsicle-stick-medium.jpg)
Figure 2. Popsicle stick attached to the cork so it is only partially off-center.
- Repeat steps 4–5 with a new piece of posterboard.
- Re-tape the popsicle stick so it is centered on the cork, as shown in Figure 3.
/-/https/www.sciencebuddies.org/cdn/Files/6355/20/popsicle-stick-centered.jpg)
Figure 3. Popsicle stick centered on the cork.
- Repeat steps 4–5 with a new piece of posterboard.
- Analyze your results by looking at your three posterboard pieces side-by-side, along with the observations you recorded in your lab notebook.
- Which popsicle stick position made the robot move the fastest? Which one made it move the slowest?
- Which popsicle stick position made the robot end up farthest from its starting point within 10 seconds? What about staying the closest to the middle of the posterboard?
- Organize your results in a data table like Table 1.
- Make graphs of your data.
- Make a bar graph with popsicle stick position on the horizontal (x) axis and robot speed on the vertical (y) axis.
- Make a graph with the popsicle stick position on the horizontal (x) axis and final distance from starting point on the vertical (y) axis.
- Do your results match your predictions about how the popsicle stick would affect the Art Bot's movement?
| Popsicle Stick Position | Robot's Speed (fastest/medium/slowest) |
Final Distance from Starting Point (farthest/medium/closest) |
|---|---|---|
| Off-center | ||
| Partially off-center | ||
| Centered |
Table 1. Data table for keeping track of how popsicle stick position affects the robot's motion.
Troubleshooting
For troubleshooting tips, please read our FAQ: Art Bot: Build a Wobbly Robot That Creates Art.
Ask an Expert
Global Goals
The United Nations Sustainable Development Goals (UNSDGs) are a blueprint to achieve a better and more sustainable future for all.
/-/https/www.sciencebuddies.org/cdn/Files/19752/5/E-WEB-Goal-09.png)
Variations
- The Art Bot you built in this project is a tripod, meaning it has three legs. What happens if you build an Art Bot that is a quadruped (has four legs) or a hexapod (has six legs)?
- Can you design an Art Bot that uses something other than a plastic cup for the robot's body? For example, can you build a body out of popsicle sticks?
- Can you design an Art Bot that goes straight, instead of wobbling around randomly?
- If you are ready for a more-advanced robotics project, check out Build a Light-Tracking Bristlebot.
Frequently Asked Questions (FAQ)
- Make sure you put the batteries into the battery holder correctly. The "+" signs on the batteries should line up with the "+" signs inside the battery pack. If you get one battery backwards, the motor will not spin.
- You might have pressed the cork too far onto the motor shaft. There should be a tiny bit of space between the edge of the cork and the face of the motor. If the cork is pushed all the way up against the motor, the friction might prevent the motor from spinning.
- You might not have completely twisted the motor and battery holder's wires together. Check to make sure the wires from the motor and battery holder are tightly twisted together.
- Your marker "legs" are loose, and not firmly taped to the plastic cup.
- The markers are not evenly spaced around the cup, causing the robot to tilt to one side.
- The popsicle stick is too far off center, causing the robot to wobble excessively and fall over.
Careers
If you like this project, you might enjoy exploring these related careers:
/-/https/careerdiscovery.sciencebuddies.org/cdn/Files/1725/18/4161_Michelle_Easter_and_Curiousity_Clone.jpg)
/-/https/careerdiscovery.sciencebuddies.org/cdn/Files/1450/21/iStock-1227179796.jpg)
/-/https/careerdiscovery.sciencebuddies.org/cdn/Files/1223/17/iStock-971549326.jpg)
/-/https/careerdiscovery.sciencebuddies.org/cdn/Files/1731/17/iStock-1187291213.jpg)
Contact Us
Our kits are developed in partnership with Home Science Tools®. If you have purchased a kit for this project, Home Science Tools® is pleased to answer any questions not addressed by the FAQ above.In your email, please follow these instructions:
- Include your Home Science Tools® order number.
- Please describe how you need help as thoroughly as possible:
Examples
Good Question I'm trying to do Experimental Procedure step #5, "Scrape the insulation from the wire. . ." How do I know when I've scraped enough?
Good Question I'm at Experimental Procedure step #7, "Move the magnet back and forth . . ." and the LED is not lighting up.
Bad Question I don't understand the instructions. Help!
Good Question I am purchasing my materials. Can I substitute a 1N34 diode for the 1N25 diode called for in the material list?
Bad Question Can I use a different part?
Contact Support

/-/https/img.youtube.com/vi/XwJQJnY6iUs/0.jpg)
/-/https/img.youtube.com/vi/k_1-fmQCjWo/0.jpg)
/-/https/img.youtube.com/vi/SrBNaFWHNN8/0.jpg)