Summary
Introduction
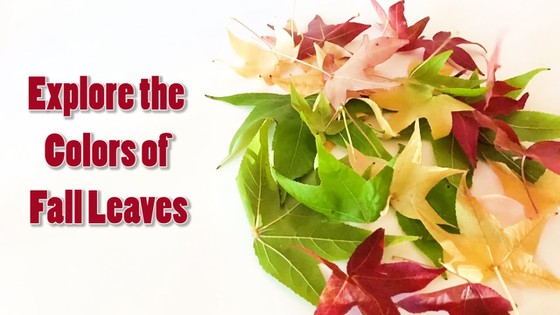
Have you ever wondered why leaves change from green to an amazing array of yellow, orange, and red during the fall? Leaves get their brilliant colors from pigments made up of various color-creating molecules. During the warm, sunny months, plants use their leaves to turn sunlight into food energy, a process called photosynthesis. This primarily uses a pigment that reflects green light, which gives the leaves their characteristic color. In autumn, when colder, shorter days arrive, many kinds of trees no longer make food energy with their leaves and, consequently, no longer need the green pigment. The leaves' other pigments, some of which were already there during summer, become visible. In this science activity, you will uncover these hidden colors by separating plant pigments with a process called paper chromatography. What colors will you see?Materials
- Leaves at different stages of turning fall colors (the more the better — about 20 of each color, from the same tree, is best)
- Scissors
- Strong, white, heavyweight, ultra-absorbent paper towels or white coffee filter paper or chromatography filter paper that can be purchased separately from our partner Home Science Tools. Note: Chromatography paper usually works better than paper towels or coffee filter. If you use paper towels, make sure to use thick paper towels as these result in better color separation.
- Ruler
- Pencil
- Clothespins or large paper clips (3–4 for each group of leaves)
- Toothpicks
- Strong, sturdy glasses, such as mason jars (one for each group of leaves)
- Tall glass jars or drinking glasses (one for each group of leaves)
- Wooden spoon or another wooden utensil with a blunt end for crushing leaves
- Fork
- Plates (one for each group of leaves)
- Very small heat-resistant bowls or tea-light candle holders (one for each group of leaves)
- Isopropyl alcohol, 70% or higher
- Measuring spoon, teaspoon
- Stove
- Tap water
- Pot
- Scale
- Resealable plastic bags (one for each group of leaves)
- Tape
 Image Credit: Svenja Lohner, Science Buddies / Science Buddies
Disclaimer: Science Buddies participates in affiliate programs with Home Science Tools, Amazon.com, Carolina Biological, and Jameco Electronics. Proceeds from the affiliate programs help support Science Buddies, a 501(c)(3) public charity, and keep our resources free for everyone. Our top priority is student learning. If you have any comments (positive or negative) related to purchases you've made for science projects from recommendations on our site, please let us know. Write to us at scibuddy@sciencebuddies.org.
Instructions
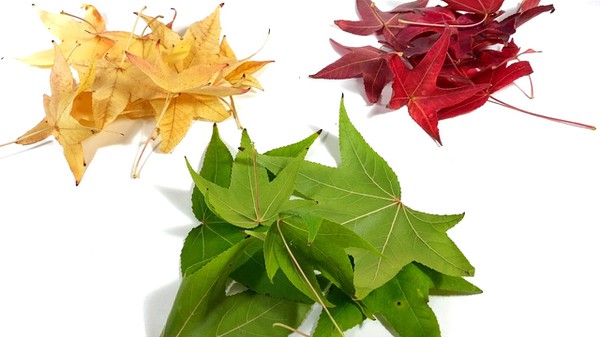
- Separate your leaves into distinct groups arranged by color, with about 20 large leaves per group. Separating them into green, yellow, and red piles may be easiest.
- Cut the leaves into small pieces with scissors.
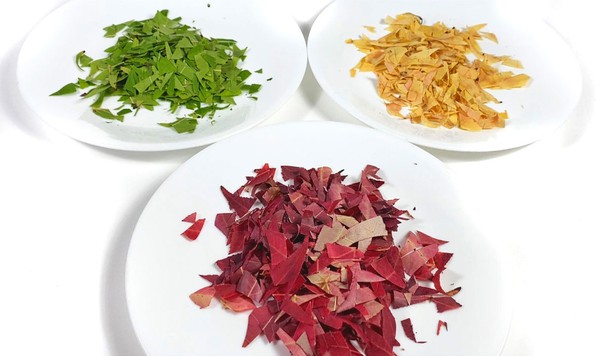 Image Credit: Svenja Lohner, Science Buddies / Science Buddies
- For each leaf color, put 10 grams of leaves into a mason jar or drinking glass.
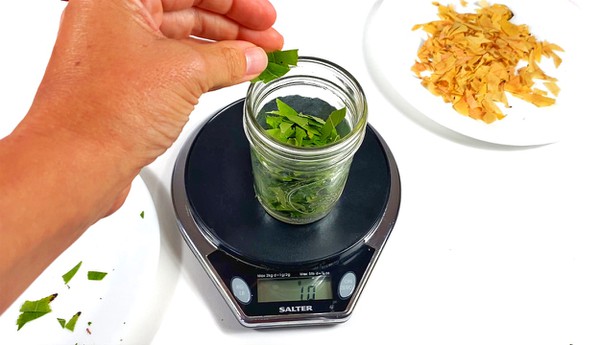 Image Credit: Svenja Lohner, Science Buddies / Science Buddies
- Add four teaspoons of isopropyl alcohol (70% or higher) to each glass.
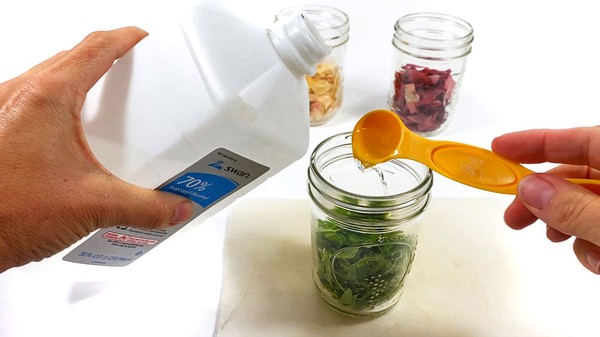 Image Credit: Svenja Lohner, Science Buddies / Science Buddies
- Crush the leaves into the alcohol using the blunt end of a wooden spoon for about five minutes, until the solution is dark.
 How has the color of the rubbing alcohol changed? Is the final color what you expected for each group of leaves?
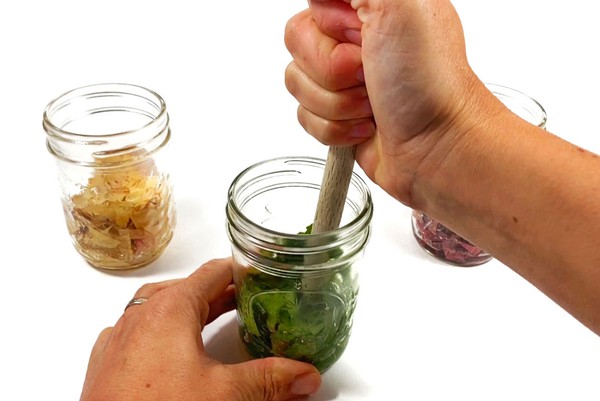 Image Credit: Svenja Lohner, Science Buddies / Science Buddies
- Let the solutions sit for 30 minutes in a dark place indoors.
- Transfer the crushed leaf solution into a resealable plastic bag. Do this for each leaf color separately. Then close each bag but leave one end open. Squeeze the leaves and collect the colored liquid in a small heat-resistant container.
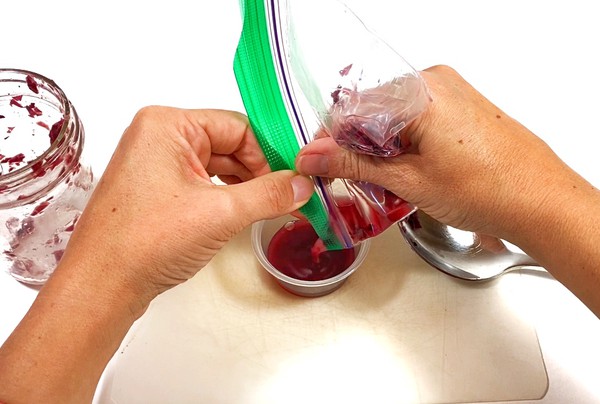 Image Credit: Svenja Lohner, Science Buddies / Science Buddies
- Pour some water into a pot and heat it up on the stove. Then switch off the stove and place the three heat-resistant containers with your leaf extracts into the hot water. Let them sit in the hot water for about 20–30 minutes, or until the isopropyl alcohol has mostly evaporated. As the alcohol evaporates, your extracts should become thicker when stirred with a fork.
- Concentrating the extracts should not require more than 30 minutes of evaporating off the isopropyl alcohol, although the extracts will become more concentrated the longer the alcohol is allowed to evaporate off.
- Stir each color thoroughly to blend and loosen any bits of dried up pigment from the side of the bowl. Be sure to use a clean fork for each color so you do not mix them!
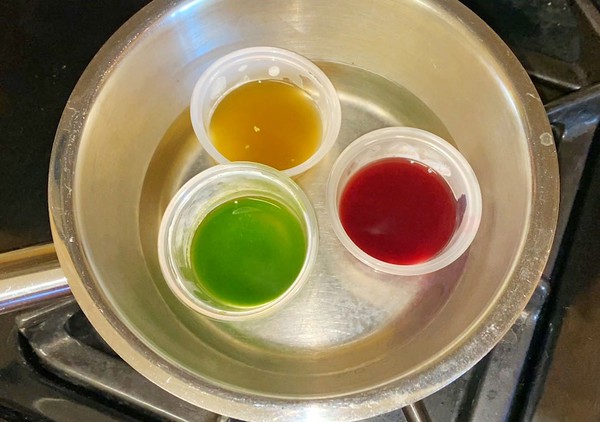 Image Credit: Svenja Lohner, Science Buddies / Science Buddies
- While the solutions are sitting, prepare your paper towel or coffee filter strips. Make three to four strips for each group of leaves. Cut up a strong, thick paper towel or a white coffee filter into long, one-inch-wide strips. They should be long enough to just touch the bottom of the tall glass jars. With a pencil, gently draw a line one inch from the bottom of each strip. You can also use chromatography paper for this step — which will give you even better results.
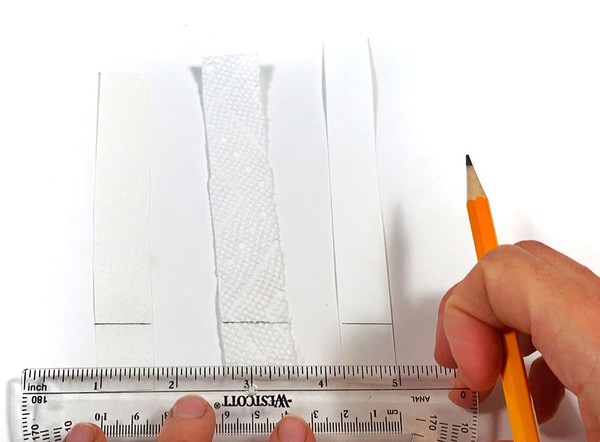 Image Credit: Svenja Lohner, Science Buddies / Science Buddies
- When your color extracts are concentrated enough, use a fork to remove any remaining leaf pieces from the solutions and discard these, while leaving the liquid in the glass.
- Thoroughly stir each colored solution with a toothpick, using a different toothpick for each solution so as not to mix the colors. Your solutions should seem thicker now.
- Using a toothpick, smoothly and evenly "paint" some of each solution across a paper towel or coffee filter strip (or strip of chromatography paper) on the pencil line you drew. Because some plant pigments can stain, you should do this on a plate so that the color will not stain your work surface. For each color, do this using a total of three to four strips.
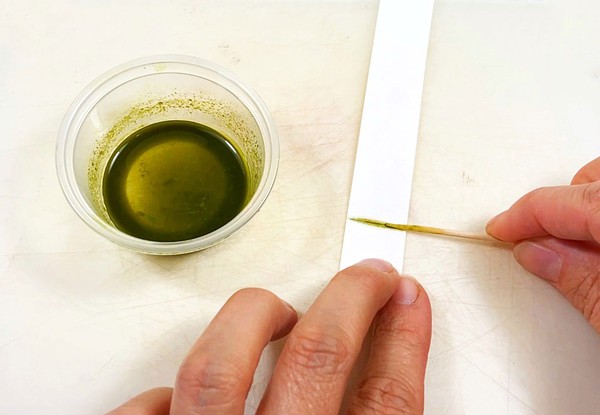 Image Credit: Svenja Lohner, Science Buddies / Science Buddies
- Allow the strips to air dry. Then apply another layer of your sample onto the paper strips. Ideally, you want to repeat this step at least 5-10 times to get enough of your sample onto the paper. Try to apply the sample on the same spot every time. The more concentrated your sample is on the paper strip, the better your results will be!
- While the strips are drying, pour enough isopropyl alcohol (70% or higher) into each tall glass to just cover the bottom. Prepare one glass for each color solution.
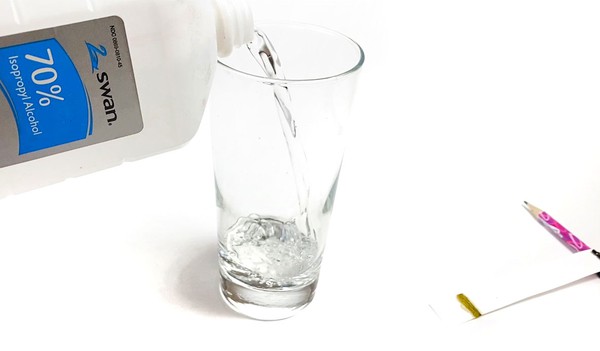 Image Credit: Svenja Lohner, Science Buddies / Science Buddies
- Use a binder clip or tape to attach the dried paper strip to a pencil or wooden splint. If your glass is wide enough, you can add several paper strips next to each other.
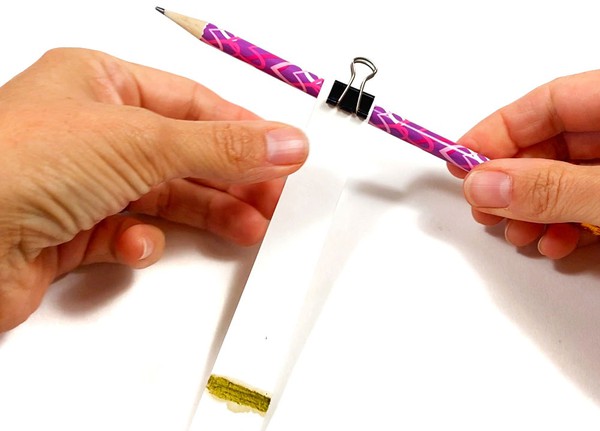 Image Credit: Svenja Lohner, Science Buddies / Science Buddies
- Carefully lay the pencil or wooden splint across the opening of the tall glass, so that the pigmented end of the strip just touches the alcohol. Make sure that the pencil line is NOT submerged in the liquid! Check that each strip is not touching the jar's sides. If you place several strips into the glass at the same time, keep them from touching each other.
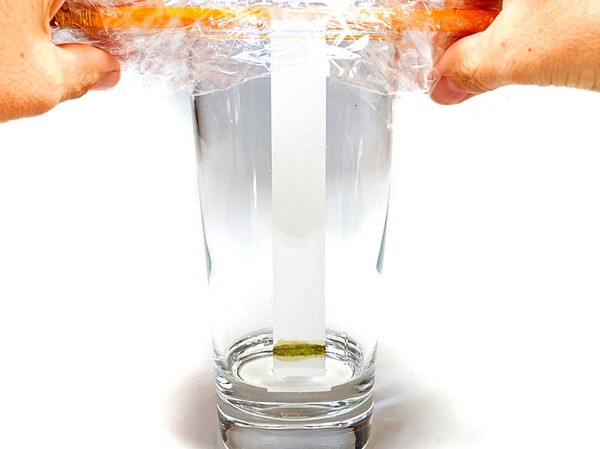 Image Credit: Svenja Lohner, Science Buddies / Science Buddies
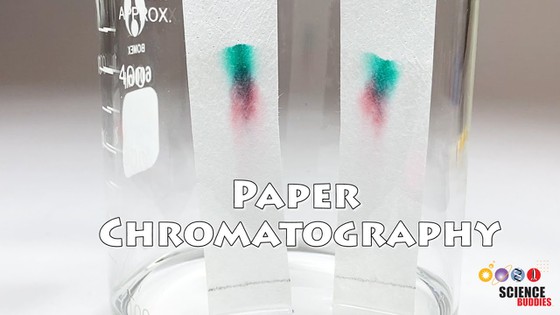
- Watch the solvent (isopropyl alcohol) rise up the paper strip. Leave the strips in the solvent until it almost reaches the top of the strip. Depending on the type of your paper this can take anywhere from 30 minutes to several hours.
What is happening to the color of the paper strips?
- Once the solvent gets close to the top of a strip, remove all strips and let them dry.
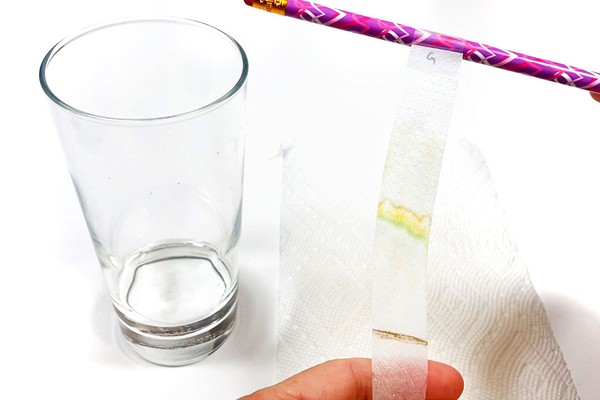 Image Credit: Svenja Lohner, Science Buddies / Science Buddies
- Look at the different dried strips.
How are the colors in the strips different? Do strips from different color solutions have unique colors, shared colors, or both?
- Look at the order in which the colors appear on the different strips.
Is the same color on the same place in different strips or is it in a different place? Do the colors appear in the same separation order or in different orders on each strip?
- Tips: If your chromatography comes out pale, try using more leaves, cutting them up into smaller pieces, and/or "painting" more of your solution onto the pencil line on the paper towel. Alternatively, you can also try to use the extracts themselves as your solvent. Pour each of the extracts into a different glass jar. Then hang the paper strips directly into the extracts.
Cleanup
What Happened?
Even though a plant leaf looks like it is mostly one color, it is actually made up of a mixture of pigment molecules. In this activity, a scientific technique called paper chromatography was used to separate the individual color pigments. You should see different colors at different locations as you go along one of the paper towel strips, and the order in which the colors appear should be roughly the same among the different color solutions you tested.
What are the different bands of color on the test strips? These are the different pigments in the leaves. The ones you may see on your paper towel strips are: green chlorophyll, yellow xanthophylls, orange carotenoids, and red anthocyanins. Pigments travel along the paper strip based on their interactions with the paper strip and the isopropyl alcohol solution. Pigments that are more attracted to the paper strip than the isopropyl alcohol stay near the bottom of the strip, where the solution was first "painted" onto the pencil line. Pigments that are more attracted to the alcohol than the paper strip usually travel farther up the strip. Because the color of the leaf depends on the mixture of pigments in it, different colored leaves will display different colors on their paper towel strips. For example, very green leaves may not have any red colors (anthocyanins) on their strips.
Digging Deeper
There are many types of pigments in plant leaves. Chlorophyll makes them green and helps carry out photosynthesis during warm, sunny months. As fall arrives and the green, food-making color fades, other pigments such as yellow, orange, and red ones become more visible.
Xanthophylls are yellow pigments, and carotenoids give leaves an orange color. Photosynthesis also uses these pigments during the summer, but chlorophyll, a stronger pigment, overpowers them. These pigments take more time to break down than chlorophyll does, so you see them become visible in fall leaves. They are also found in carrots, daffodils, bananas, and other plants that have these vibrant colors. There are also anthocyanins, intense red pigments that are not made during the summer, only appearing with the final group of the fall colors. These molecules also give the red hue to apples, cranberries, strawberries, and more.
Although a leaf is a mixture of these pigments, you can separate the colors using a method called paper chromatography. In this method, a mixture (such as your pigment mixture) is applied onto a chromatography paper. The paper strip is dipped into a liquid, called the solvent or mobile phase. The liquid will start traveling up the paper strip and carry all the components within the mixture (such as your different color pigments) along through the chromatography paper. While traveling up the paper, each component interacts with the paper and the solvent differently depending on its chemical properties. Some of them are more attracted to the paper whereas others prefer to stay in the mobile phase. As a result, each individual component travels along the paper at a different speed. This is how with paper chromatography a colorful mixture of pigment molecules can be separated into each individual pigment component.
You can learn more about paper chromatography in the video below. The video gives an overview of what paper chromatography is, shows how it is done, explains the separation processes involved, and also provides tips and tricks for troubleshooting your experiment.
Ask an Expert
For Further Exploration
- You can use this same procedure to compare the color molecules in many different plant sources. For example, you could try red cabbage, blueberries, carrots, beets, spinach, flowers, or other intensely colored plants. How do their mixtures of color molecules compare?
- If you find a tree with a wide range of colors, you can repeat this procedure using leaves at more intermediate stages of change. An especially good source of a wide variety of leaf colors is aspen trees.
Related Resources
Project Ideas

Links
- Blog Post: Fall Chromatography