Weaving a Wearable Touch Sensor
Summary
/-/https/www.sciencebuddies.org/cdn/Files/18765/5/final-woven-sensor-activity-thumbnail.jpg)
/-/https/i.ytimg.com/vi/Qme0DYXcF-0/maxresdefault.jpg)
Introduction
Sensors are everywhere—on your phone, in your car, and even at the grocery store. Learn how to craft your own wearable sensor that you can put on your clothing. Using a simple and easy crafting method, you will be able to weave your own capacitive touch sensor patch that will detect when someone touches the fabric. You can use the sensor to turn on an LED, buzzer, or motor when it detects touch!
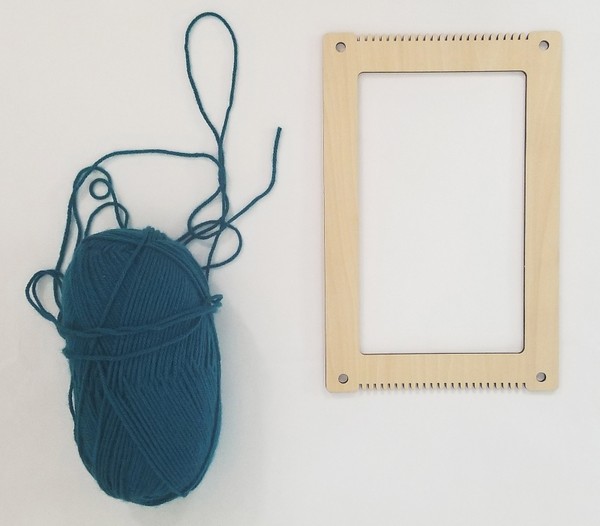
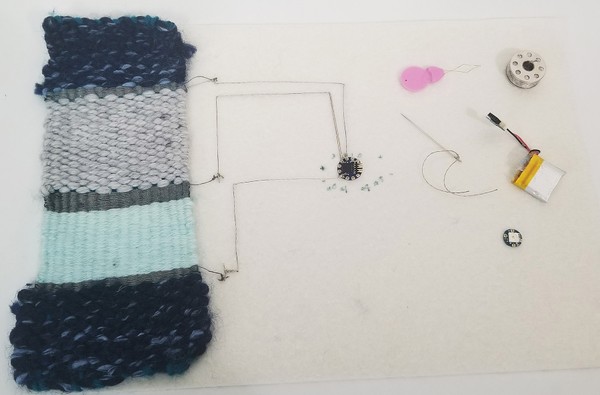
Materials
Crafting Materials:
- Any fabric (felt, t-shirt, socks, etc.)
- Thick yarn
- Thin yarn
- Conductive thread
- Weaving kit
- Scissors
/-/https/www.sciencebuddies.org/cdn/Files/18766/5/woven-sensor-crafting-materials.jpg)
/-/https/www.sciencebuddies.org/cdn/Files/18767/5/woven-sensor-patch-integration-materials.jpg)
Disclaimer: Science Buddies participates in affiliate programs with Home Science Tools®, Amazon.com, Carolina Biological, and Jameco Electronics. Proceeds from the affiliate programs help support Science Buddies, a 501(c)(3) public charity, and keep our resources free for everyone. Our top priority is student learning. If you have any comments (positive or negative) related to purchases you've made for science projects from recommendations on our site, please let us know. Write to us at [email protected].
Prep Work
- Set up your loom for a patch using the directions for your loom. Each loom should have a set of instructions. If not, feel free to look through our playlist for the loom most like yours. If your loom design is like the one shown in this project, you can follow the instructions under "Setting up your loom."
- To familiarize you with basic weaving terminology, the warp is the yarn that runs vertically and is held in tension by the loom. The weft is the yarn that passes horizontally over and under the warp as you weave.
- Make sure you have the Arduino IDE installed on your computer.
- If this is your first time using an Arduino, see the Science Buddies How to Use an Arduino page. That page is for the Arduino UNO, but the process is similar for a TinyLily board.
Instructions
Setting up your loom
- Warp your loom. The warp yarn should be your non-conductive thin yarn of choice. Using a thinner yarn for the warp will make it easier to weave. If your loom looks like the one shown here, you can follow the instructions in this section. If you do not need these instructions, skip to the next section.
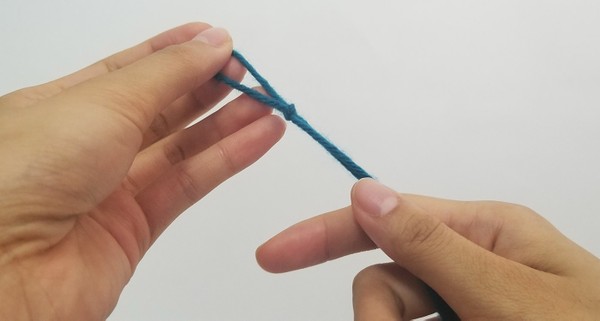
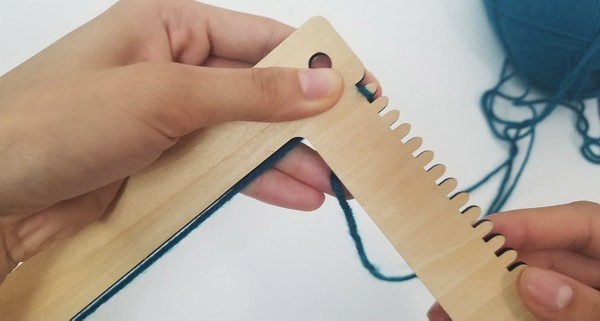
- To set up the warp, first measure out and cut approximately 10 feet of thin yarn. Form a knot with the desired warp yarn to fit over the first groove. Leave a 3-4 inch tail. Wrap the yarn around the groove so that it faces the front. It needs to be secure but not super tight. You can tape the loop down to the frame so that it does not come loose.
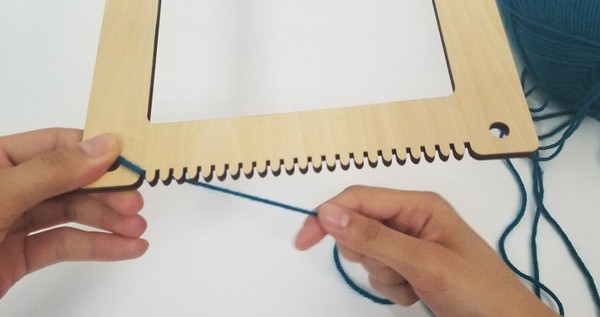
- Now stretch the warp yarn across the loom to the opposite slot.
- Bring the warp yarn around the back of the next prong and up through the adjacent groove. Then stretch it across the loom to the opposite slot. (All of your warp yarns will stretch across the top of the loom.)
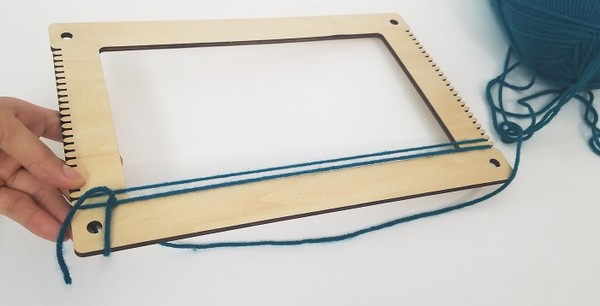
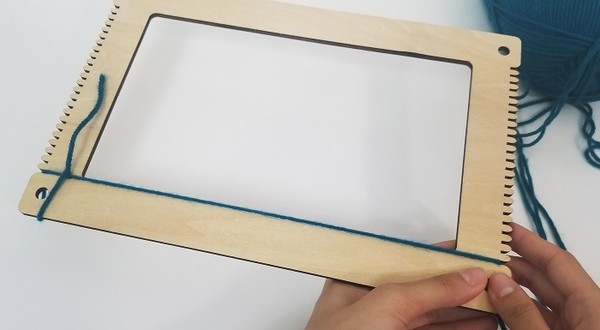
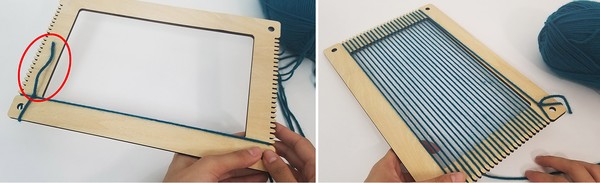
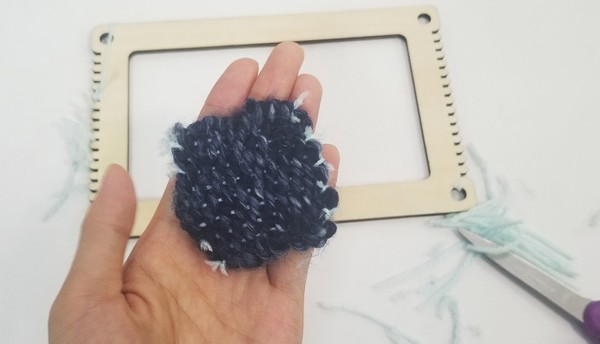
- Repeat this process across the loom. Cut any excess warp yarn. Note: the pictures in this procedure show an 8" x 5.2" patch, that might take you all day to weave. For a smaller 2" x 2" or 3" x 3" patch that will only take a few hours to weave, do not thread the entire loom. Rather, only thread the loom the approximate width of the patch (see image below).
- Once the warp yarn is through the final slot, you can bring it around to the back and tie a knot to connect it with the beginning warp tail to secure the warp in place.
The following image shows the beginning warp tail.
/-/https/www.sciencebuddies.org/cdn/Files/18772/5/first-yarn-empty-loom.jpg)
/-/https/www.sciencebuddies.org/cdn/Files/18773/5/knot-yarn.jpg)
/-/https/www.sciencebuddies.org/cdn/Files/18774/5/loop-loom.jpg)
/-/https/www.sciencebuddies.org/cdn/Files/18775/5/loom-thread-1.jpg)
/-/https/www.sciencebuddies.org/cdn/Files/18776/5/loom-thread-2.jpg)
/-/https/www.sciencebuddies.org/cdn/Files/18777/5/loom-thread-3.jpg)
/-/https/www.sciencebuddies.org/cdn/Files/18778/5/small-patch-1.jpg)
/-/https/www.sciencebuddies.org/cdn/Files/18779/6/beginning-tail-comp-thread-2.jpg)
/-/https/www.sciencebuddies.org/cdn/Files/18780/9/tie-loose-ends.jpg)
Weaving
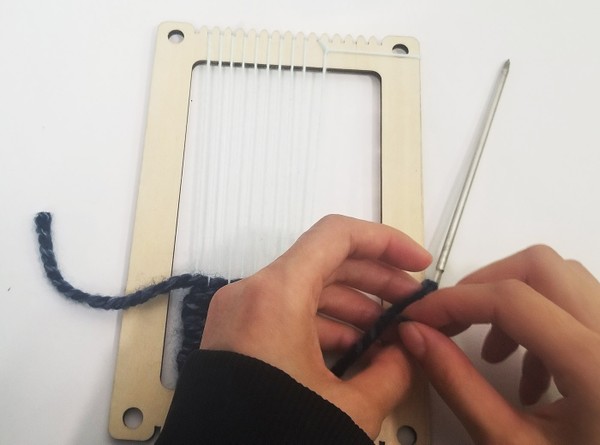
- To start, cut about 6 feet of non-conductive thick yarn. This is your weft yarn. For the weaving, you will be using a plain weave technique. The plain weave is the basic "over, under" sequence.
- Thread your weft yarn through the hole in the tapestry needle and weave.
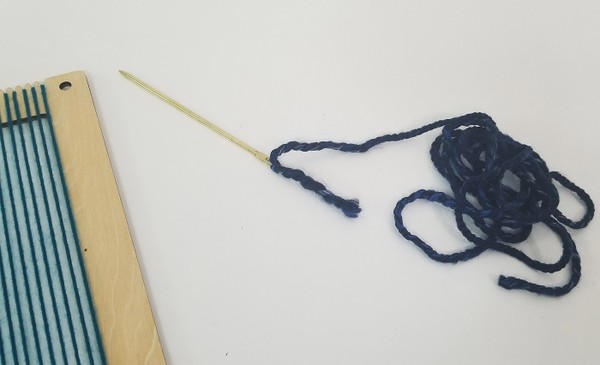
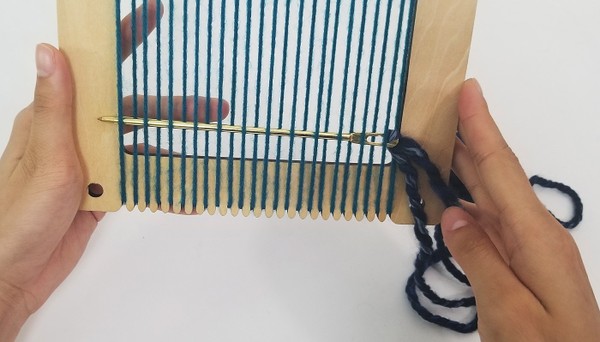
- Pull the yarn all the way through but leave a 3-4 inch tail.

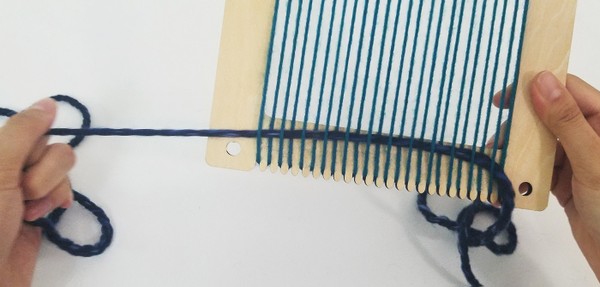
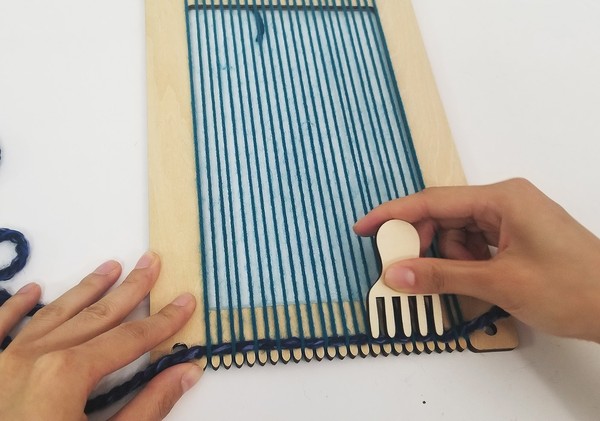
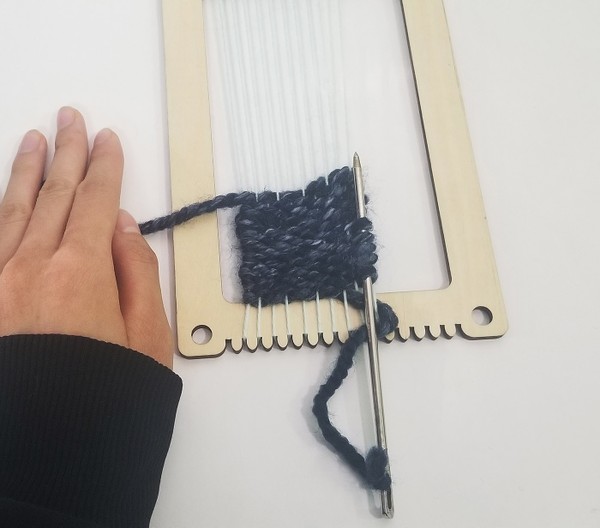
- Use the comb that came with your loom or your fingers to push the yarn down after weaving a row. At the end of each row, add a little bit of slack to the yarn so the edge does not pull in.
- Weave about an inch or two. If 6 feet of yarn is not enough, cut more yarn and tie it to the end of your weft yarn. Cut the excess yarn leaving about a 2 inch tail.
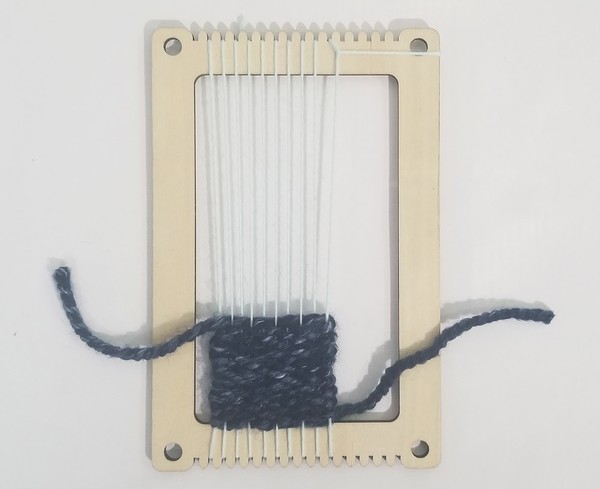
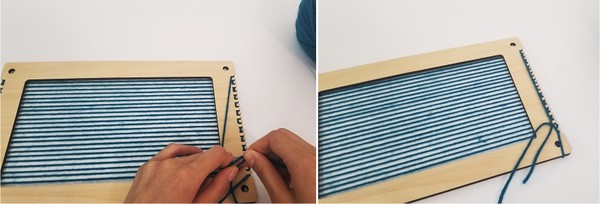
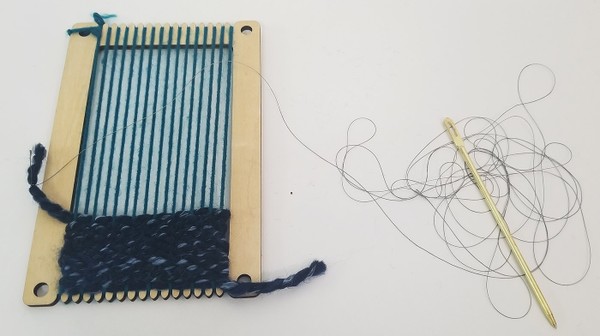
- Once the non-conductive yarn section is done, begin your conductive thread section. Because conductive thread is much thinner, it will take more rows of weaving to make a section similar in height to the previous section. Thus, cut about 10 feet of conductive thread and thread through your tapestry needle.
- Tie the end of the conductive thread to the excess yarn tail from the previous section. Continue weaving.
- Weave about half an inch of rows with conductive thread. Leave about 7-8 inches of conductive thread. Tie it around the last warp yarn (not weft). Tape excess conductive thread down onto your loom so it does not get in the way.
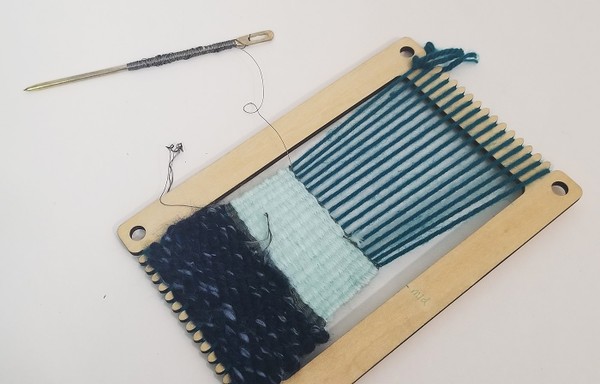
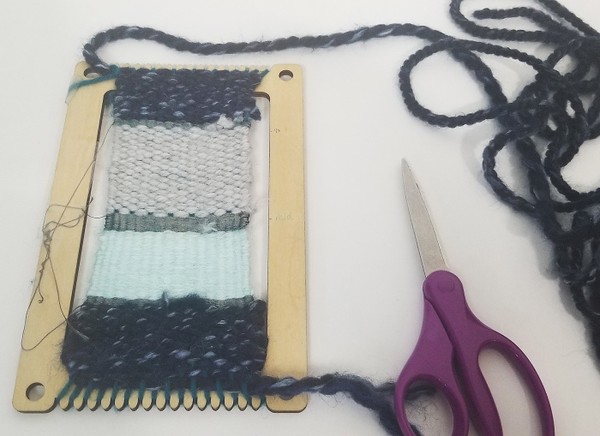
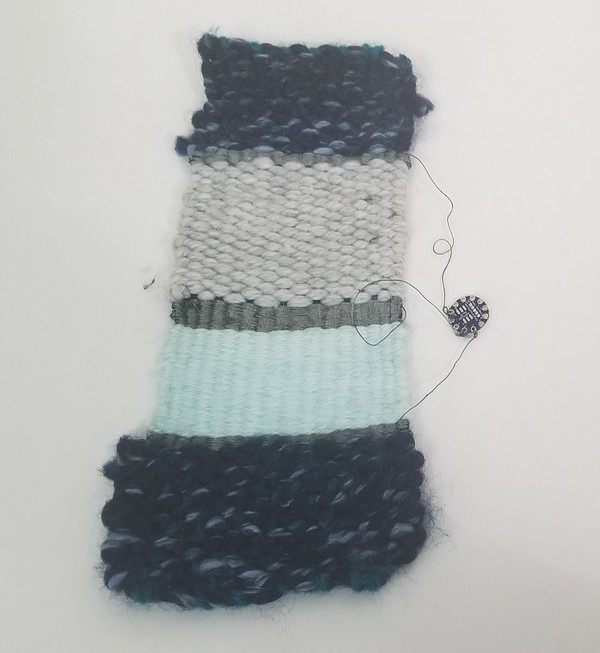
- Repeat the non-conductive yarn section (steps 1-5). However, when starting the new yarn section, do not leave a 3-4 inch tail. Tie the yarn to the vertical weft yarn. Trim the excess. Then, continue weaving. Follow with another conductive thread section (steps 6-8). To make weaving with the conductive thread easier, you can wrap the thread around your tapestry needle and leave about 8-9 inches at the end. Repeat this step twice so that there are a total of three conductive thread sections separated by different yarn sections. The example uses different colored and different types of yarn used (acrylic, cotton, and wool).
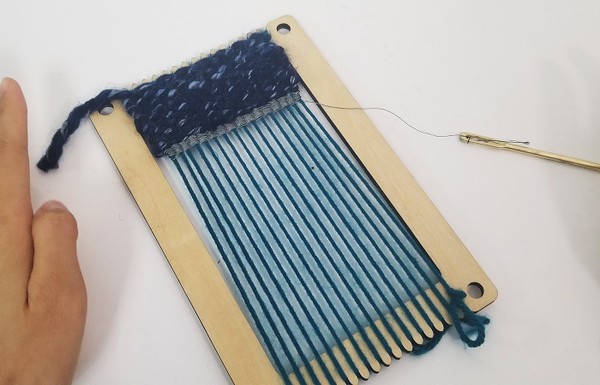
- To finish your patch, you will need to weave one more non-conductive thick yarn patch. Leave a 3-4 inch tail.
/-/https/www.sciencebuddies.org/cdn/Files/18781/5/tapestry-needle-1.jpg)
/-/https/www.sciencebuddies.org/cdn/Files/18782/5/weave-tapestry.jpg)
/-/https/www.sciencebuddies.org/cdn/Files/18783/5/weave-thick-yarn.jpg)
/-/https/www.sciencebuddies.org/cdn/Files/18784/5/woven-one-row.jpg)
/-/https/www.sciencebuddies.org/cdn/Files/18785/5/push-combing-row.jpg)
/-/https/www.sciencebuddies.org/cdn/Files/18786/5/conductive-thread-1-yarn.jpg)
/-/https/www.sciencebuddies.org/cdn/Files/18787/5/conductive-patch.jpg)
/-/https/www.sciencebuddies.org/cdn/Files/18788/5/wrapping-conductive-thread.jpg)
/-/https/www.sciencebuddies.org/cdn/Files/18789/5/completed-patch.jpg)
Finishing your sensor
- Finish your weave and remove it from the loom. Follow the steps below if you have a similar loom. If you do not have the same loom, use the directions found on your loom to finish your weave. See the curated YouTube playlist for additional instructions on removing your woven patch from your loom.
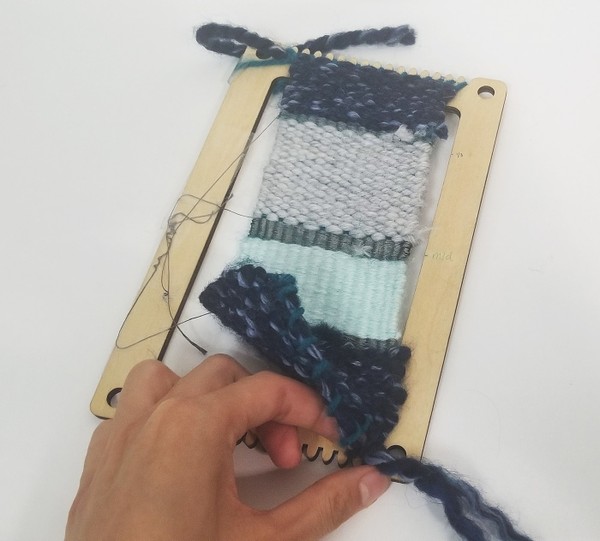
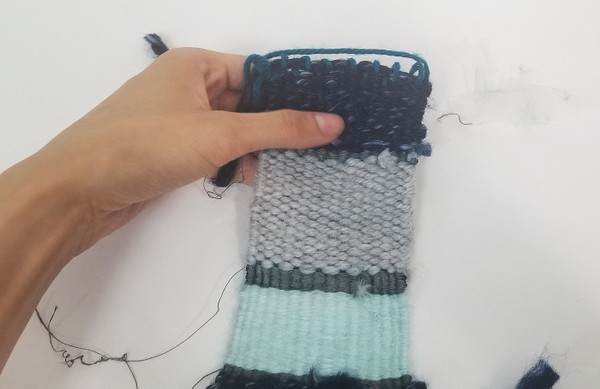
- You should have a 3-4 inch tail of thick yarn at the beginning of your patch and at the end of your patch. Working on one end at a time, tie the excess yarn to your tapestry needle. Thread the excess yarn through at least 3-4 side loops down the outer edge of the woven patch. Remaining excess yarn can be cut.
The following images demonstrate this on a different smaller patch for better visibility.
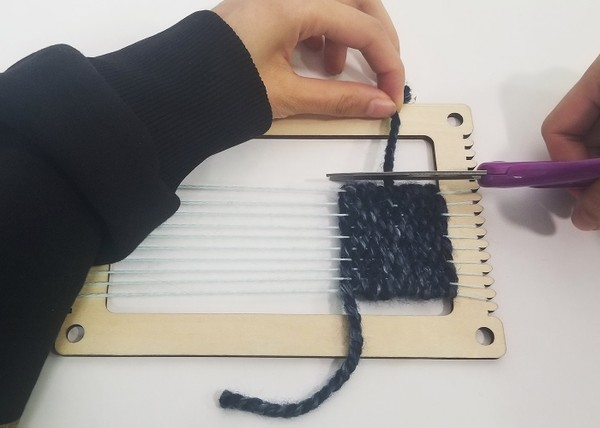
- Remove the tape from the loom. Trim any excess yarn. Do not trim the conductive thread.
- If you have woven your patch to the edges of your loom, follow step 5. If you did not weave your patch to the edge, follow step 6.
- If you wove your patch to the edge of your loom, carefully remove the holding loops from the loom's teeth. Gently massage your weft yarn to fill the extra warp yarn.
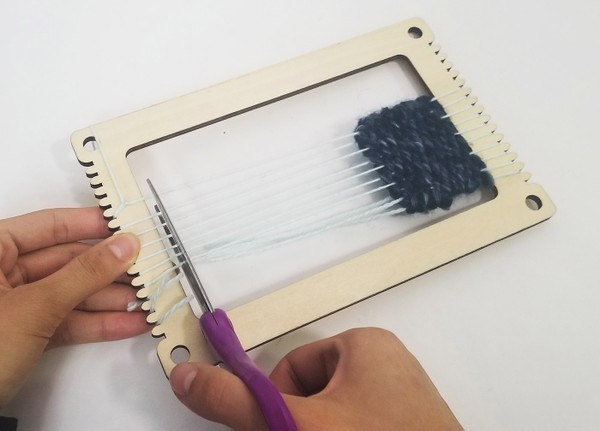
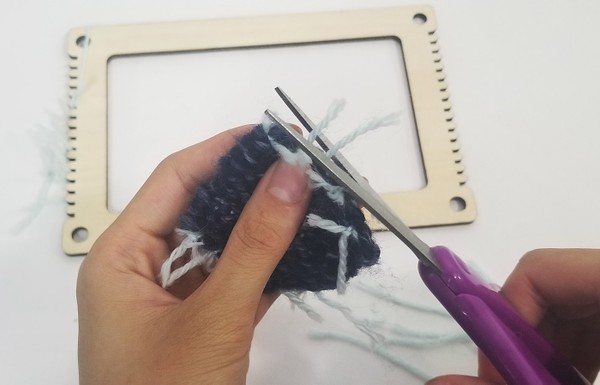
- If you did not weave your patch to the edges of the loom, cut the warp yarns. Double-knot tie warp yarns together so that the warp wraps around the final row of weft yarn. Make sure it is tightened. The following images demonstrate a patch that is not woven to the edges of the loom.

Testing your sensor
- Connect the excess conductive thread from each conductive thread section to pins A0, 2, and 3 to the TinyLily Mini Processor. This can be done by (1) tying the thread to the TinyLily directly or (2) sewing the threads to the TinyLily on the desired piece of clothing or scrap piece of fabric.
- Launch the Arduino IDE.
- Connect your TinyLily to the computer using the TinyLily Mini USB adapter and Micro USB Cable.

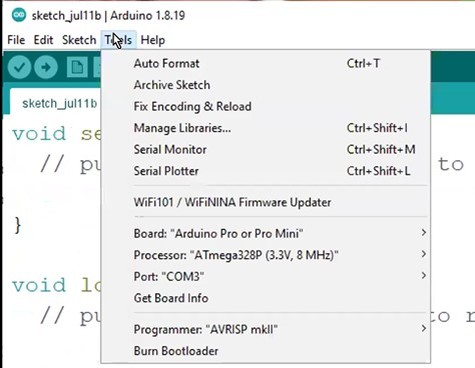
- Go to the top bar: Tools → Board. Click the drop-down menu and select "Arduino Pro or Pro Mini."
- Select Tools→ Processor. Select "ATmega328p (3.3V, 8MHz)." Note: this option will not appear until you have selected "Arduino Pro or Pro Mini" for the board.
- Select Tools→ Port. Select the available port. It should be "COM" followed by a series of numbers. If your computer is a Mac, this would be "dev/cu.usbserial" followed by a series of numbers.
- Download TouchSensor.zip, extract the folder. Then, open Touchsensor.ino in the Arduino IDE. Note: sensingCode.ino is from Arduino Playground Capacitive Sensor.
- Upload onto your TinyLily.
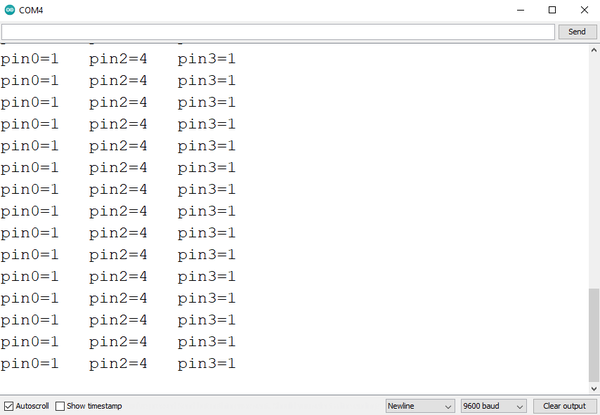
- Open the Serial Monitor by selecting: Tools → Serial Monitor. A new window should pop up.
- Once your Arduino code has successfully uploaded onto your TinyLily, you should see different pins being represented as text.
- Look at the serial monitor when you are not touching woven conductive thread patches. All of the pins should have a value of 1.
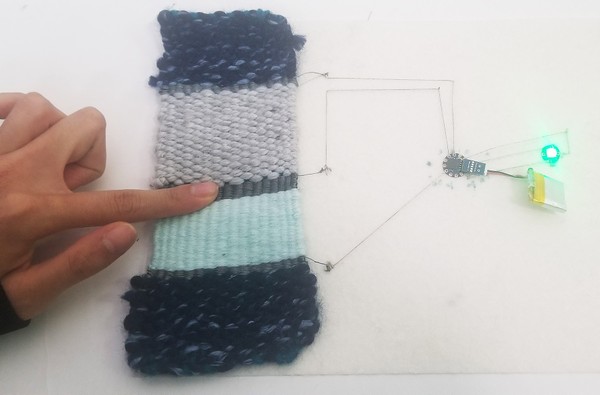
- Touch a woven conductive thread patch. Each patch is a different sensor. Only touch one part at a time. You should see one of the pin's value change.
- Remove your hand from the sensor. The pin value should go back to 1.
- Test all your patches. If the values do not change or if the value is not 1 when you are not touching it, double check to make sure threads from different patches are not touching each other.
Adding an LED to your circuit
- Disconnect your TinyLily from your computer.
- Sew your sensor patch onto a piece of clothing. This example uses a sheet of felt, but the clothing can be anything. If you have not sewn the connections from the sensor patch to the TinyLily, do so.
- Sew an RGB LED to the same article of clothing or fabric piece. Make the following connections with conductive thread. Note that you do not need to connect the lithium polymer battery yet.

- Connect the + pin on the TinyLily to the + pin on the LED board.
- Connect the - pin on the TinyLily to the - pin on the LED board.
- Connect pin 1 on the TinyLily to the pin with the arrow pointing into the LED board.
- Download TouchRGB.zip, extract the folder. Then, open TouchRGB.ino in the Arduino IDE. Note: sensingCode.ino is from Arduino Playground Capacitive Sensor.
- Download and install the FastLED Library. To do so, navigate to the top bar and click: Tools→Manage Libraries. This should bring you to this window.

- Using the search bar at the top, search "FastLED". Install the first result's most recent version by Daniel Garcia.
- Upload the code onto your TinyLily.
- Once your Arduino code has been successfully uploaded onto your TinyLily, you should see the LED light up in different colors corresponding to the different sensor patches. Each section of woven conductive thread is a different sensor patch. If not, double-check your conductive thread's connection pins.
- Switch your USB adapter with your battery adapter and power the TinyLily with the LiPo battery.
/-/https/www.sciencebuddies.org/cdn/Files/18790/5/threading-tapestry-needle-2.jpg)
/-/https/www.sciencebuddies.org/cdn/Files/18791/5/thread-up-side-patch.jpg)
/-/https/www.sciencebuddies.org/cdn/Files/18792/5/cut-side-excess.jpg)
/-/https/www.sciencebuddies.org/cdn/Files/18793/5/loop-remove.jpg)
/-/https/www.sciencebuddies.org/cdn/Files/18794/5/massage-patch.jpg)
/-/https/www.sciencebuddies.org/cdn/Files/18795/5/cut-patch-off.jpg)
/-/https/www.sciencebuddies.org/cdn/Files/18796/5/cut-small-patch-loops.jpg)
/-/https/www.sciencebuddies.org/cdn/Files/18797/5/trim-small-patch.jpg)
/-/https/www.sciencebuddies.org/cdn/Files/18798/5/finished-small-patch.jpg)
/-/https/www.sciencebuddies.org/cdn/Files/18799/5/tinylily-patch.jpg)
/-/https/www.sciencebuddies.org/cdn/Files/18800/5/micro-USB-patch.jpg)
/-/https/www.sciencebuddies.org/cdn/Files/18717/5/ArduinoIDE-screenshot.jpg)
/-/https/www.sciencebuddies.org/cdn/Files/18801/5/SerialMonitor.png)
/-/https/www.sciencebuddies.org/cdn/Files/18767/5/woven-sensor-patch-integration-materials.jpg)
/-/https/www.sciencebuddies.org/cdn/Files/18802/5/circuit-diagram-patch-tinylily-RGB-LED.png)
/-/https/www.sciencebuddies.org/cdn/Files/18718/6/library-manager-screenshot.jpg)
/-/https/www.sciencebuddies.org/cdn/Files/18803/5/final-completed-woven-sensor-patch.jpg)
Cleanup
What Happened?
Were you able to see the changing values on your Serial Monitor? Were you able to make your LED light up in different colors? In this project, you connected three different sensor patches from your woven patch to the TinyLily. You also connected three wires from the TinyLily to the RGB LED. The TinyLily worked as the brain of the system and detected touch from your woven patch and told the RGB LED to light up in different colors depending on which patch you touched. Note that your circuit might not work properly if you accidentally connect (or short-circuit) two of the patches of conductive thread to each other. If you would like to change how the LED lights up when you touch the different conductive patches, you can modify the code in TouchRGB.ino. You can also incorporate this touch sensor into a fashion design or costume of your choice.
Digging Deeper
You created a capacitive touch sensor. A capacitor is an electronic part that stores electrical charge. Capacitors take time to charge up and to discharge (lose charge). Bigger capacitors take longer to charge up or discharge. When you touch one of the patches of conductive thread, the connection to your body changes the capacitance. The TinyLily, a type of microcontroller or electrical "brain," detects that change and knows that you are touching the patch. It then sends a control signal to the RGB LED to make it change colors based on which patch you are touching.
Ask an Expert
For Further Exploration
- Try touching the sensors with different materials. What materials cause the sensors to detect touch?
- Can you try adding more sensors to the system?
- How would you add more conductive sensor patches? What would you change about how you wire it? What about the code?
- Instead of an RGB LED, what other ways can you show that the sensor is activated?
/-/https/www.sciencebuddies.org/cdn/Files/5150/8/traffic-glove-red-green-LEDs_img.jpg)
/-/https/www.sciencebuddies.org/cdn/Files/20680/7/blobid1723565203039.jpg)
/-/https/www.sciencebuddies.org/cdn/Files/18709/6/unicorn-horn-finished.jpg)
/-/https/img.youtube.com/vi/q0T5Ytp1xik/0.jpg)
/-/https/img.youtube.com/vi/ts0EVc9vXcs/0.jpg)
/-/https/img.youtube.com/vi/BnWtqdFw9YA/0.jpg)