Summary
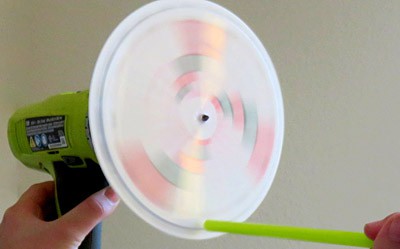
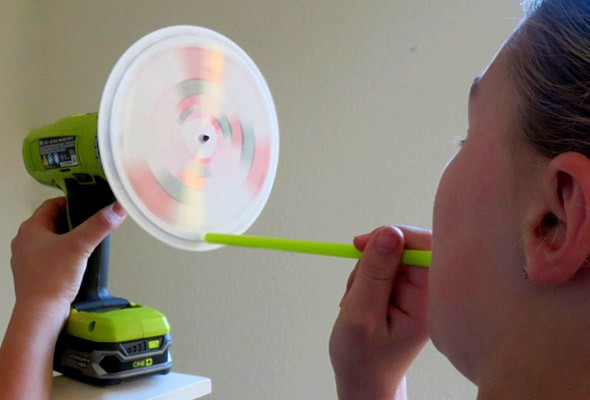 Image Credit: Sabine De Brabandere, Science Buddies / Science Buddies
Introduction
If you live in an urban area, you probably hear them almost every day: sirens. Police cars, ambulances, fire trucks—they all can come blaring. Their wailing sounds are piercingly loud to help alert others to clear the road in front of them. But have you ever thought about how this loud noise is generated? Make your own disk siren in this activity and find out for yourself.
Materials
- Plastic lid, the type you see on large yogurt tubs, preferably 16 cm diameter.
- Scissors
- Protractor
- Ruler
- Permanent marker
- Double-sided foam tape, a small piece is enough.
- Hole punch
- Cordless electric high-power screwdriver that reaches at least 1,000 rotations per minute. You should only use it with adult supervision.
- Small bit for the screwdriver
- Straw
- Paper clip or needle
- Adult helper
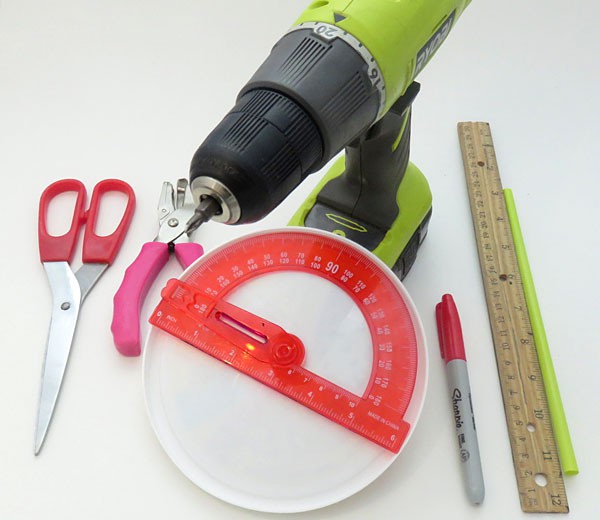 Image Credit: Sabine De Brabandere, Science Buddies / Science Buddies
Prep Work
- Take the container lid and cut off the side rim. Throw the rim away. The plastic center is used as the disk.
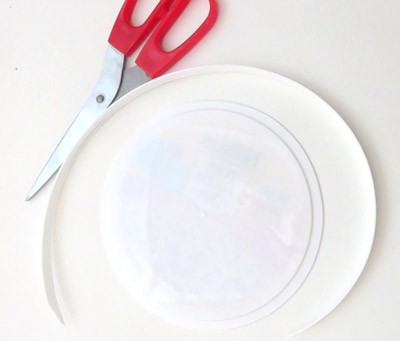 Image Credit: Sabine De Brabandere, Science Buddies / Science Buddies
- Use the protractor to draw lines through the center of the disk in equal 15-degree intervals.
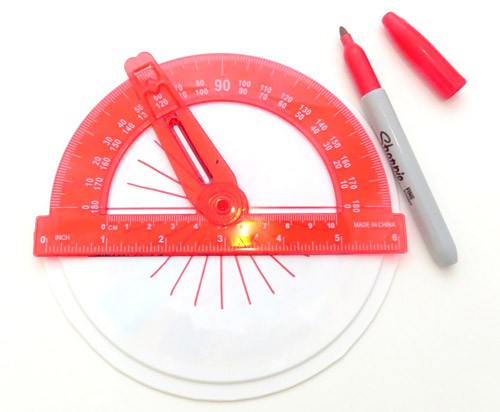 Image Credit: Sabine De Brabandere, Science Buddies / Science Buddies
- Use a ruler to extend the lines so they almost reach the sides of the disk. Alternating between two colors to draw the lines is not necessary but can make the next step a little easier.
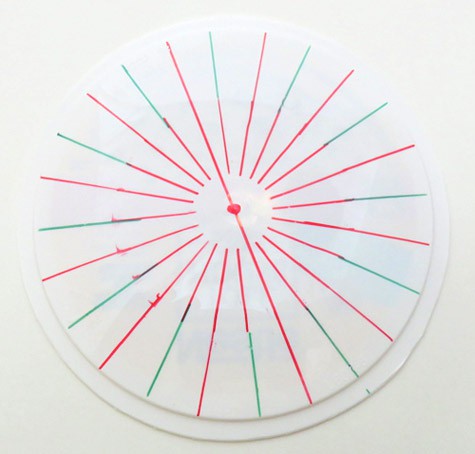 Image Credit: Sabine De Brabandere, Science Buddies / Science Buddies
- Use the hole punch to punch a hole on one of the lines 2 cm from the rim. If your hole punch cannot reach that far, punch a hole as far in away from the rim as you can. Do this on every other line drawn on the disk. If you used alternating colors to draw the lines, all these holes will be on lines of the same color.
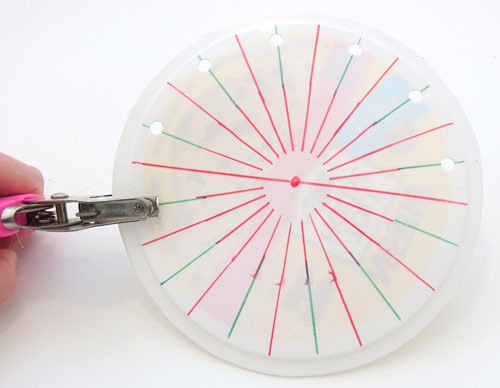 Image Credit: Sabine De Brabandere, Science Buddies / Science Buddies
- Next punch holes on every line, about .5 to 1 cm from the rim.
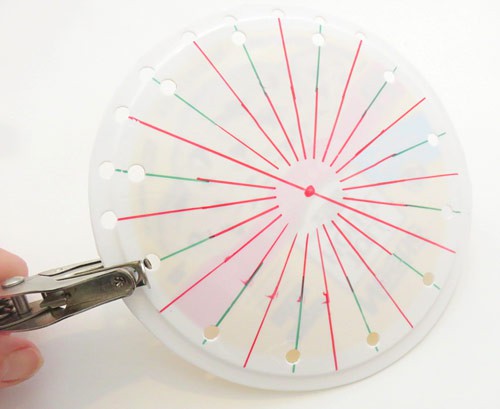 Image Credit: Sabine De Brabandere, Science Buddies / Science Buddies
- You now have a disk with two concentric rings of holes. The outer ring has twice as many holes as the inner ring.
- Optional: Decorate one side of the disk with permanent marker(s). This side will be the front side.
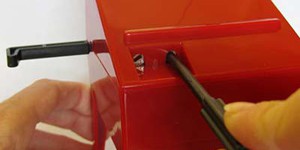
- Put a small bit in your cordless screwdriver.
- Cut a small piece of double-sided foam tape and stick it on the center on the back side of the disk. With a paper clip or needle make a small hole through the center of the disk and foam tape.
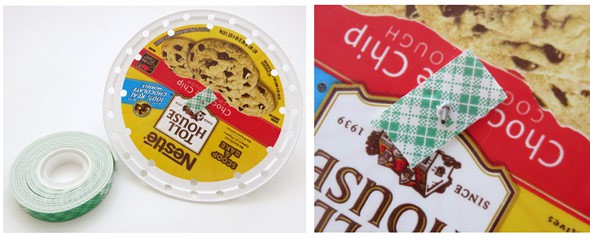 Image Credit: Sabine De Brabandere, Science Buddies / Science Buddies
- Remove the paper backing from the double-sided tape.
- Take the perforated disk and push the bit through the small center hole so that the foam tape faces toward the electric screwdriver. If this is too hard, you can first enlarge the central hole a little by pushing the tip of a sharp pencil in it. Do not make the hole too big. If you need to push hard to get the disk onto the bit, it will sit firmly. The foam tape also helps to adhere the disk to the bit.
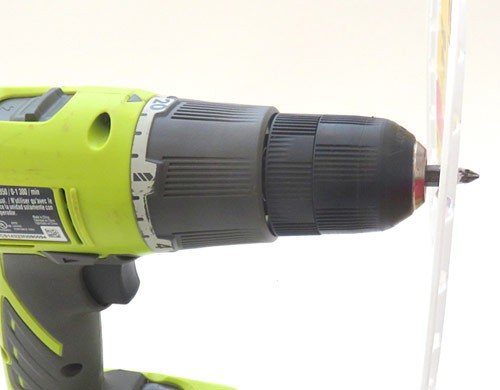 Image Credit: Sabine De Brabandere, Science Buddies / Science Buddies
Instructions
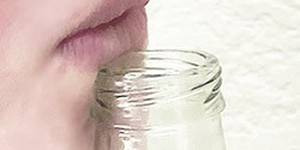
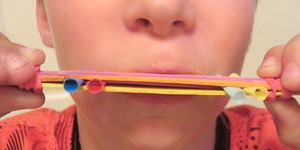
- Take the straw and hold your hand in front of it while blowing into it.
 Can you feel the air flowing through the straw? Listen carefully. Does the air make any sound?
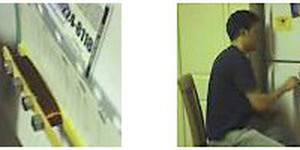
 - Ask your adult helper to hold the cordless electric screwdriver with the disk attached.
- Have your adult helper turn on the cordless screwdriver on the lowest setting. If the disk doesn't spin, gradually go to a higher setting. If the disk flies off, stop and use stronger double-sided tape to attach the disk more firmly to the bit. You can also push a cork or eraser onto the end of the bit to help keep the disk in place.
- To experiment with the screwdriver's speed, ask your adult helper to slowly power it on. Pay attention to the disk speed. Find out if the screwdriver has settings to change the rotational speed.
Is the disk always spinning at the same rotational speed? Can you make the disk spin at different rates?
- Listen to the sound the disk makes when it rotates.
Is there any sound coming from the disk when it rotates? Do you hear anything besides the noise of the cordless screwdriver?
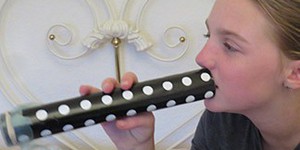
- Have your adult helper power on the cordless screwdriver again and keep the disk spinning on the highest setting. Make sure to keep the rotation speed of the disk the same. While the disk is spinning, take the straw and place it about one to two centimeters (about ½ inch) in front of, or perpendicular to, the outer ring of holes so you can blow air into the holes. Blow through the straw. Be sure you do not let the straw touch the disk.
What happens this time? Listen. Does your siren make a sound, and if so, why does it make a sound? Do you hear a high- or low-pitch tone?
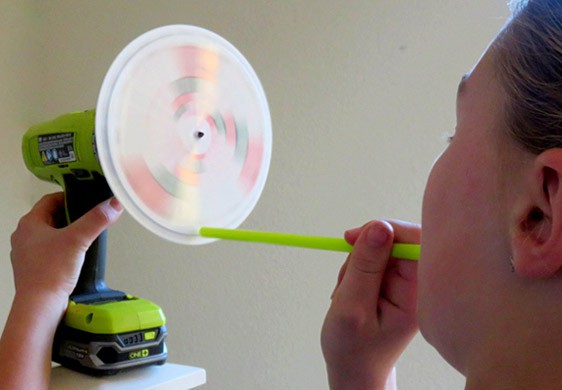 Image Credit: Sabine De Brabandere, Science Buddies / Science Buddies
- With the disk still spinning at the same speed, move your straw so that it is in line with the inner circle of holes and blow air through the straw.
Can you hear a sound? Is the tone different from the previous one? Why do you think the sound is different?
- If you do not hear a sound, make sure the screwdriver is on the highest setting and that the battery is fully charged. You want to have your disk spinning at a rate of 1,000 rotations or more per minute. If you decorated the disk, the decorations should blur together when spinning. If individual pieces are still visible, the disk is not rotating fast enough.
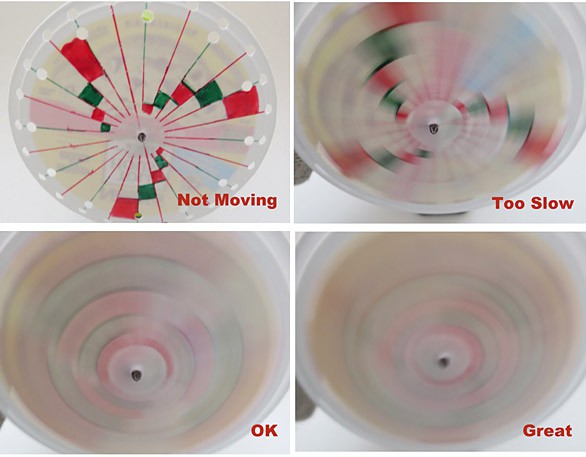 Image Credit: Sabine De Brabandere, Science Buddies / Science Buddies
- Take the straw again and blow against the outer ring of holes on the disk. While blowing, change the speed of the cordless screwdriver continuously so that the disk spins at different rates.
What happens to the sound of the siren when the rotational speed changed? How does the tone sound with a high-speed setting compared to the tone at a low speed? Can you explain your observations?
- Experiment with blowing at the two rings of holes while the drill spins at different rotational speeds.
Can you create a realistic wailing siren sound?
What Happened?
Did you get your siren to make wailing sounds?
Air consists of lots of tiny particles. A sound is made up of a repeating pattern of small areas that have the air particles packed together alternated with areas that have these particles spread out. This sound (or pattern) travels through the air to our ears, and we hear the sound.
Blowing through the straw on its own does not produce a sound. When you blow through the straw at the non-moving disk, you create a smooth flow of air particles, but you do not create a pattern. Also, if you just spin the disk with the cordless screwdriver, the main noise that you probably hear is the cordless screwdriver itself. Blowing against the perforated disk with your straw, however, generates a different sound. This is because the air you blow through the straw alternately puffs through the holes and is cut off as the wheel spins. Each airburst (or puff) moving through a hole creates an area with more air particles moving away from the disk. If the puffs follow each other close enough in time, you can hear this regular pattern as sound.
When the disk rotated at a steady speed and the holes were evenly spaced, the puffs and blockages came at regular intervals. We hear this type of pattern as a pure sound, so you probably were able to detect a smooth note.
When you blew air through the inner circle, you created a different regular pattern, so you heard a different sound. Because there was more time between the puffs (because the holes are farther apart), the sound you heard should have been lower.
Finally, if you kept changing the rotation speed of the disk while you were blowing through the straw, the distance between the puffs changed continuously. As the disk spun faster, the puffs followed each other faster, so the sound rose in pitch. By alternating the rotation speed back and forth from low to high, you should have been able to create the characteristic wailing of a siren.
Digging Deeper
To understand how sirens work, one must first look at the physics of sound. By moving or displacing air particles, you can generate a sound wave, which consists of a repeating pattern of high- and low-pressure regions that travels through a medium (usually the air) in the form of a pressure wave. The number of high-pressure regions passing by per second is called the frequency. Frequency determines the pitch we hear. We perceive higher frequency waves (or high-pressure regions more rapidly following one another) as higher pitched sounds.
The simplest version of a siren is a mechanical device that pushes an air stream against a rotating perforated disk. As the disk spins, the airflow will be alternately interrupted and allowed to pass. The fluctuation in air pressure produces a series of high-pressure regions that we perceive as sound. If the holes in a circle of the disk are evenly spaced, the number of holes in the circle and the rotational speed of the disk determine its frequency. You can calculate the sound's frequency by multiplying the number of rotations per second by the number of holes in the disk.
You created a siren by pushing an air stream against a rotating perforated disk with your straw. When you blew air through the inner circle—with half the amount of the holes—instead of the outer circle, you probably noticed that the sound's pitch decreased. Specifically, the pitch should have been one octave lower than the one from the outer circle. This is because the two circles create two musical notes with half or double frequency. If you changed the rotation speed of the disk while you were blowing against the disk, the pitch of the sound also changed. As the disk spun faster, the puffs' frequency increased, and the sound rose in pitch. By alternating the rotation speed back and forth from low to high, you should have been able to create the characteristic wailing of a siren.
Today electronic sirens are slowly replacing the mechanical disk siren design. Many of the sirens on fire trucks, however, are still based on the same principle as the disk siren. In these sirens, an electric motor turns a fan that spins inside a slotted drum. The fan sucks in air from the front and expels it through the sides. When the fan openings align with the slots in the drum, an airburst is generated. Similar to the perforated disk, the fan chops the air stream into individual airbursts, and their frequency determines the siren's pitch.
Ask an Expert
For Further Exploration
- Does the diameter of the disk matter? Try using a smaller or larger disk, keeping the 15 and 30 degree spacing of holes and the speed at which the disk spins the same. Do these disks create a different sound?
- Create more disks with different hole patterns and listen to how they sound. What happens if the holes are not evenly spaced? How does it sound if you have a series of close holes followed by a gap?
- Take a lightweight paper, such as a paper towel, and have your adult helper hold it closely behind the spinning disk (between their body and the disk) while you blow through your straw. Observe the paper towel. What happens to the paper towel? Does it move at all? Can you see a movement pattern? (It helps if you spin the disk relatively slowly for this part of the activity.)
Related Resources
Project Ideas
Activities
Lesson Plans
- 1-PS4-1. Plan and conduct investigations to provide evidence that vibrating materials can make sound and that sound can make materials vibrate.
- MS-PS4-1. Use mathematical representations to describe a simple model for waves that includes how the amplitude of a wave is related to the energy in a wave.
Links
- Blog Post: DIY Musical Instruments