Summary
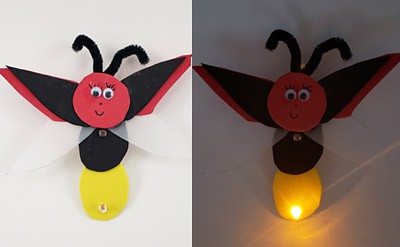
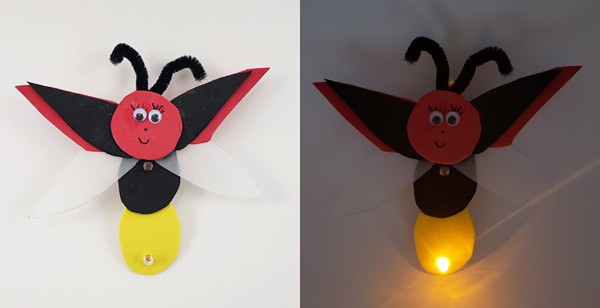 Image Credit: Ben Finio, Science Buddies / Science Buddies
Introduction
Are you ready to move beyond paper circuits and squishy circuits? This is a great intermediate circuit project where you will build your own working night-light. And of course, you will have some fun decorating it!
Materials
- DIY Night-Light Kit, available from our partner Home Science Tools. The kit includes all the electronics you need to build a simple circuit that will turn on an LED automatically in the dark:
- Mini breadboard
- Transistor
- Photoresistor
- Potentiometer
- 3/4 inch jumper wire
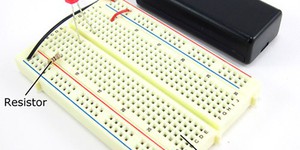
- 30 Ω resistor
- 2xAAA battery holder
- AAA batteries (4)
- Super bright LEDs in assorted colors (3)
- Craft supplies to decorate your night-light (construction paper, scissors, markers, glue, etc.).
Disclaimer: Science Buddies participates in affiliate programs with Home Science Tools, Amazon.com, Carolina Biological, and Jameco Electronics. Proceeds from the affiliate programs help support Science Buddies, a 501(c)(3) public charity, and keep our resources free for everyone. Our top priority is student learning. If you have any comments (positive or negative) related to purchases you've made for science projects from recommendations on our site, please let us know. Write to us at scibuddy@sciencebuddies.org.
Instructions
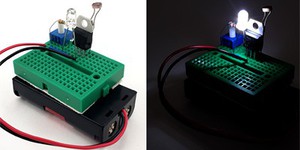
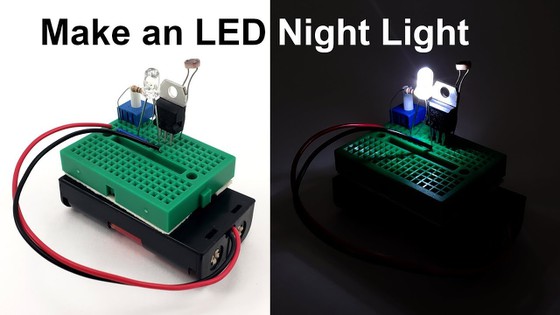
- Build your circuit on the breadboard as shown in the picture.
- If you have trouble, or this is your first time using a breadboard, check out the How to Use a Breadboard for Electronics and Circuits page.
- Pay attention to which way the parts face. Certain parts cannot be backwards, or the circuit will not work.
- Do not switch the battery pack's red and black wires.
- In the picture, the LED's long leg is on the left, and the short leg is on the right.
- In the picture, the writing on the front of the transistor is facing towards you.
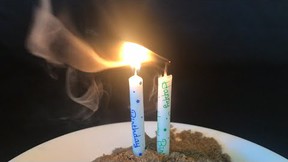
- If your circuit feels hot, or you see or smell any smoke, you have a short circuit. Immediately disconnect the batteries and double-check your wiring.
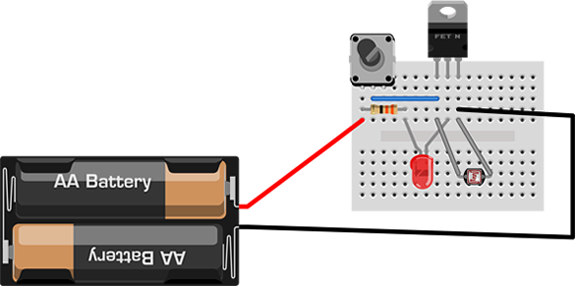 Image Credit: Ben Finio, Science Buddies / Science Buddies
- Turn the potentiometer's knob all the way clockwise. The LED should be off.
- Turn the potentiometer's knob all the way counterclockwise. The LED should turn on.
- If the LED does not turn on (or if the LED never turns off when you turn the potentiometer), double-check your circuit. If you still cannot find an error, ask someone else to look at it for you. Having just one part on the wrong breadboard hole will prevent the circuit from working. It can be hard to spot mistakes if you are new to working with breadboards.
- Turn the potentiometer's knob to roughly the middle position.
- You can quickly test your circuit by covering the tip of the photoresistor with your finger. You can also turn off the lights, or take your circuit into a dark room. When you do, the LED should turn on.
- Turning the potentiometer adjusts the light threshold at which the LED will turn on. Keep adjusting and testing your circuit until you get it just the way you like it.
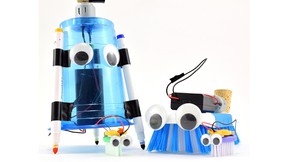
- Decorate your circuit! Can you build a case or enclosure to hide the breadboard and battery? You will need to make sure the LED and photoresistor are still exposed.
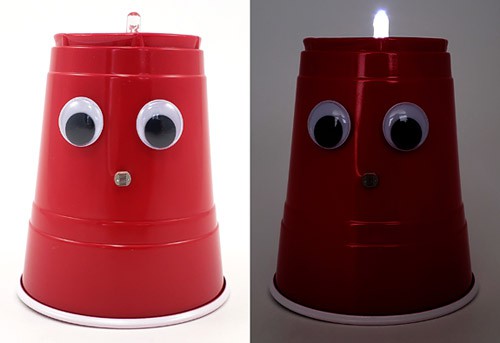 Image Credit: Ben Finio, Science Buddies / Science Buddies
What Happened?
The circuit you build in this project works just like a real night-light you can buy at a store. If you have a real night-light in your house, unplug it and look at it closely. You will probably be able to see the face of a photoresistor on it somewhere. This is the light-detecting part of the circuit. The other parts of the circuit (the potentiometer and the transistor) turn the LED on or off depending on how much light hits the photoresistor.
Digging Deeper
If you have tried other simple circuit activities like squishy circuits or paper circuits, you may be familiar with basic circuit parts like batteries, LEDs, and resistors. This circuit contains some new parts that you might not have seen before. A potentiometer and a photoresistor are both special types of resistors that both have a variable (changing) resistance. You can change the resistance of a potentiometer by turning the knob. A photoresistor's resistance depends on how much light is hitting it. Its resistance goes down in bright light, and goes up in darkness. The other new part is a transistor. A transistor is like an electronically-controlled switch. It uses an electrical signal to turn the LED on or off. For a more detailed explanation of how the circuit works, you can watch this video:
Ask an Expert
For Further Exploration
- If you know how to solder, try building a more permanent night-light by using a protoboard instead of a solderless breadboard, or soldering the components' leads together directly.
- Try wiring multiple LEDs in parallel to make your night-light even brighter.
- You can make a plug-in night-light instead of a battery-powered one. See this project for suggestions.